Overview
Apache Kafka is a powerful messaging system, renowned for its speed, scalability, and fault-tolerant capabilities. It is widely used by organizations to reliably transfer data. However, deploying and maintaining Kafka-based streaming and analytics applications can require a team of developers and engineers capable of writing and managing substantial code. Striim is designed to simplify the process, allowing users to reap the full potential of Kafka without extensive coding.
Striim and Confluent, Inc. (founded by the creators of Apache Kafka), partnered to bring real-time change data capture (CDC) to the Kafka ecosystem. By integrating Striim with Confluent Kafka, organizations can achieve a cost-effective, unobtrusive solution for moving transactional data onto Apache Kafka message queues in real time. This delivery solution is managed through a single application that offers enterprise-level security, scalability, and dependability.
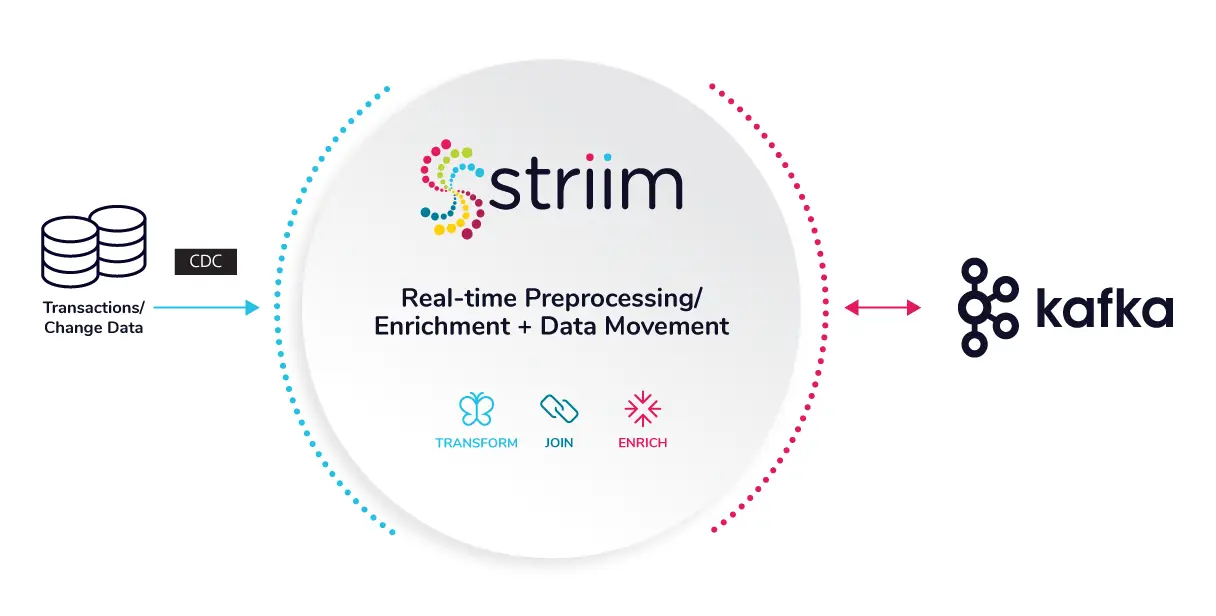
The Striim platform helps Kafka users quickly and effectively process streaming data from enterprise databases to Kafka. Streamlined SQL-like queries allow for data transformations, filtering, aggregation, enrichment, and correlation. Furthermore, Striim and Confluent work together to ensure high-performance, ACID-compliant CDC and faster Streaming SQL queries on Kafka. For further insights into the strengths of the Striim and Kafka integration, visit our comparison page.
This recipe will guide you through the process of setting up Striim applications (Striim apps) with Confluent Kafka. Two applications will be set up: one with Kafka as the data source using the Kafka Reader component and another with Kafka as the destination with the Kafka Writer component. You can download the associated TQL files from our community GitHub page and deploy them into your free Striim Developer account. Please follow the steps outlined in this recipe to configure your sources and targets.
Core Striim Components
Kafka Reader: Kafka Reader reads data from a topic in Apache Kafka 0.11 or 2.1.
Kafka Writer: Kafka Writer writes to a topic in Apache Kafka 0.11 or 2.1.
Stream: A stream passes one component’s output to one or more components. For example, a simple flow that only writes to a file might have this sequence.
Snowflake Writer: Striim’s Snowflake Writer writes to one or more existing tables in Snowflake. Events are staged to local storage, Azure Storage, or AWS S3, then written to Snowflake as per the Upload Policy setting.
Mongodb Reader: Striim supports MongoDB versions 2.6 through 5.0 and MongoDB and MongoDB Atlas on AWS, Azure, and Google Cloud Platform.
Continuous Query: Striim continuous queries are continually running SQL queries that act on real-time data and may be used to filter, aggregate, join, enrich, and transform events.
Step 1: Configure the Kafka Source adapter
In this recipe the Kafka topic is hosted on Confluent. Confluent offers a free trial version for learning and exploring Kafka and Confluent Cloud. To sign-up for a free trial of Confluent cloud, please follow the Confluent documentation. You can create a topic inside your free cluster and use it as the source for our Striim app.
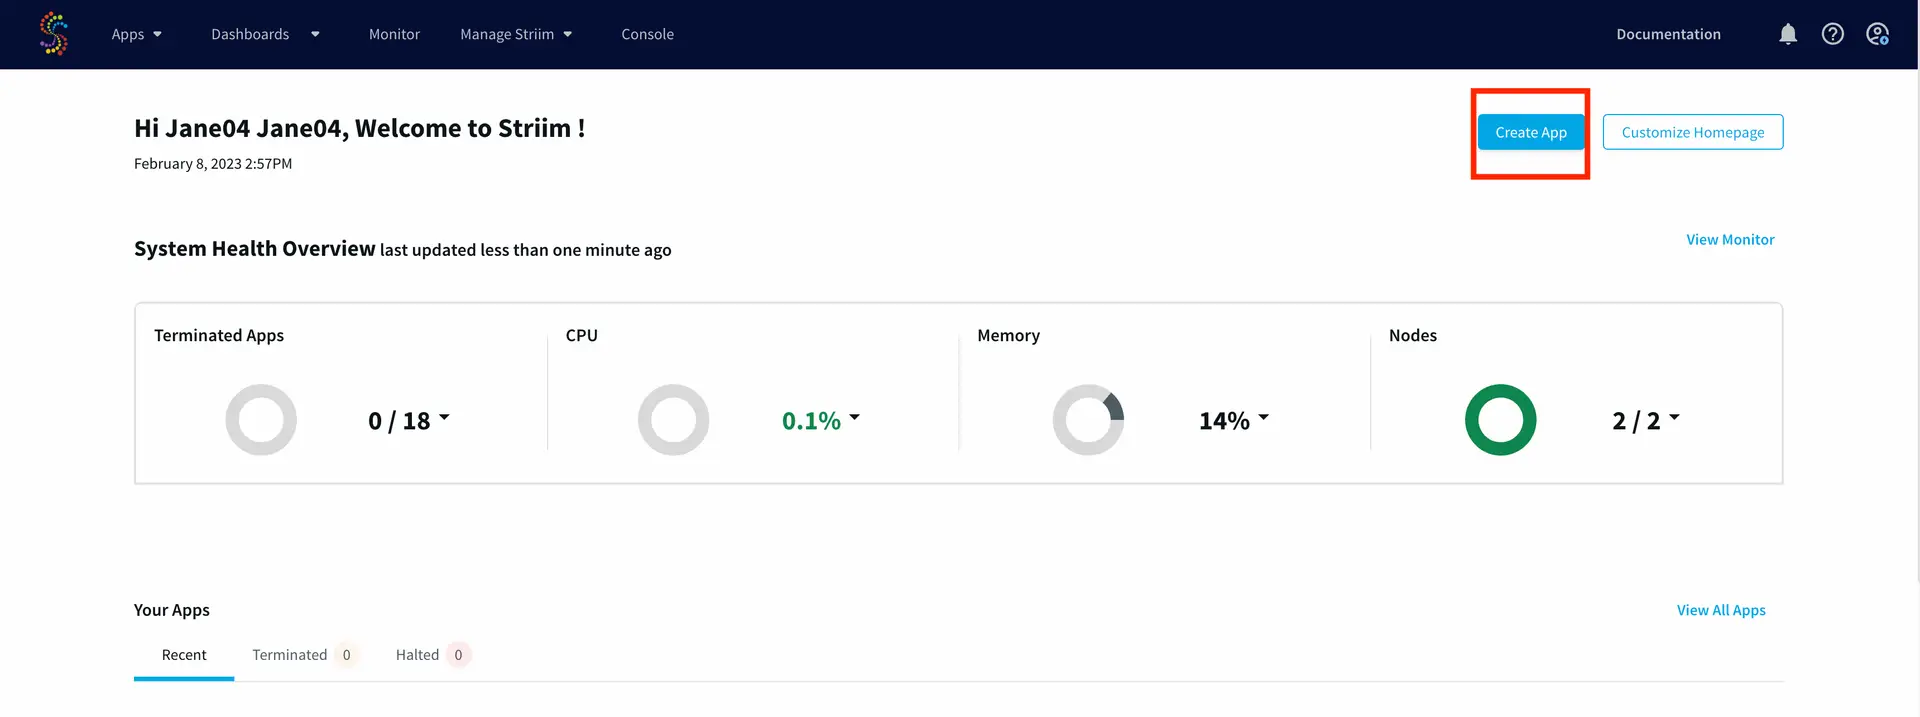
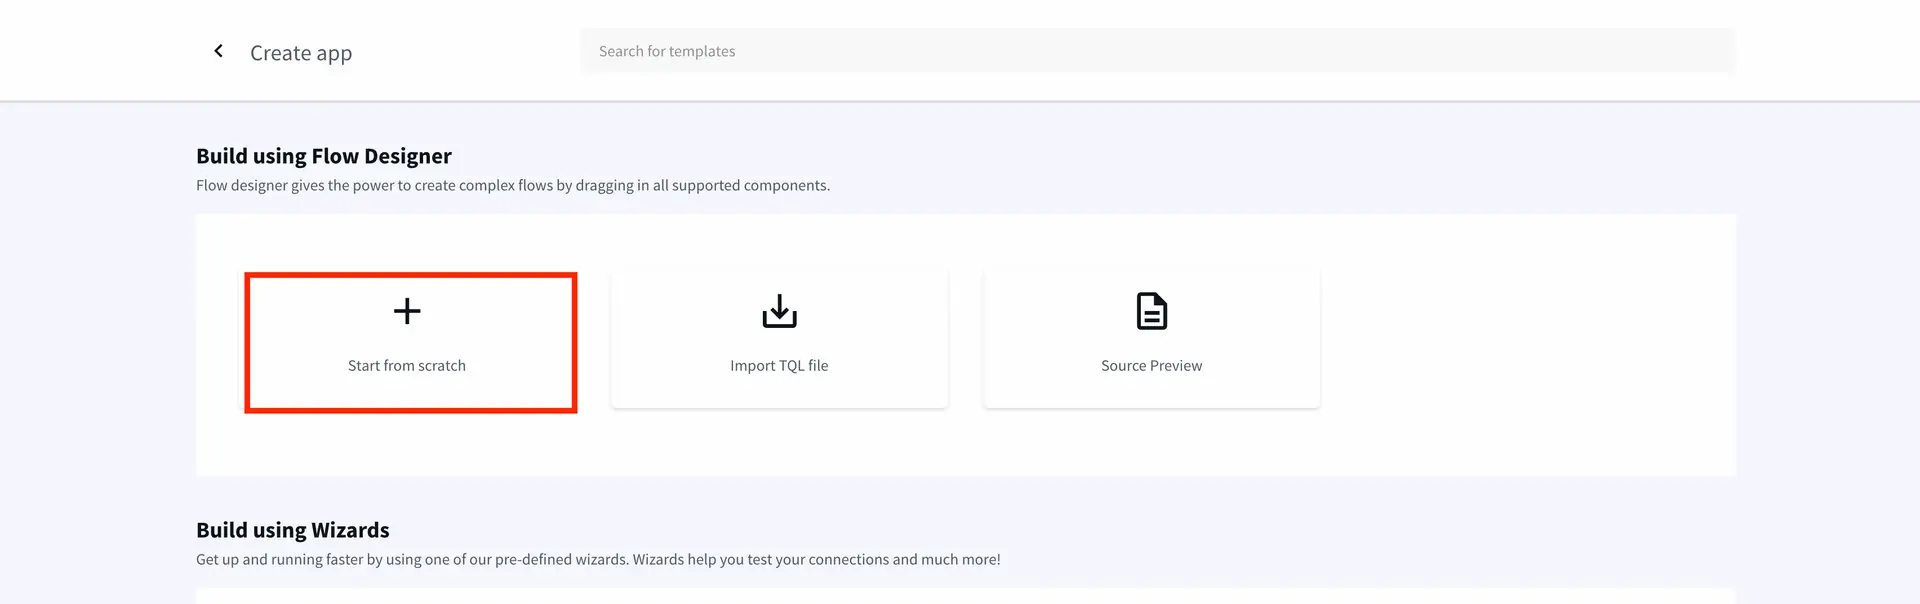
To configure your source adapter from the Flow Designer, click on ‘Create app’ on your homepage followed by ‘Start from scratch’. Name your app and click ‘Save’.

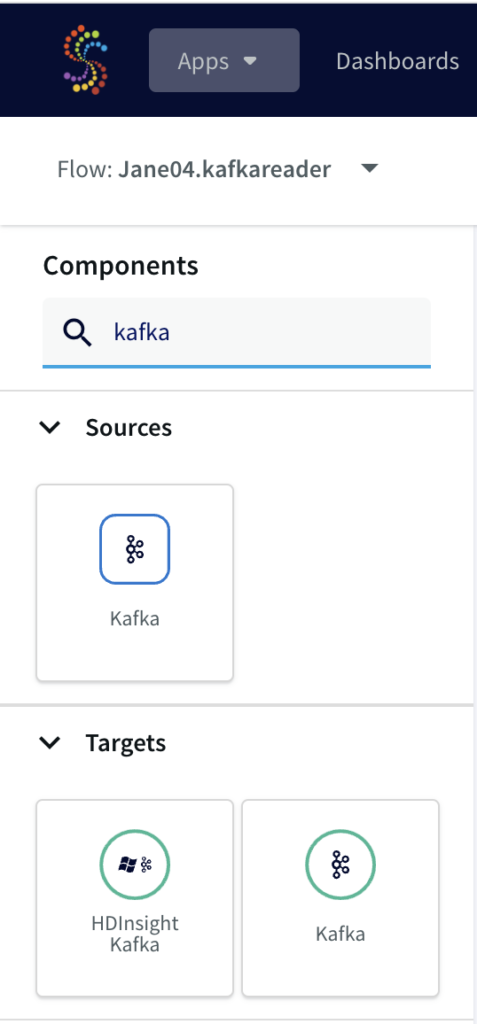
From the side panel, drag the Kafka source component and enter the connection details.

Add the broker address that you can find under client information on Confluent Cloud, also called the bootstrap server.

Enter the offset from where you want to stream data from your topic. Change the Kafka Config value and property separators as shown above. For the Kafka Config field you will need API key and API secret of your Confluent Kafka topic. The Kafka Config is entered in the following
format:session.timeout.ms==60000:sasl.mechanism== PLAIN:sasl.jaas.config==org.apache.kafka.common.security.plain.PlainLoginModule required username=””password=””; :ssl.endpoint.identification.algorithm==https:security.protocol==SASL_SSL
You can copy the sasl.jaas.config from client information on Confluent Cloud and use the correct separators for the Kafka Config string.
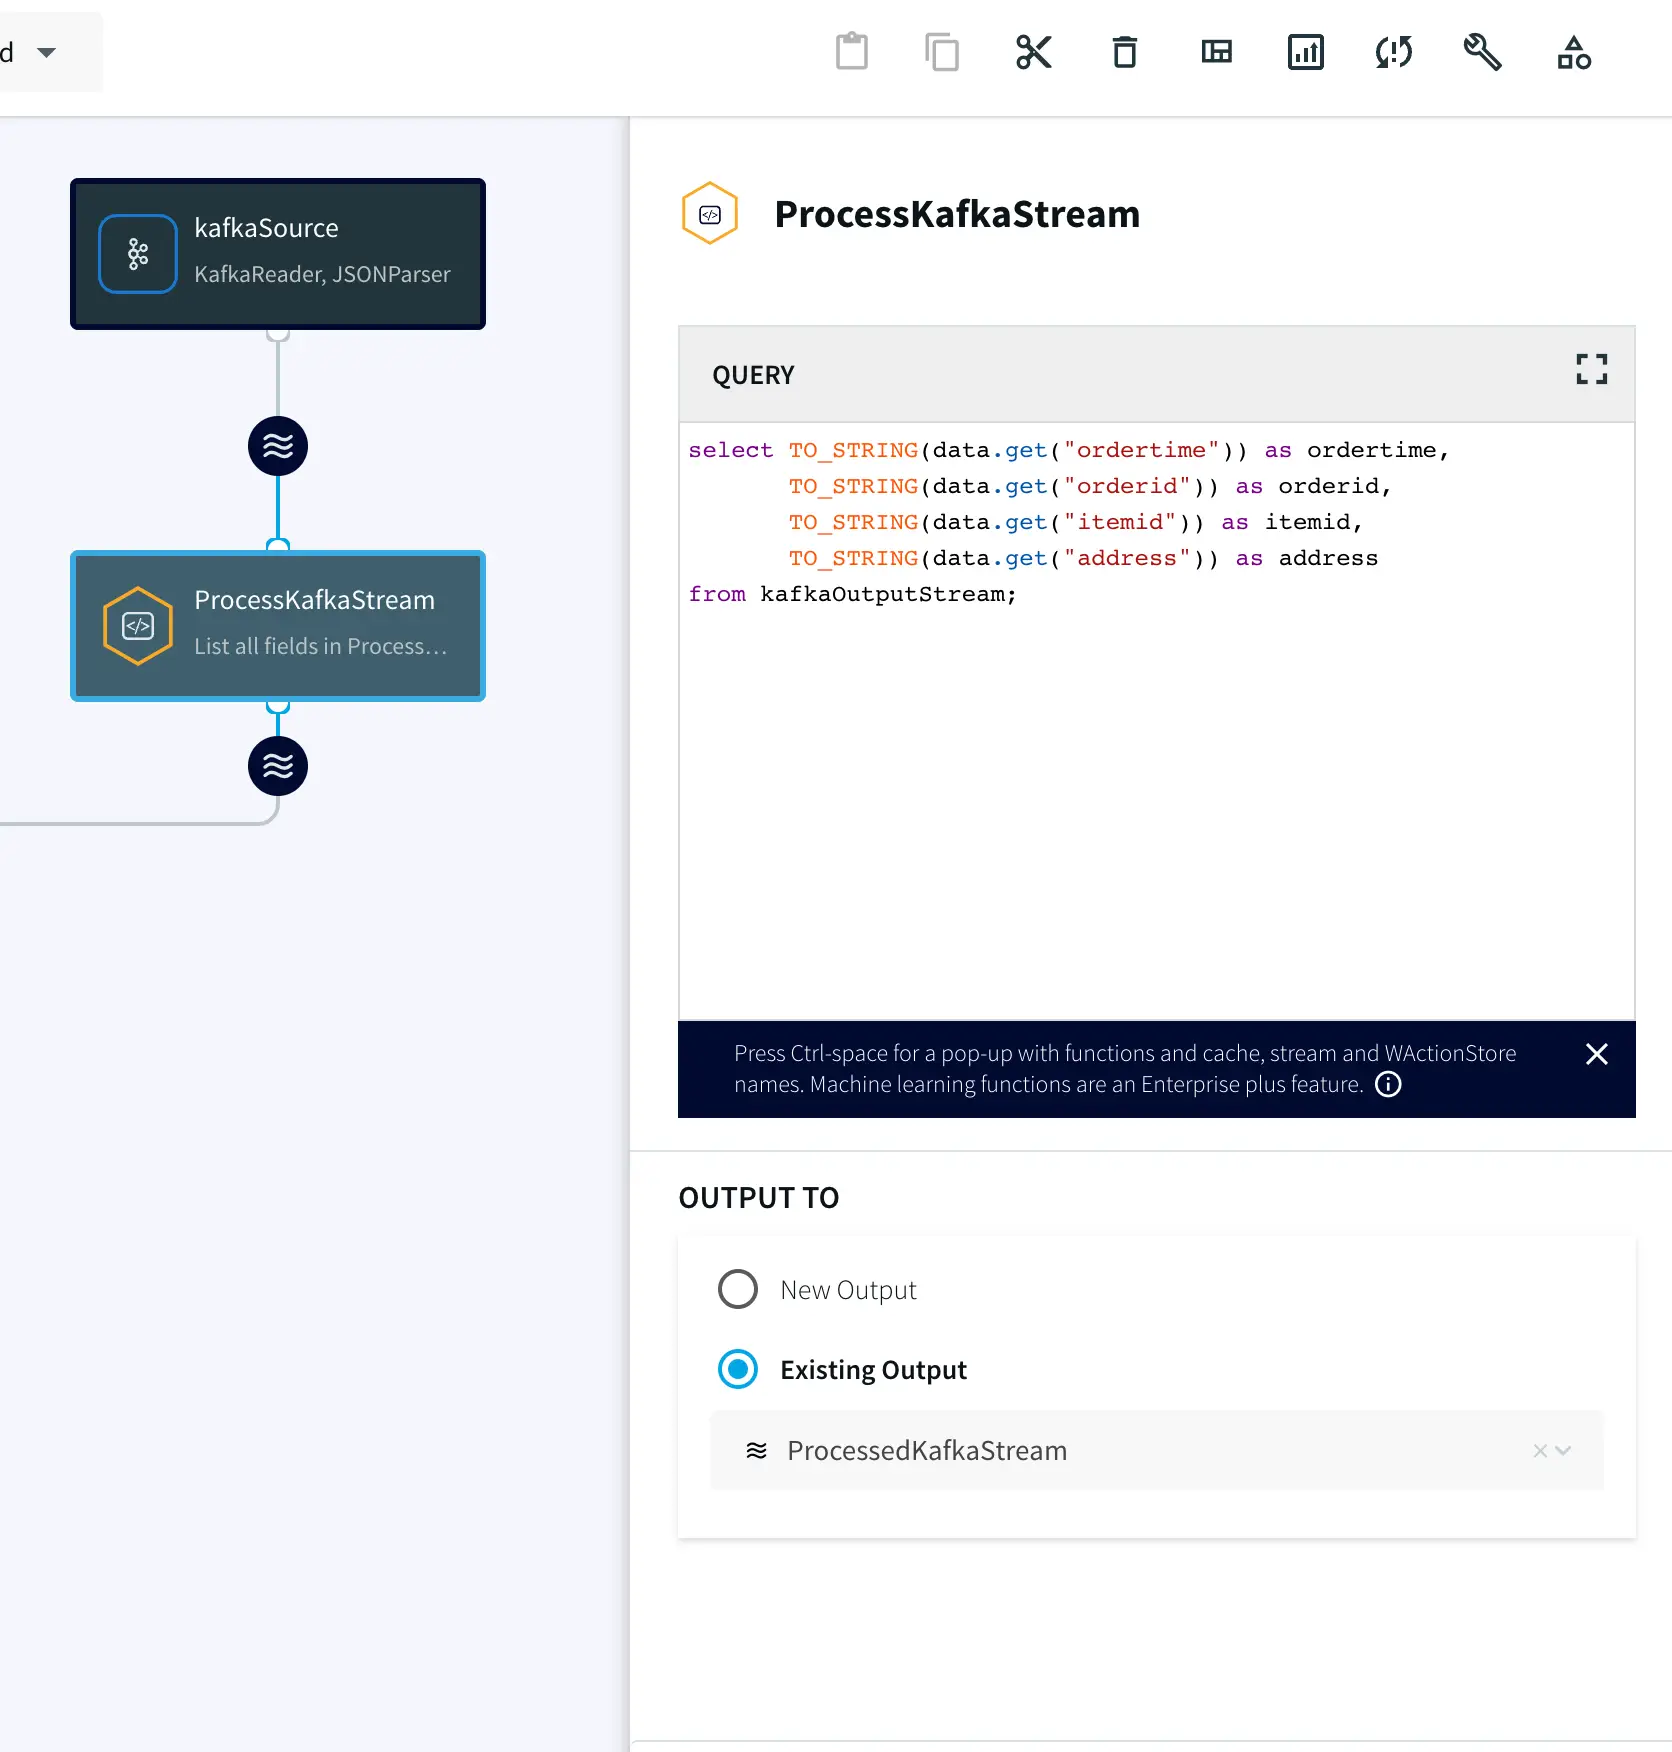
Step 2: Add a Continuous Query to process the output stream
Now the data streamed from the Kafka source will be processed in real time for various analytical applications. In this recipe the data is processed with SQL-like query that converts the JSON values into a structured table which is then streamed into your Snowflake warehouse, all in real time.
Drag the CQ component from the side panel and enter the following query. You can copy the SQL query from our GitHub page.
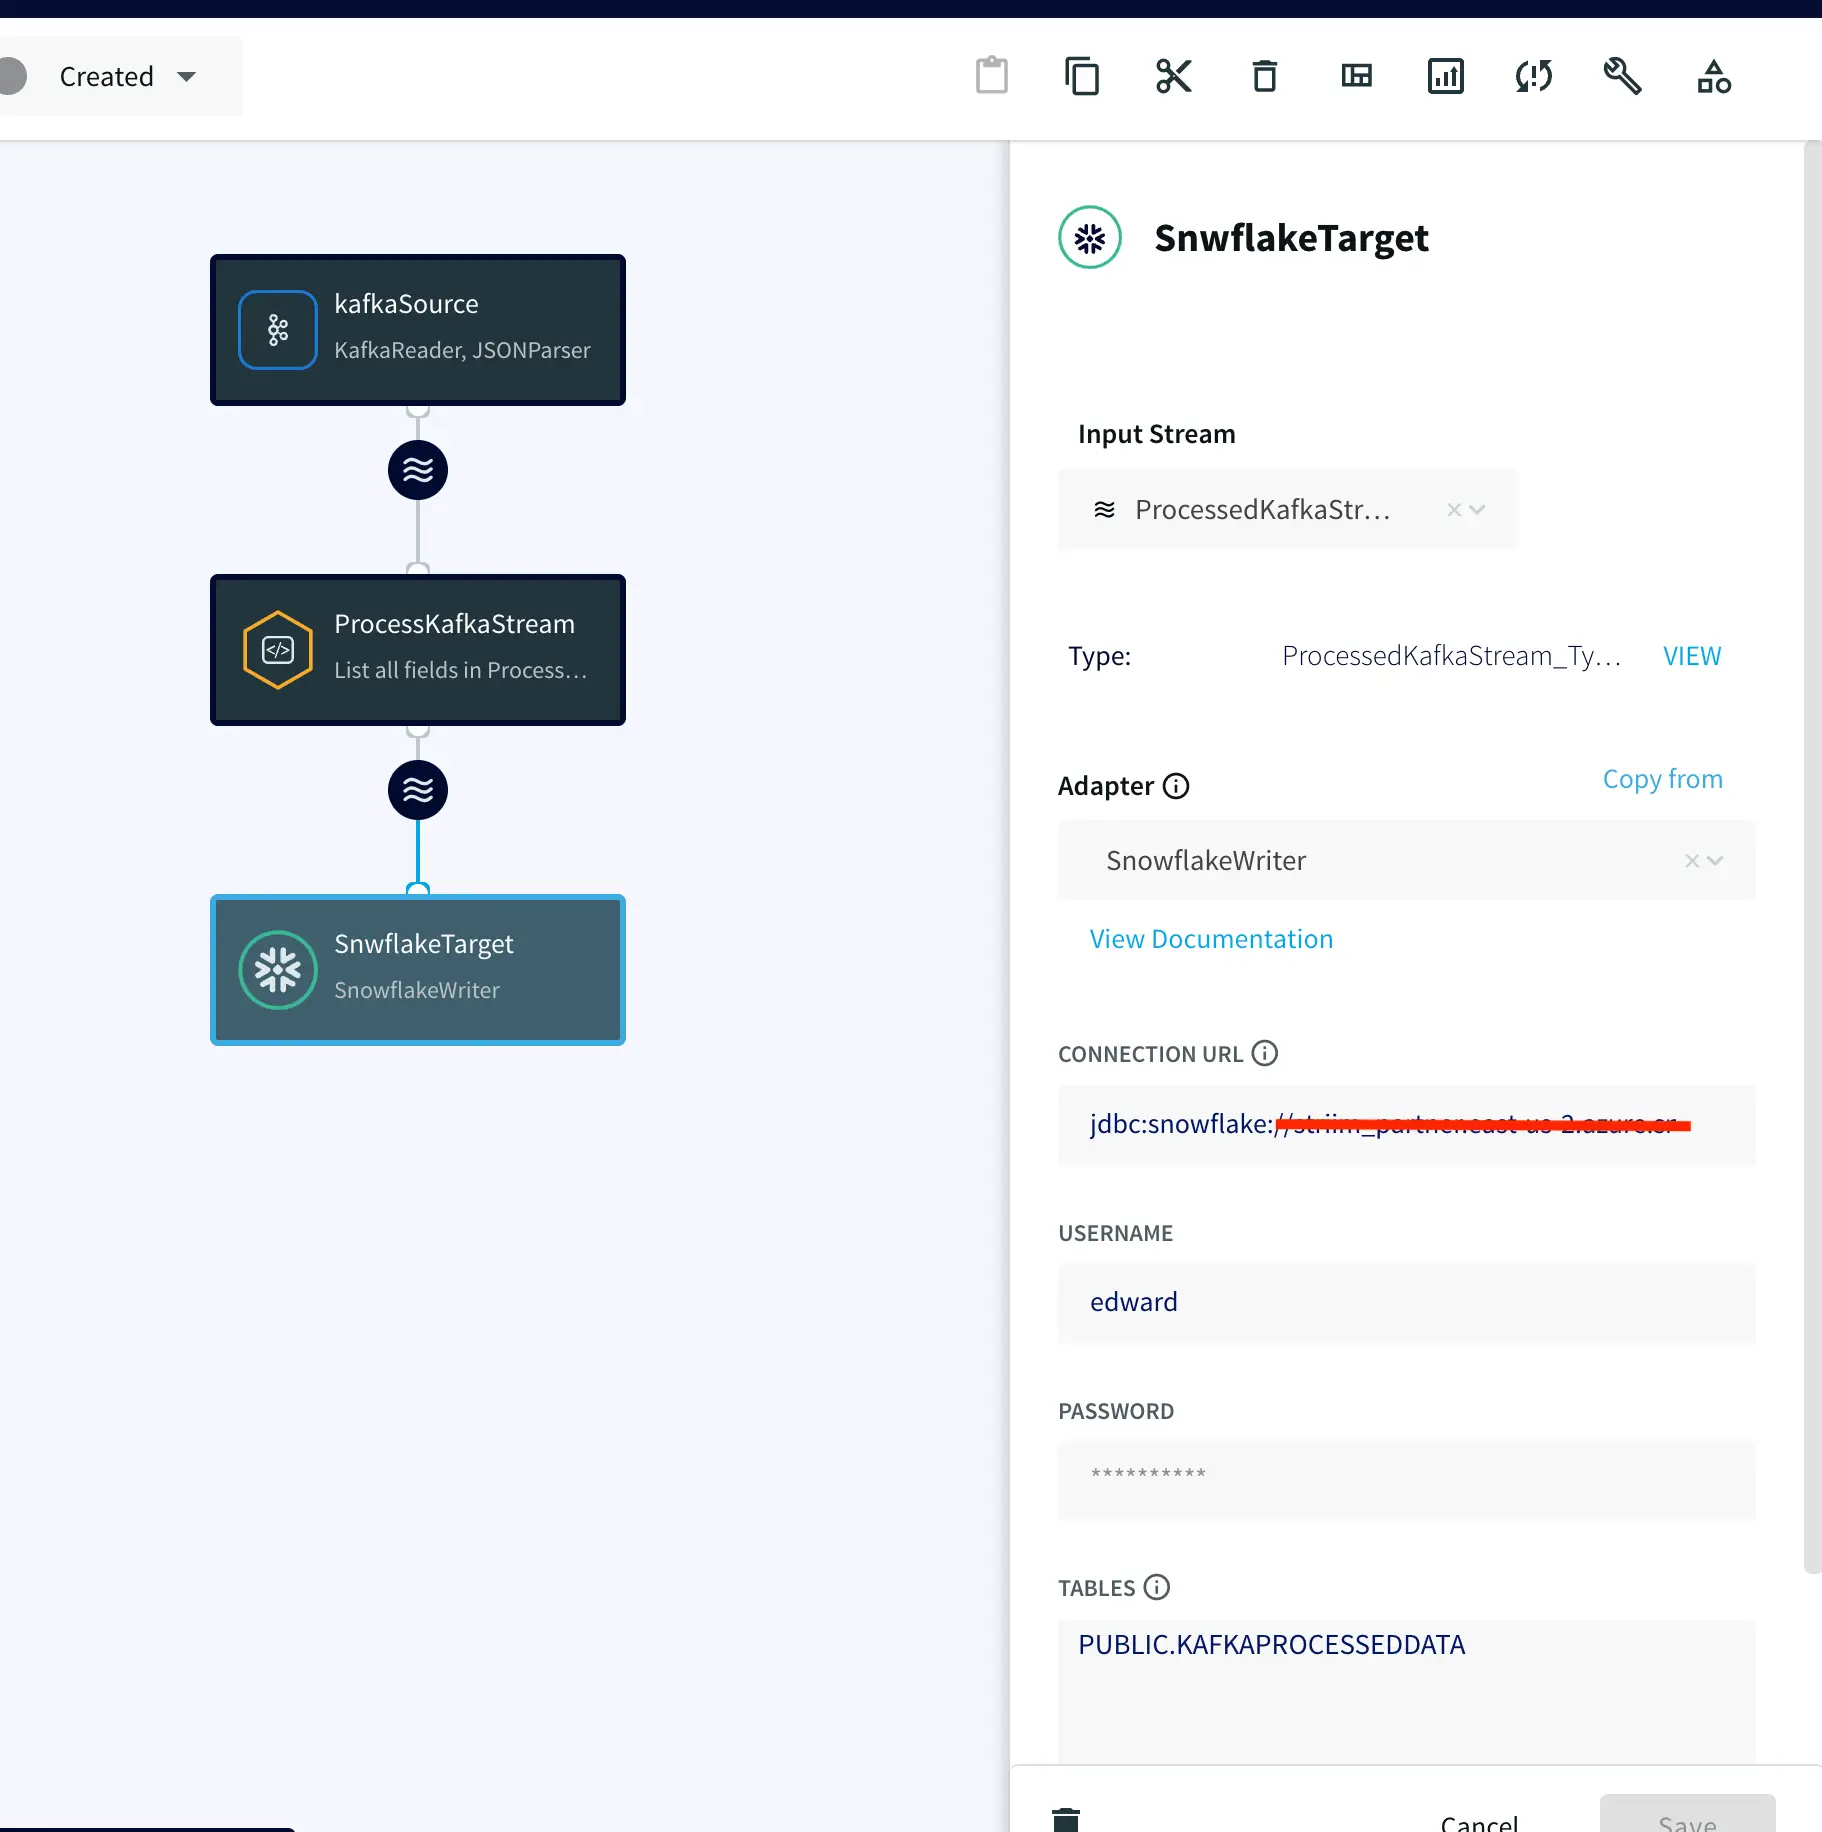
Step 3: Configure your Snowflake Target
On your target Snowflake warehouse, create a table with the same schema as the processed stream from the above Continuous Query. Enter the connection details and save. You can learn more about Snowflake Writer from this recipe.
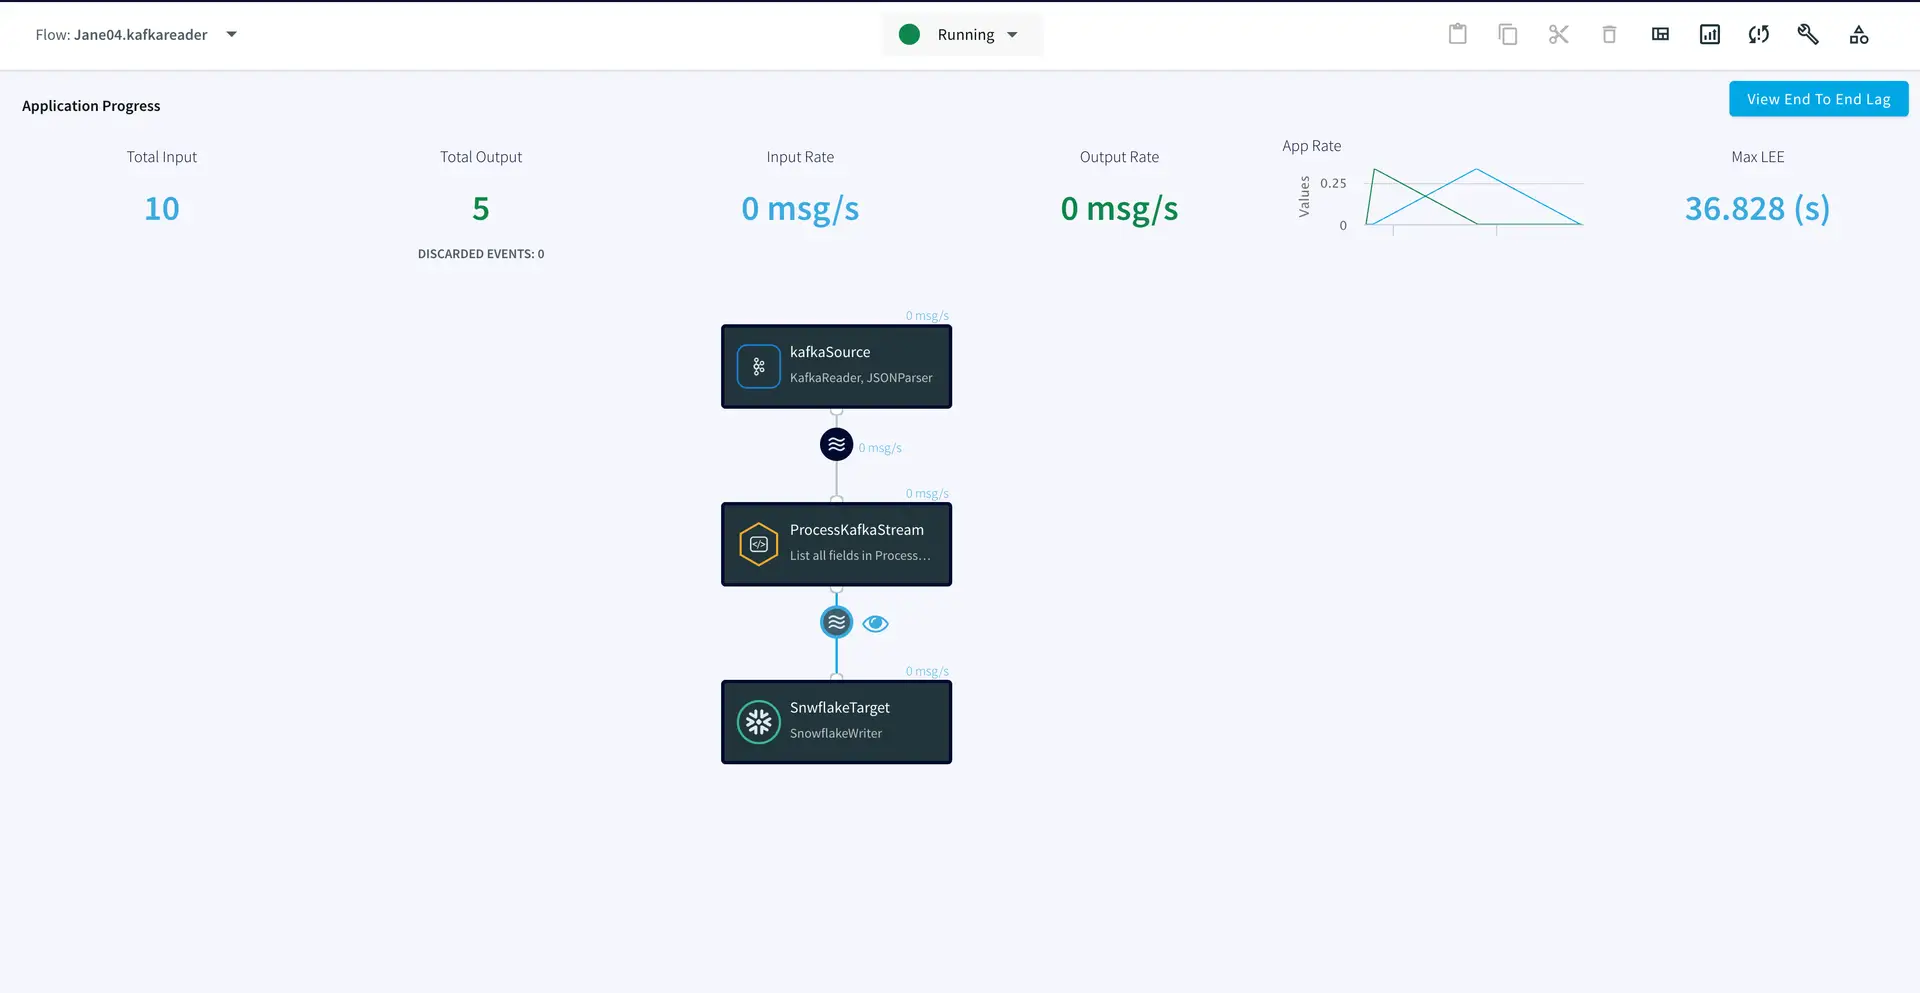
Step 4: Deploy and run the app
Once the source, target and CQ are configured, select Deploy from the dropdown menu next to ‘Created’. Choose any available node and click Deploy. After the app is deployed, from the same drop-down, select StartApp.
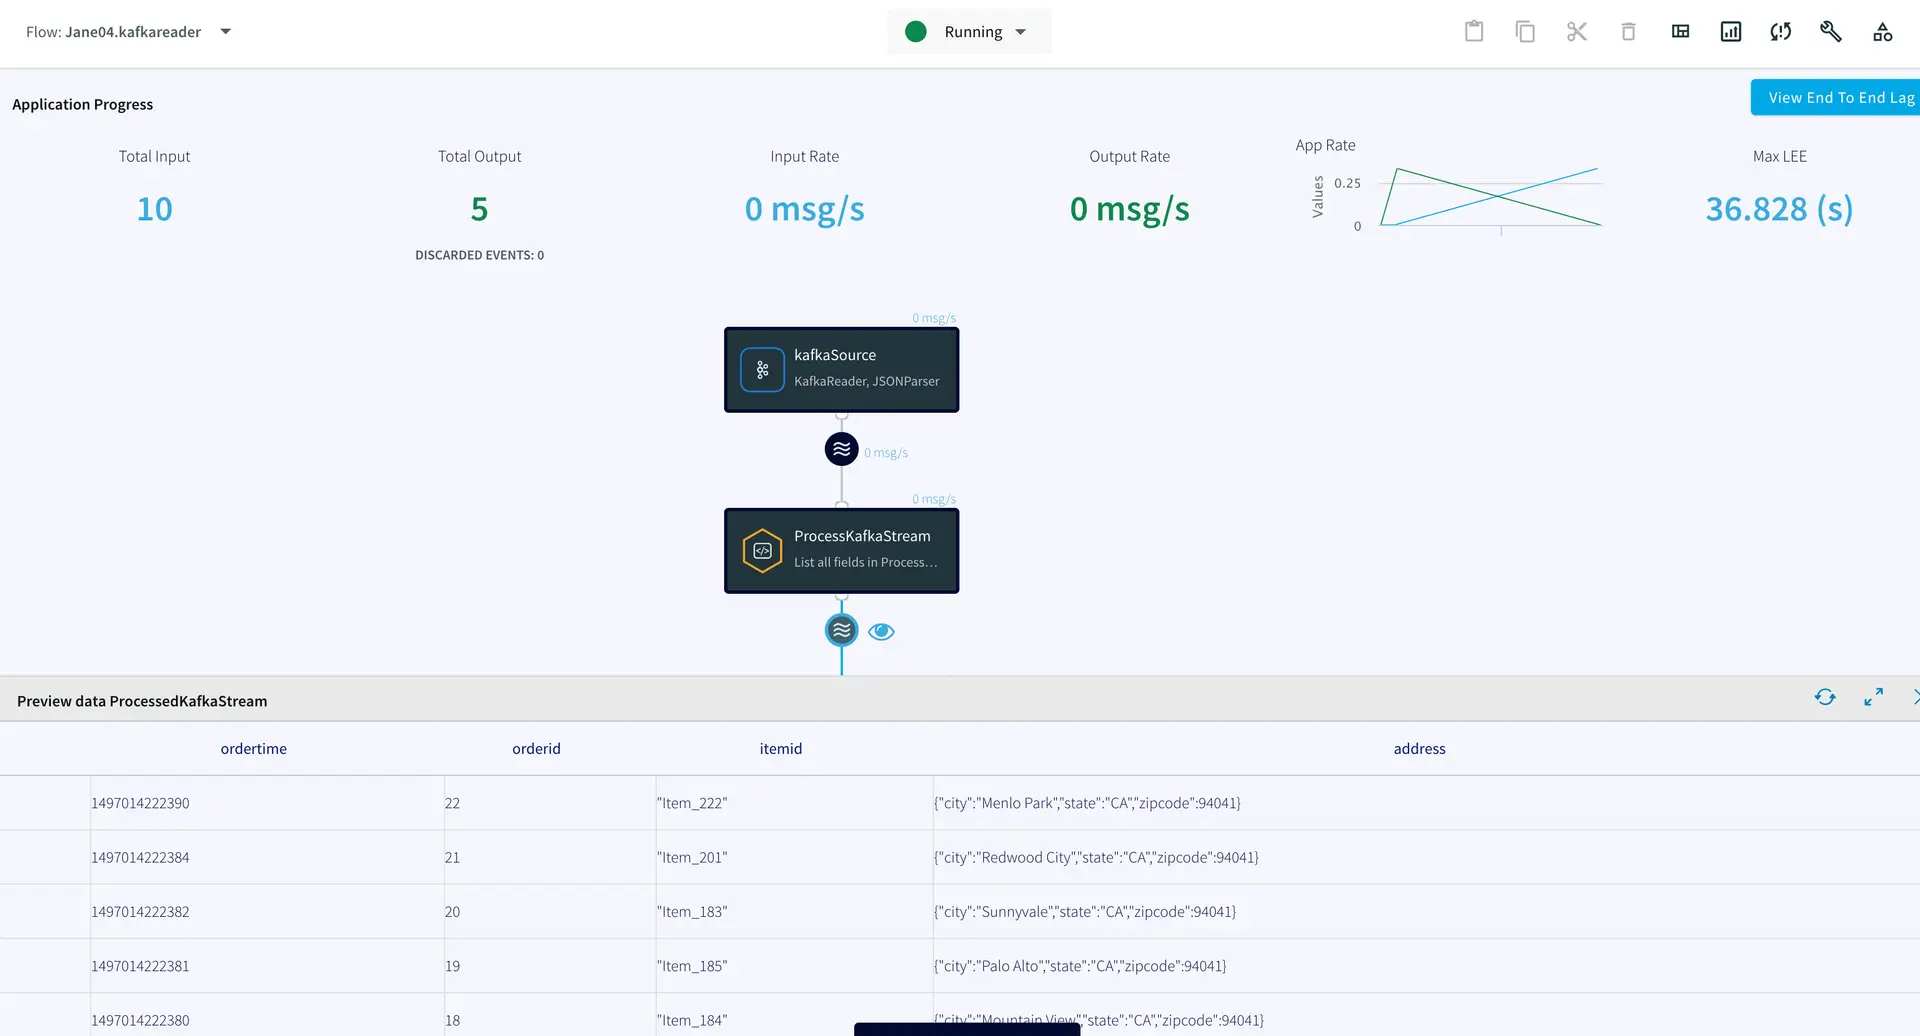
You can preview the processed data by clicking on the ‘eye’ icon next to the stream component.
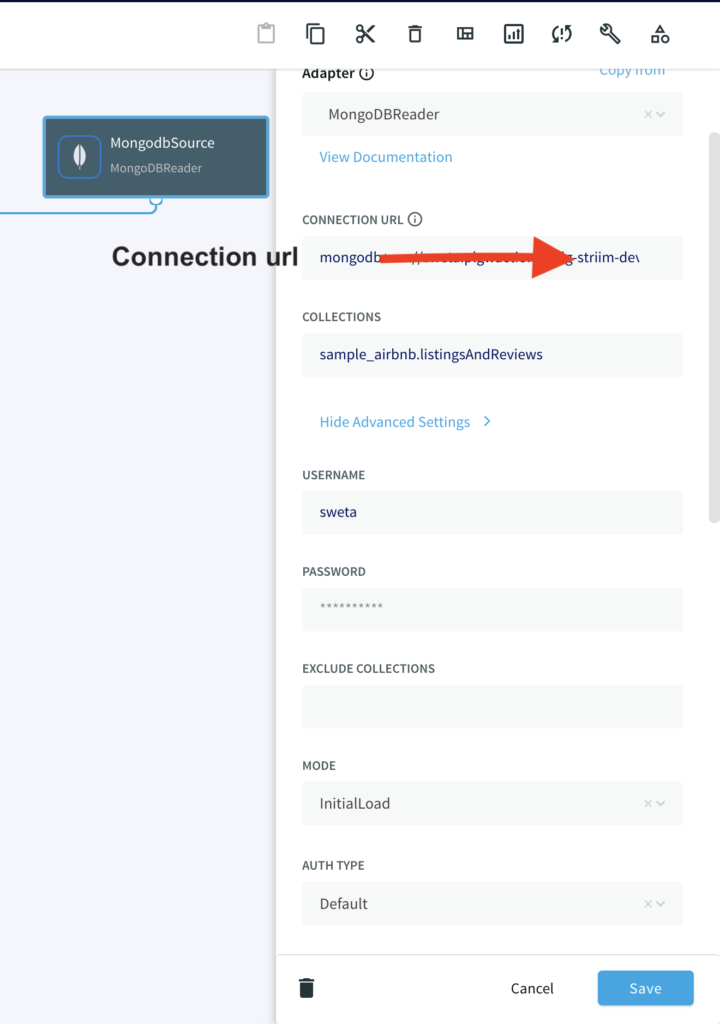
Step 1: Set up your MongoDB Source
Configure your MongoDB source by filling in the connection details. Follow this recipe for detailed steps on setting up a MongoDB source on Striim. Enter the connection url, username, password and the collection data that you want to stream.
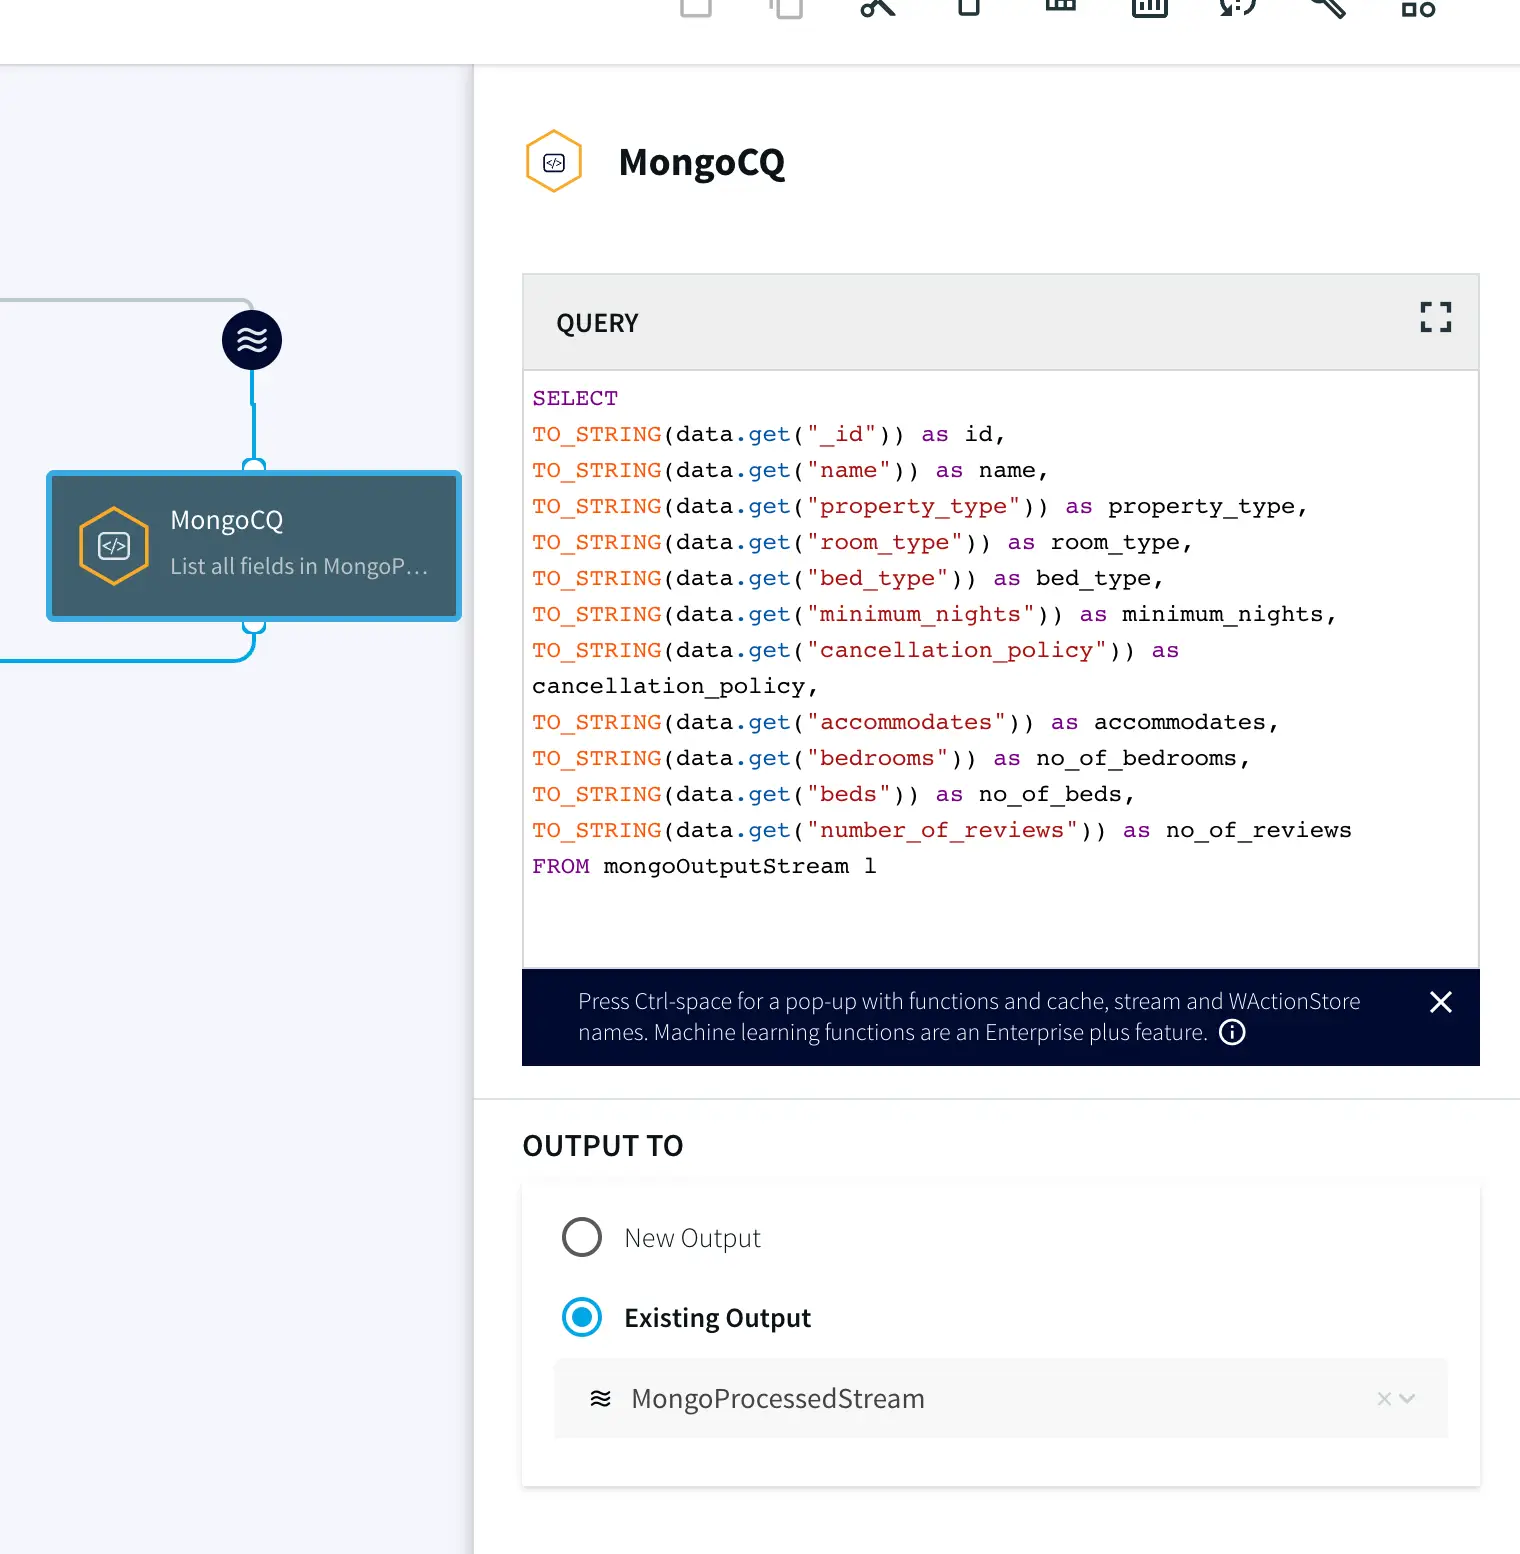
Step 2: Add a Continuous Query to process incoming data
Once the source is configured, we will run a query on the data stream to process it. You can copy and paste the code from our GitHub page.
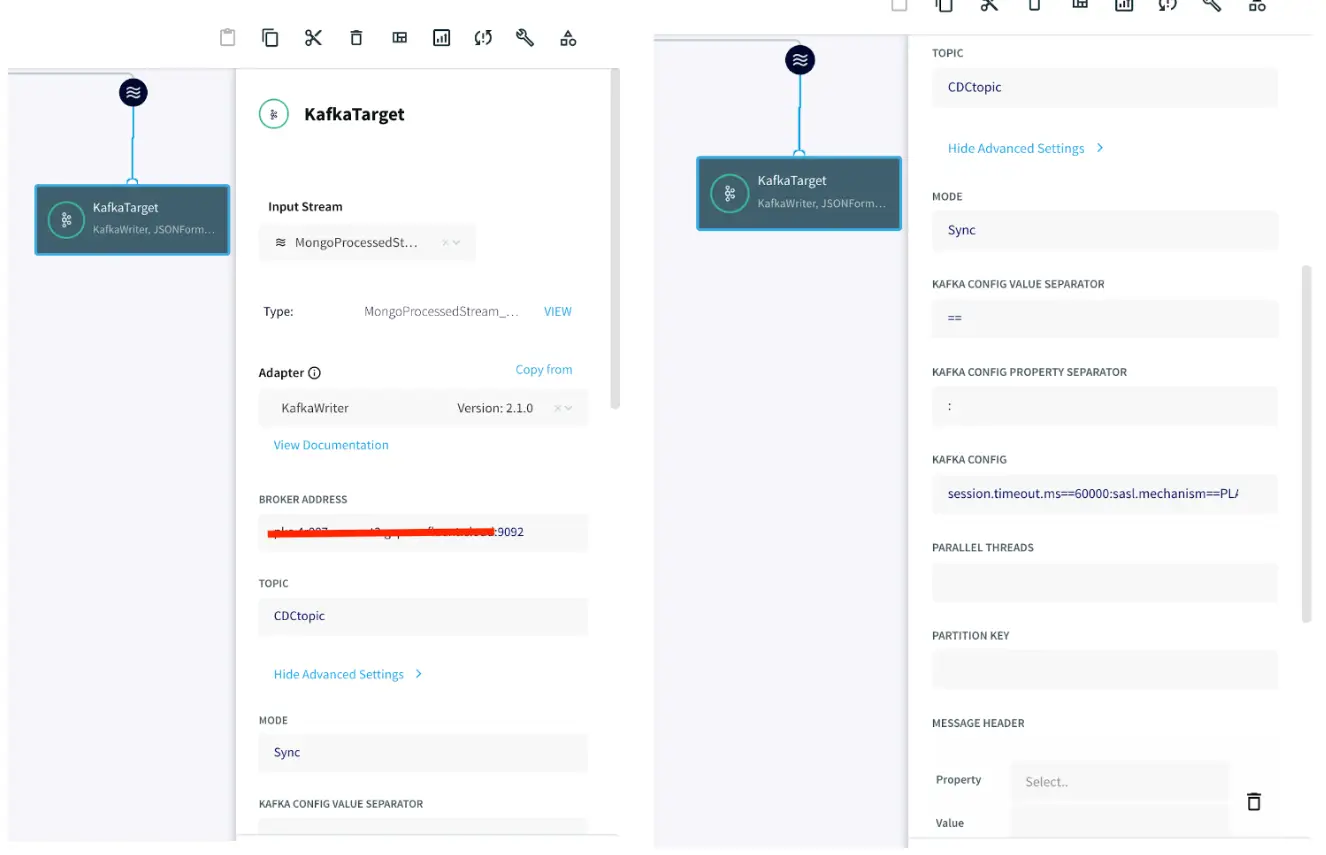
Step 3: Set up the Kafka target
After the data is processed, it is written to a Confluent Kafka topic. The configuration for the Kafka Writer is similar to Kafka Reader as shown in app 1. Enter the connection details of your Kafka and click Save.
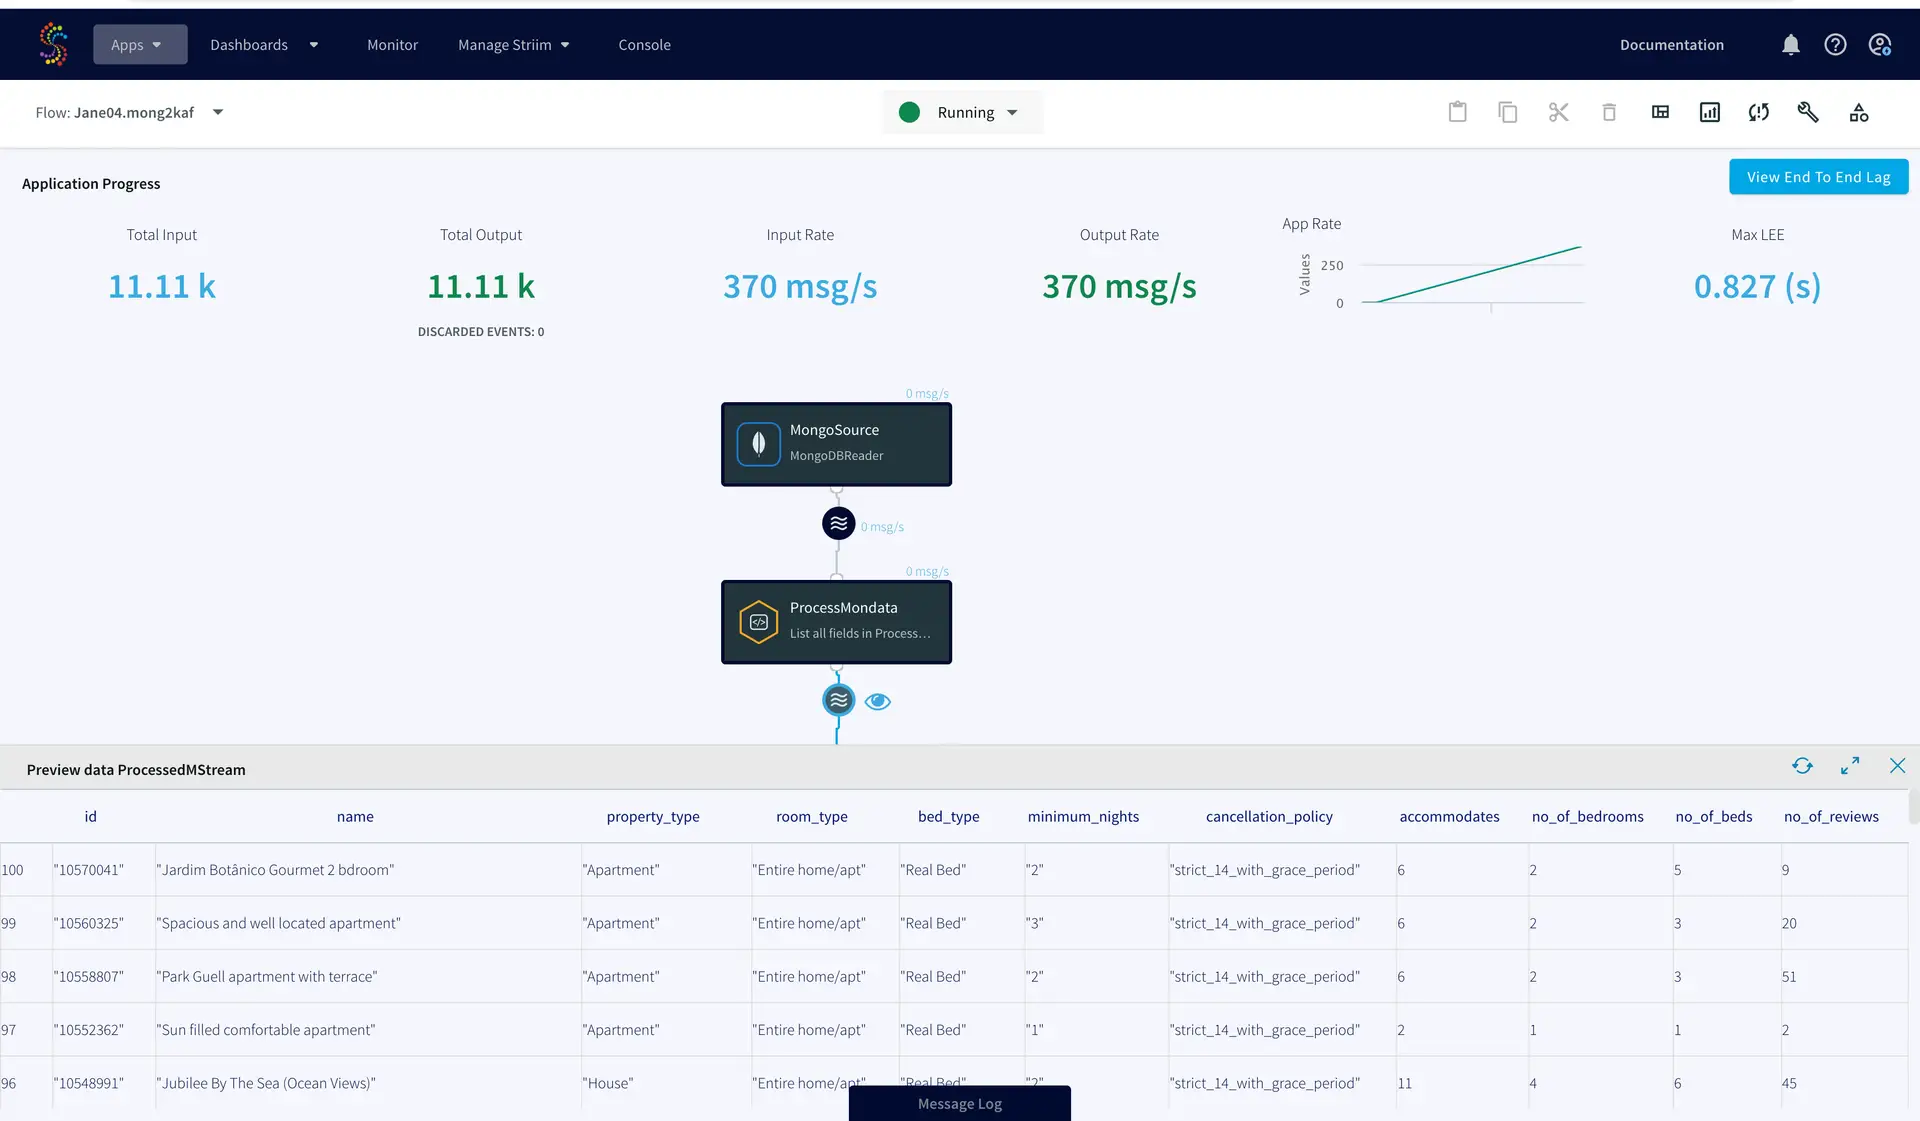
Step 4: Deploy and run the app
After the source and target adapters are configured, click Deploy followed by Startapp to run the data stream.
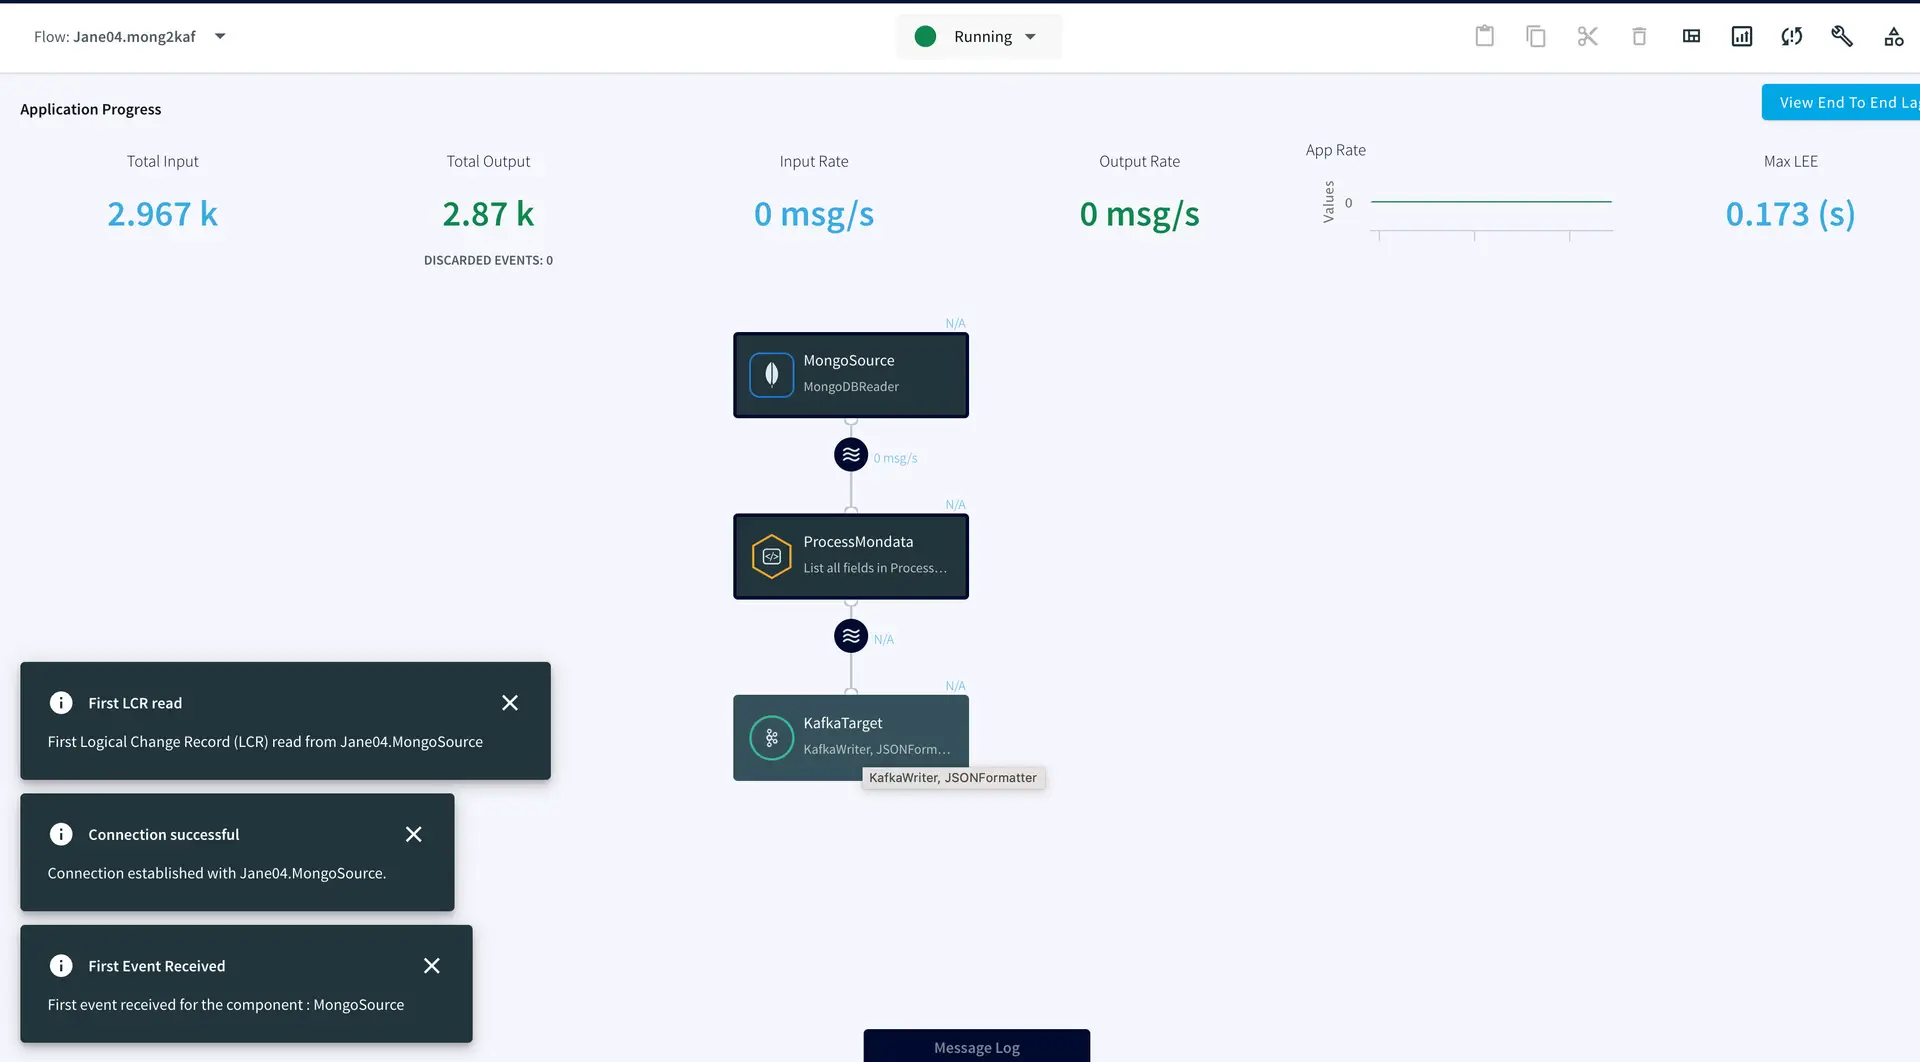
You can preview the processed data through the ‘eye’ wizard next to the data stream.
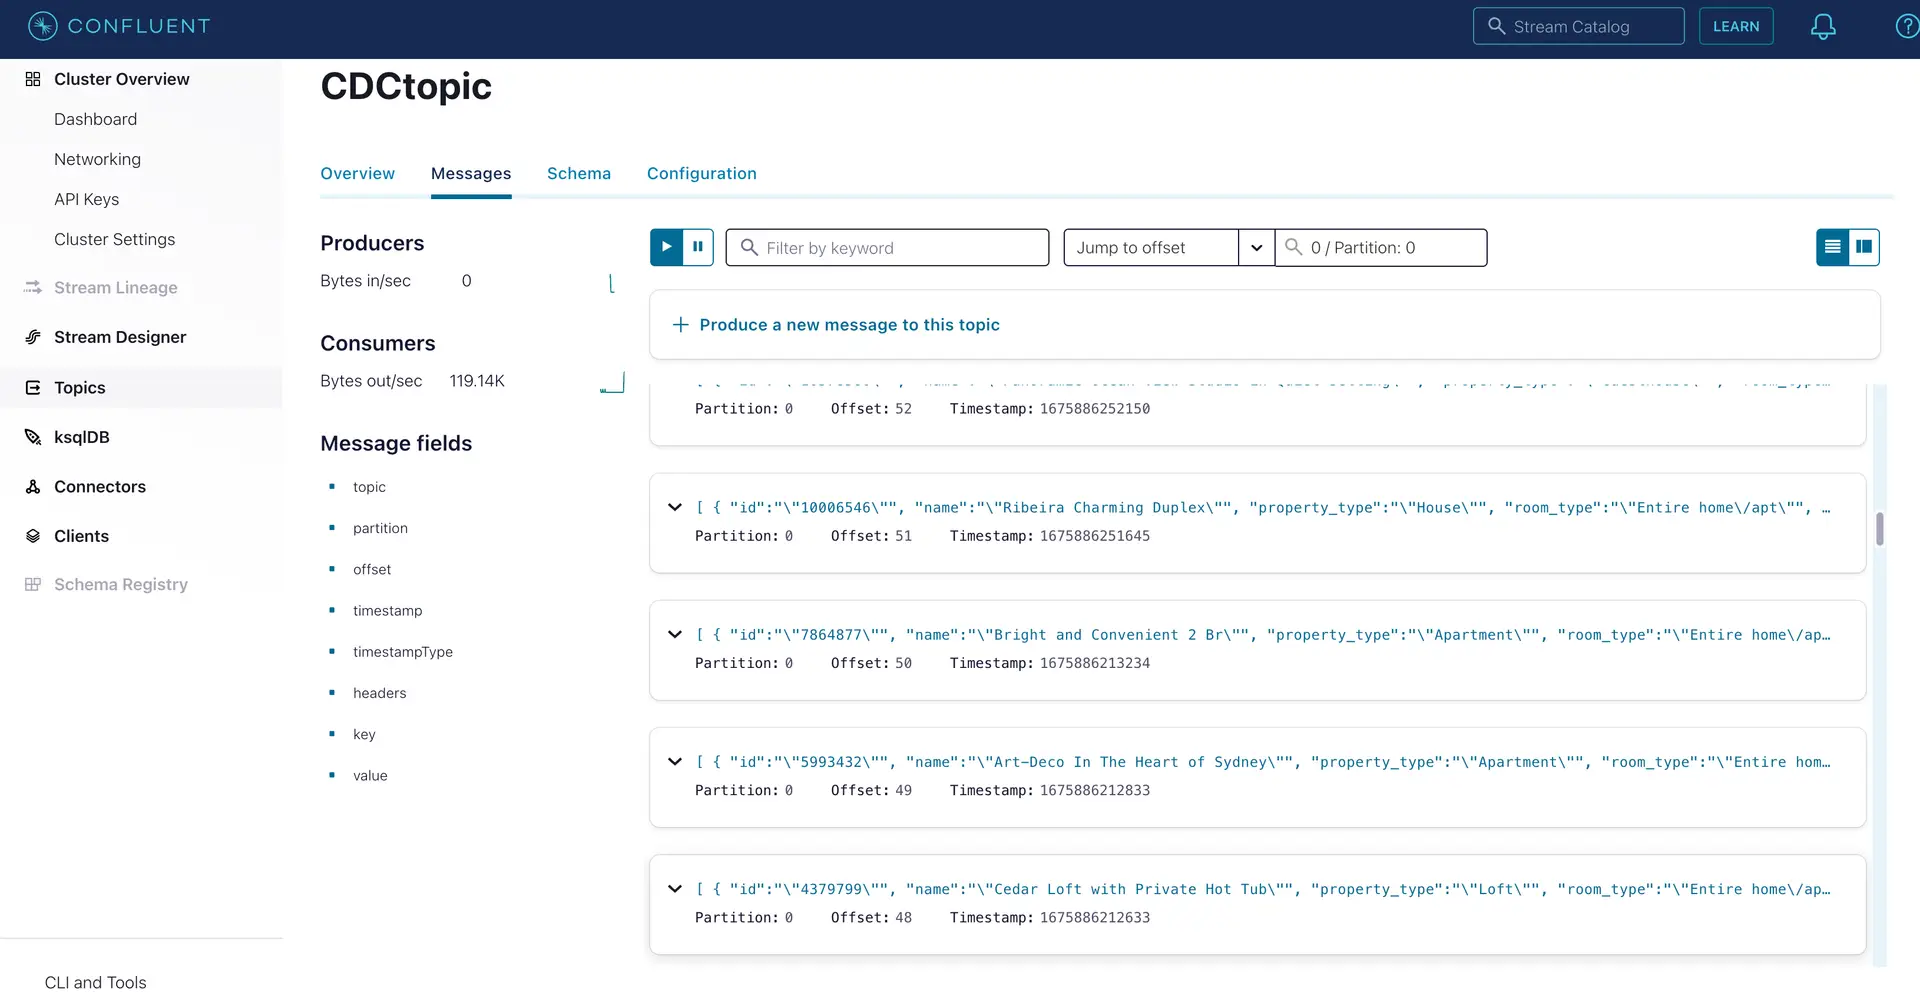
As seen on the target Kafka messages, the data from MongoDB source is streamed into the Kafka topic.

Striim
Striim’s unified data integration and streaming platform connects clouds, data and applications.

Snowflake
Snowflake is a cloud-native relational data warehouse that offers flexible and scalable architecture for storage, compute and cloud services.
Apache Kafka
Apache Kafka is an open-source distributed streaming system used for stream processing, real-time data pipelines, and data integration at scale.

MongoDB
NoSQL database that provides support for JSON-like storage with full indexing support.