


Overview
In this post, we will walk through an example of how to replicate and synchronize your data from on-premises MySQL to BigQuery using change data capture (CDC).
Data warehouses have traditionally been on-premises services that required data to be transferred using batch load methods. Ingesting, storing, and manipulating data with cloud data services like Google BigQuery makes the whole process easier and more cost effective, provided that you can get your data in efficiently.
Striim real-time data integration platform allows you to move data in real-time as changes are being recorded using a technology called change data capture. This allows you to build real-time analytics and machine learning capabilities from your on-premises datasets with minimal impact.
Step 1: Source MySQL Database
Before you set up the Striim platform to synchronize your data from MySQL to BigQuery, let’s take a look at the source database and prepare the corresponding database structure in BigQuery. For this example, I am using a local MySQL database with a simple purchases table to simulate a financial datastore that we want to ingest from MySQL to BigQuery for analytics and reporting.
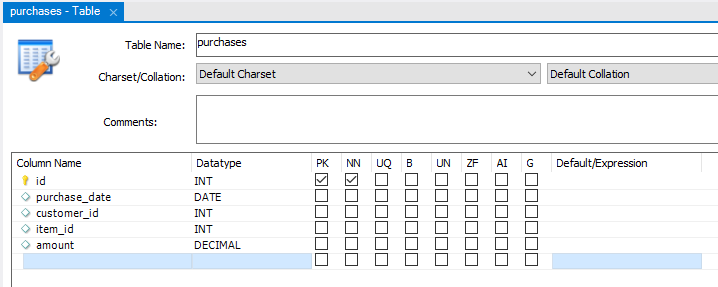
I’ve loaded a number of initial records into this table and have a script to apply additional records once Striim has been configured to show how it picks up the changes automatically in real time.
Step 2: Targeting Google BigQuery
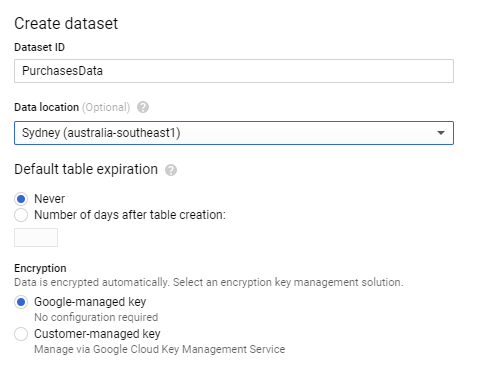
You also need to make sure your instance of BigQuery has been set up to mirror the source or the on-premises data structure. There are a few ways to do this, but because you are using a small table structure, you are going to set this up using the Google Cloud Console interface. Open the Google Cloud Console, and select a project, or create a new one. You can now select BigQuery from the available cloud services. Create a new dataset to hold the incoming data from the MySQL database.
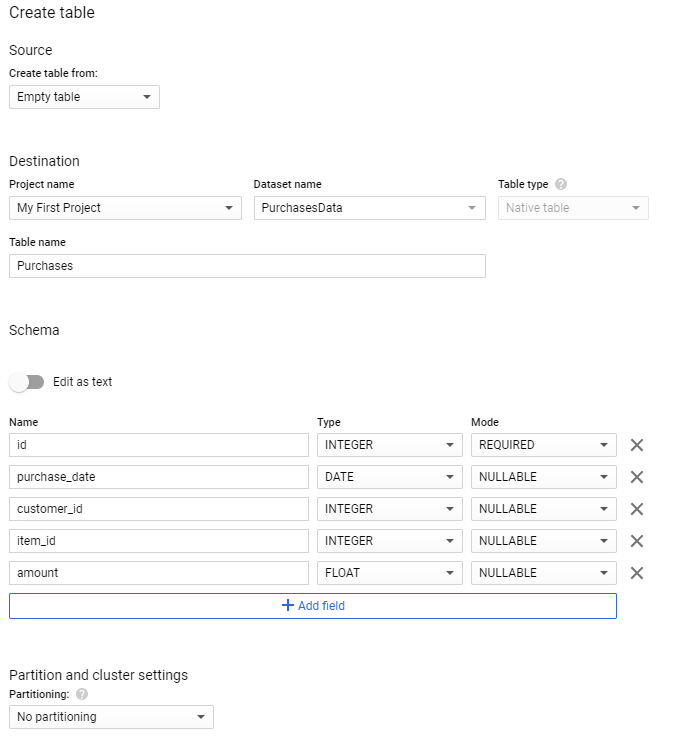
Once the dataset has been created, you also need to create a table structure. Striim can perform the transformations while the data flies through the synchronization process. However, to make things a little easier here, I have replicated the same structure as the on-premises data source.
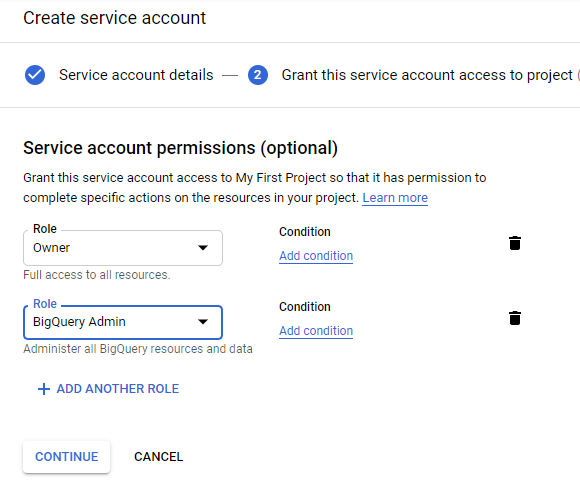
You will also need a service account to allow your Striim application to access BigQuery. Open the service account option through the IAM window in the Google Cloud Console and create a new service account. Give the necessary permissions for the service account by assigning BigQuery Owner and Admin roles and download the service account key to a JSON file.
Step 3: Set Up the Striim Application
Now you have your data in a table in the on-premises MySQL database and have a corresponding empty table with the same fields in BigQuery. Let’s now set up a Striim application on Google Cloud Platform for the migration service.
Open your Google Cloud Console and open or start a new project. Go to the marketplace and search for Striim. A number of options should return, but the option you are after is the first item that allows integration of real-time data to Google Cloud services.

Select this option and start the deployment process. For this tutorial, you are just using the defaults for the Striim server. In production, you would need to size appropriately depending on your load.
Click the deploy button at the bottom of this screen and start the deployment process.
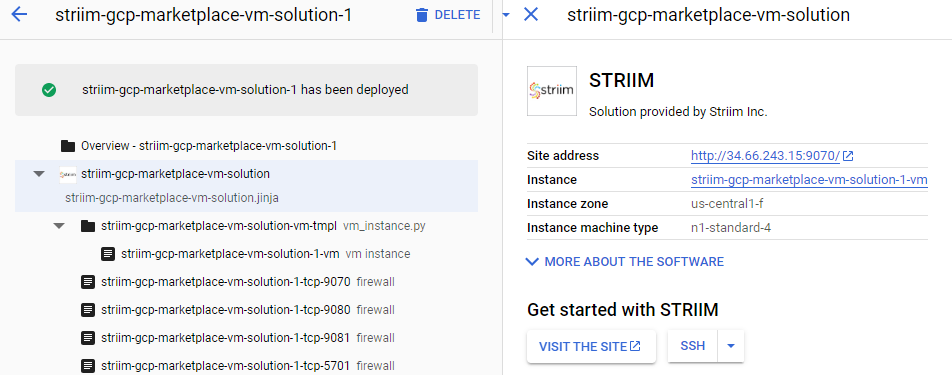
Once this deployment has finished, the details of the server and the Striim application will be generated.
Before you open the admin site, you will need to add a few files to the Striim Virtual Machine. Open the SSH console to the machine and copy the JSON file with the service account key to a location Striim can access. I used /opt/striim/conf/servicekey.json.
You also need to restart the Striim services for these setting and changes to take effect. The easiest way to do this is to restart the VM.
Give these files the right permissions by running the following commands:
chown striim:striim
chmod 770
You also need to restart the Striim services for this to take effect. The easiest way to do this is to restart the VM.
Once this is done, close the shell and click on the Visit The Site button to open the Striim admin portal.
Before you can use Striim, you will need to configure some basic details. Register your details and enter in the Cluster name (I used “DemoCluster”) and password, as well as an admin password. Leave the license field blank to get a trial license if you don’t have a license, then wait for the installation to finish.
When you get to the home screen for Striim, you will see three options. Let’s start by creating an app to connect your on-premises database with BigQuery to perform the initial load of data. To create this application, you will need to start from scratch from the applications area. Give your application a name and you will be presented with a blank canvas.
The first step is to read data from MySQL, so drag a database reader from the sources tab on the left. Double-click on the database reader to set the connection string with a JDBC-style URL using the template:
jdbc:mysql://:/
You must also specify the tables to synchronize — for this example, purchases — as this allows you to restrict what is synchronized.
Finally, create a new output. I called mine PurchasesDataStream.


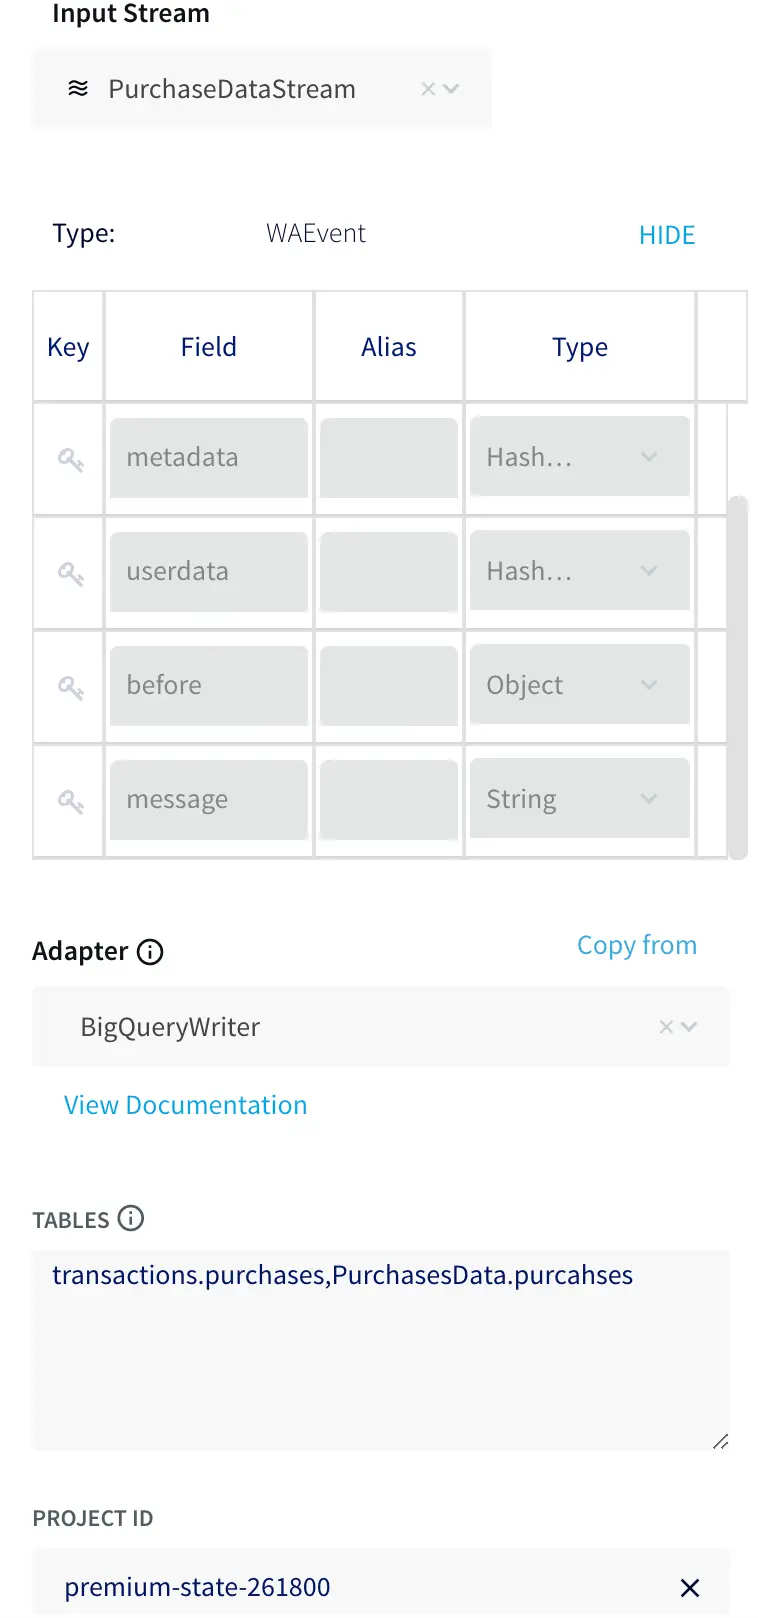
You also need to connect your BigQuery instance to your source. Drag a BigQuery writer from the targets tab on the left. Double-click on the writer and select the input stream from the previous step and specify the location of the service account key. Finally, map the source and target tables together using the form:
.,.
For this use case this is just a single table on each side.
Once both the source and target connectors have been configured, deploy and start the application to begin the initial load process. Once the application is deployed and running, you can use the monitor menu option on the top left of the screen to watch the progress.
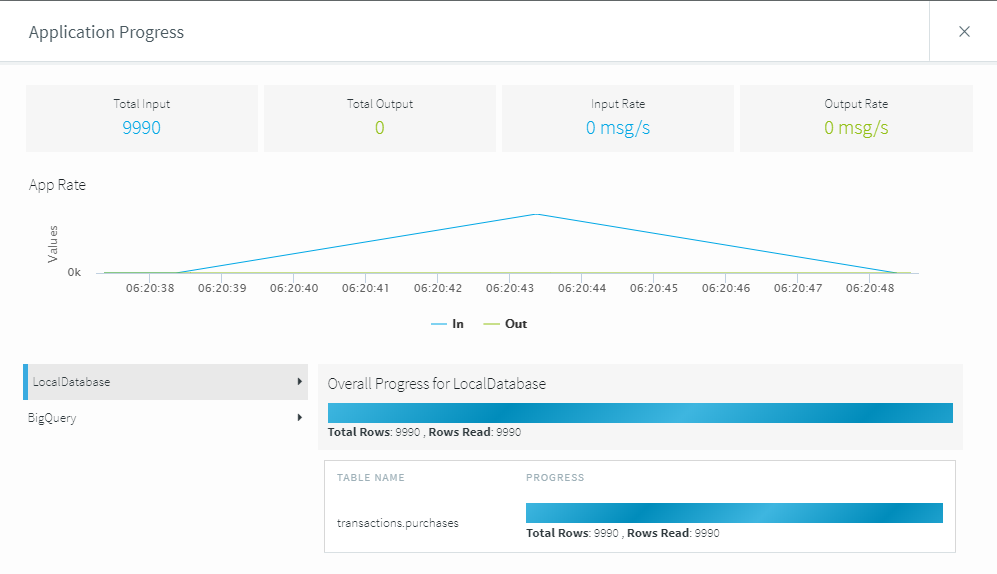
Because this example contains a small data load, the initial load application finishes pretty quickly. You can now stop this initial load application and move on to the synchronization.
Step 4: Updating BigQuery with Change Data Capture
Striim has pushed your current database up into BigQuery, but ideally you want to update this every time the on-premises database changes. This is where the change data capture application comes into play.
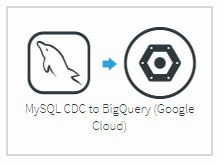
Go back to the applications screen in Striim and create a new application from a template. Find and select the MySQL CDC to BigQuery option.
Like the first application, you need to configure the details for your on-premises MySQL source. Use the same basic settings as before. However, this time the wizard adds the JDBC component to the connection URL.
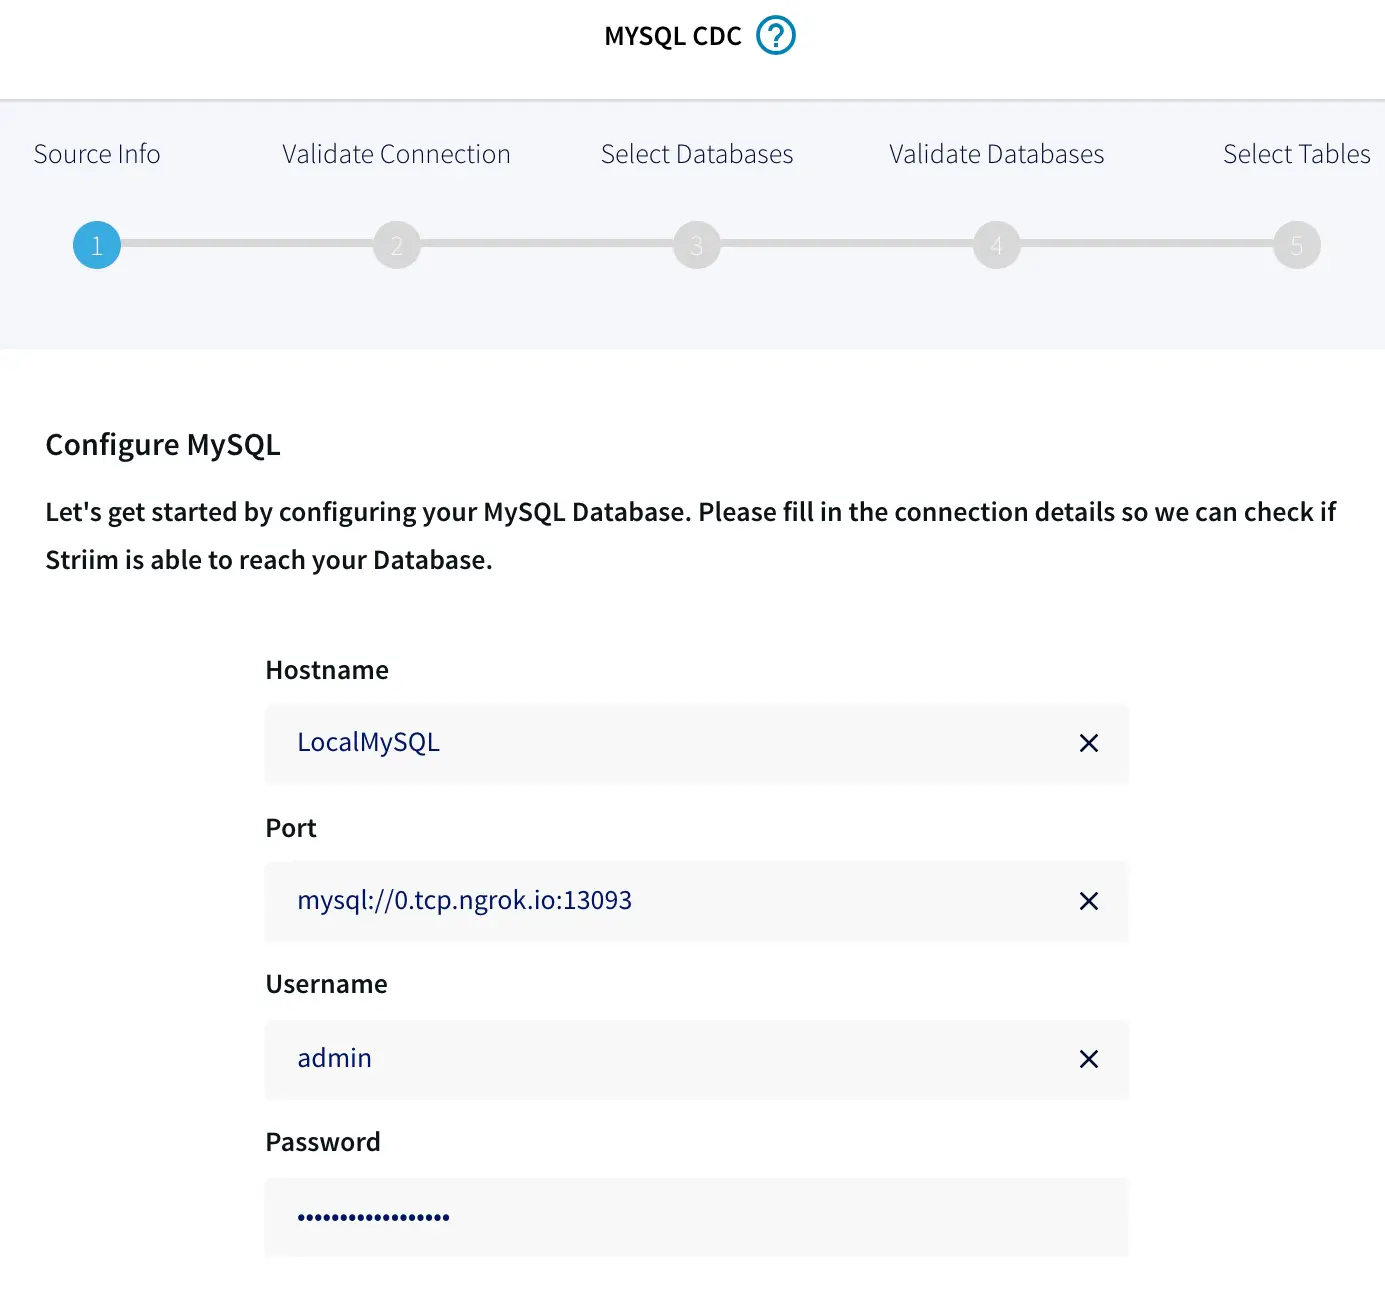
When you click Next, Striim will ensure that it can connect to the local source. Striim will retrieve all the tables from the source. Select the tables you want to sync. For this example, it’s just the purchases table.

Once the local tables are mapped, you need to connect to the BigQuery target. Again, you can use the same settings as before by specifying the same service key JSON file, table mapping, and GCP Project ID.

Once the setup of the application is complete, you can deploy and turn on the synchronization application. This will monitor the on-premises database for any changes, then synchronize them into BigQuery.
Let’s see this in action by clicking on the monitor button again and loading some data into your on-premises database. As the data loads, you will see the transactions being processed by Striim.

Next Step
As you can see, Striim makes it easy for you to synchronize your on-premises data from existing databases, such as MySQL, to BigQuery. By constantly moving your data into BigQuery, you could now start building analytics or machine learning models on top, all with minimal impact to your current systems. You could also start ingesting and normalizing more datasets with Striim to fully take advantage of your data when combined with the power of BigQuery.
To learn more about Striim for Google BigQuery, check out the related product page. Striim is not limited to MySQL to BigQuery integration, and supports many different sources and targets. To see how Striim can help with your move to cloud-based services, schedule a demo with a Striim technologist or download a free trial of the platform.

Striim
Striim’s unified data integration and streaming platform connects clouds, data and applications.
MySQL
MySQL is an open-source relational database management system.

Snowflake
Snowflake is a cloud-native relational data warehouse that offers flexible and scalable architecture for storage, compute and cloud services.
