Introduction
Striim for Snowflake combines the power of fast data streaming with the simplicity of fully automated, ELT (Extract-Load-Transform) data integration to replicate databases to Snowflake in real-time.
Striim for Snowflake is also the only automated data integration product that leverages Snowflake’s new Snowpipe Streaming API to provide fast, cost-optimized data ingest.
You can try Striim for Snowflake yourself by signing up for a 14-day free trial with $1,000 worth of free credits included.
Follow this step-by-step guide to configure your data streaming pipeline in snowflake for Striim.
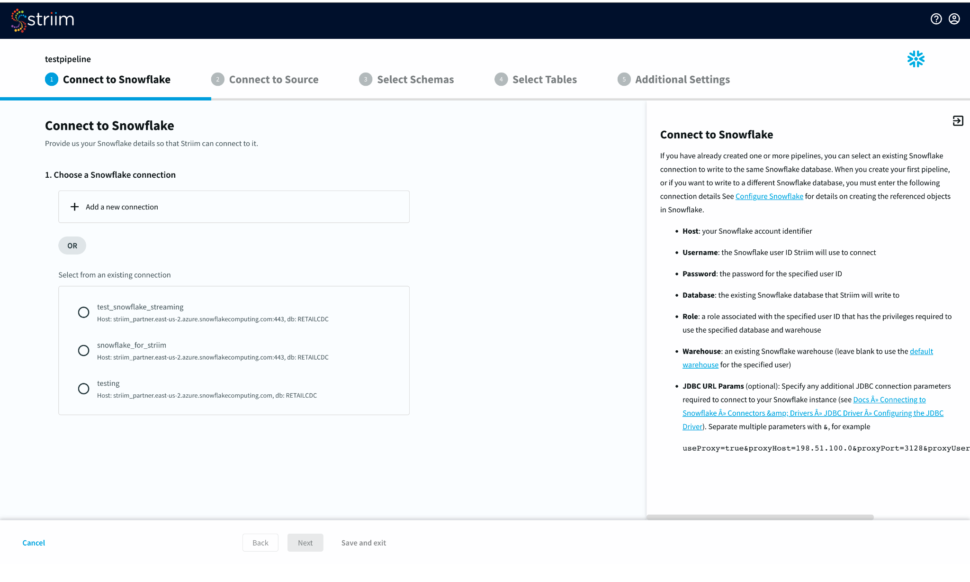
Step 1: Configure your snowflake target connection
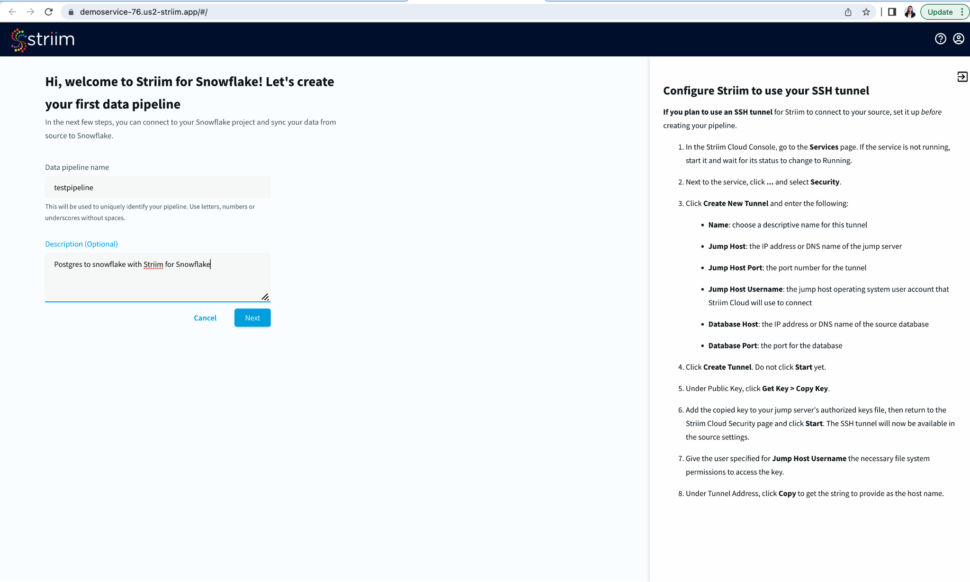
- To start building your data pipeline, first name your pipeline, and optionally add a description.
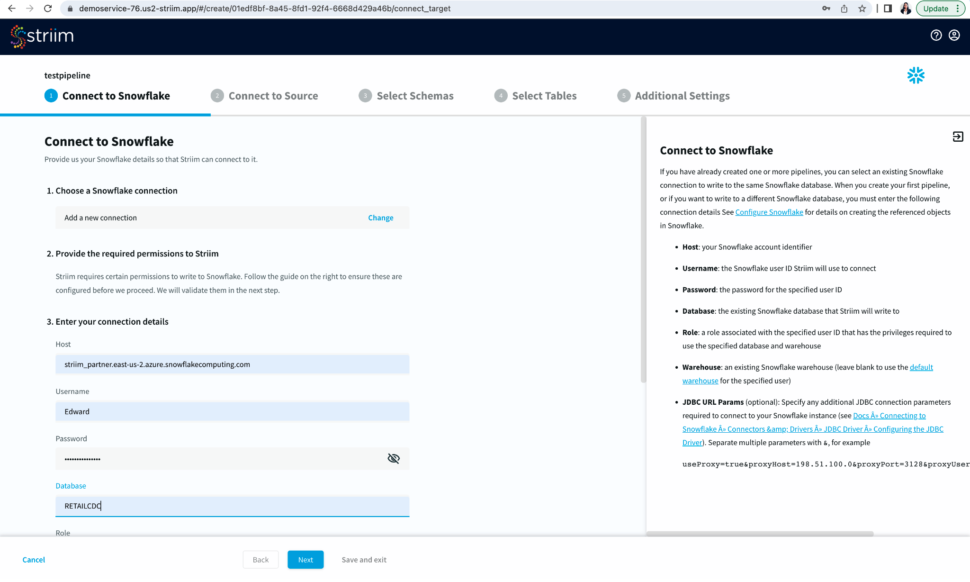
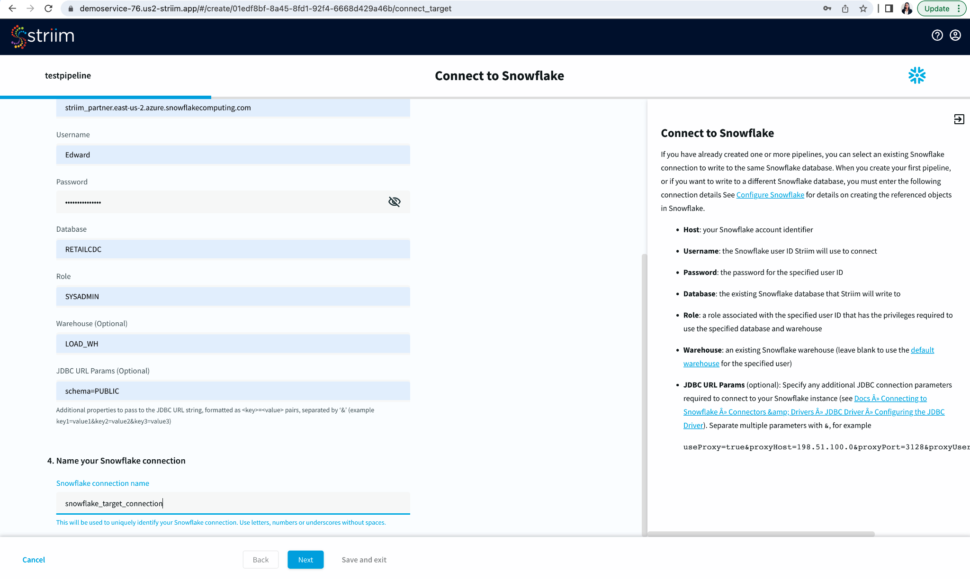
- Select an existing connection or add a new connection from scratch by adding hostname or account identifier, username and password for your snowflake account, target database, role associated with the user id, snowflake warehouse associated with the specified user, and any additional properties in the jdbc string in <key>=<value> format separated by ‘&’.
- Name your snowflake connection. Striim saves these connection details under the connection name for future use.
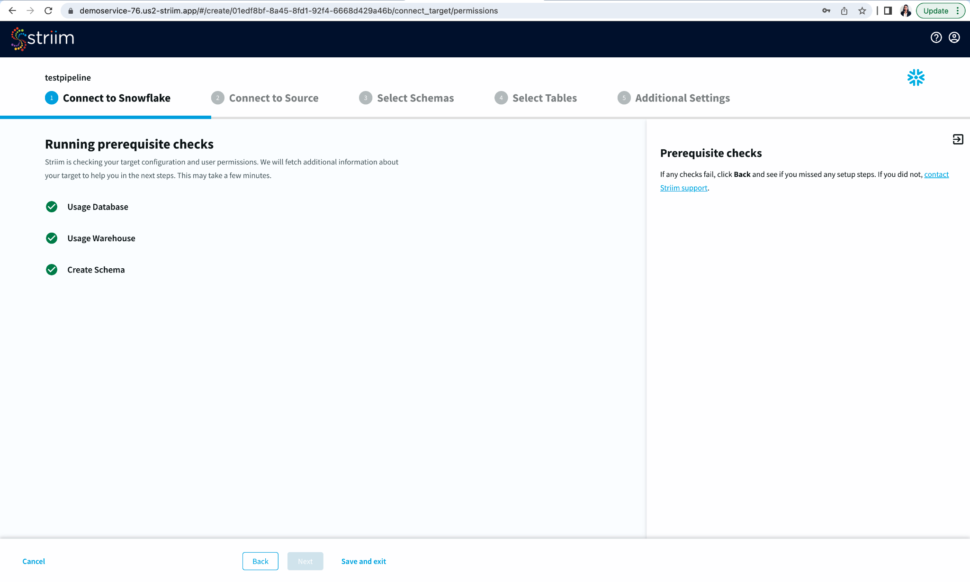
- After you have entered your connection details, click Next. Striim will check if all the prerequisites have been met.
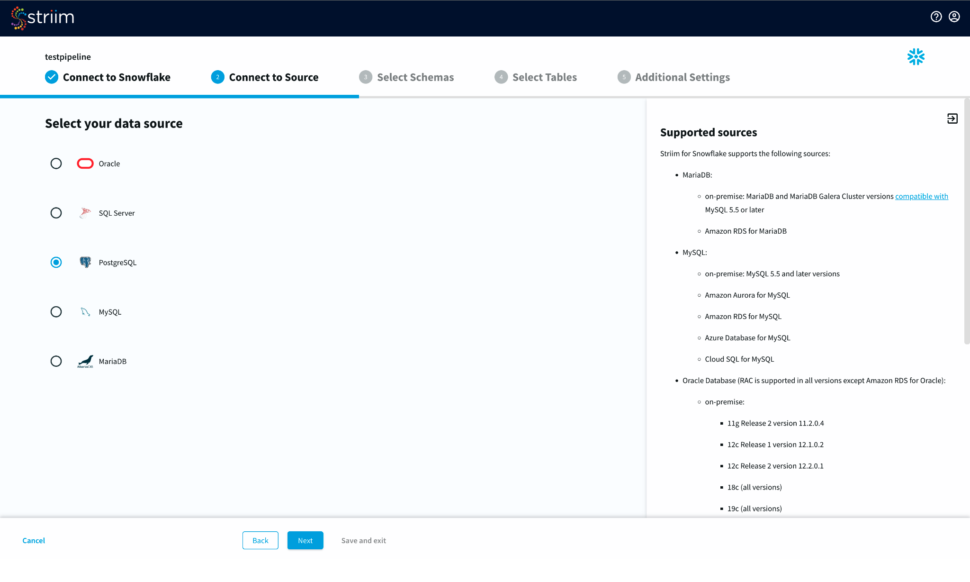
Step 2: Configure your Source connection
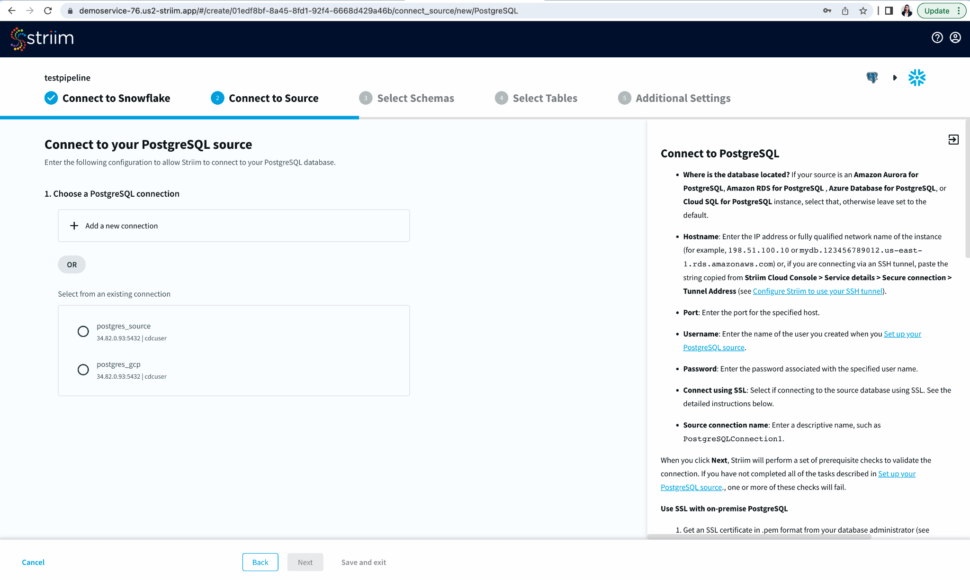
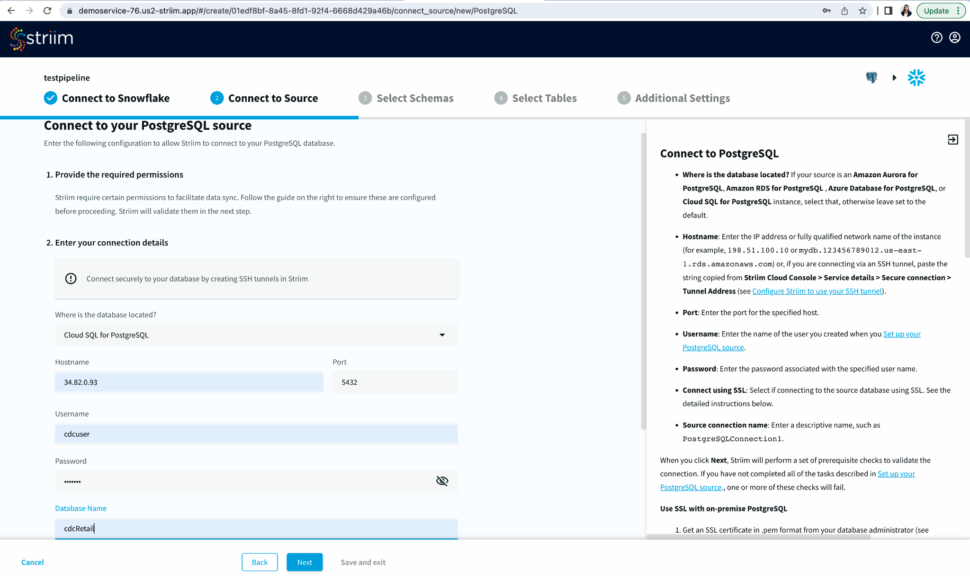
- Once your target connection is verified, configure your source connection by selecting your source database. Here, we have selected postgreSQL as our data source.
- Select an existing connection or add a new connection. Enter the hostname, username, password and database name. You can also connect securely by using SSH tunnel

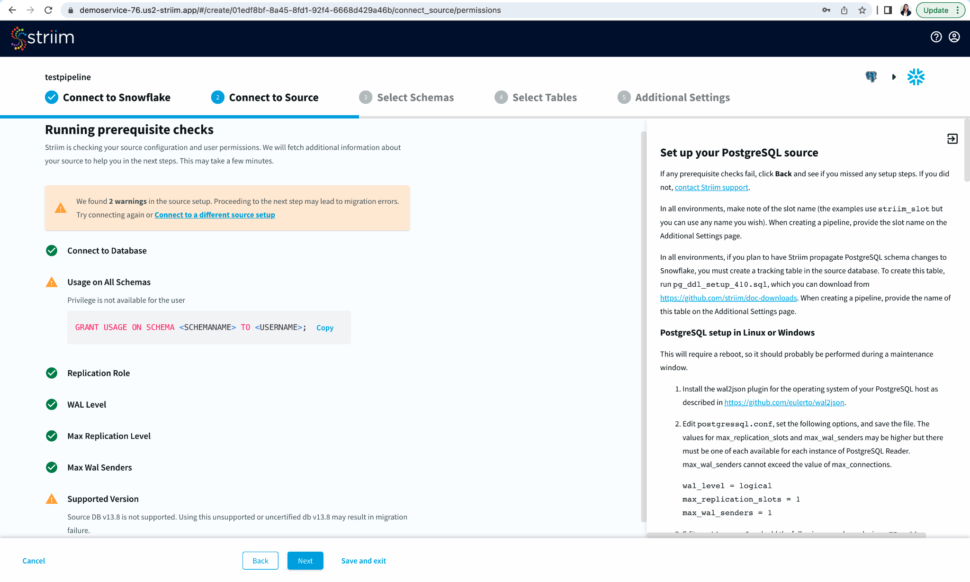
Now Striim will run prerequisite checks to verify source configuration and user permissions.
Step 3: Select Schema and Tables to move into the target
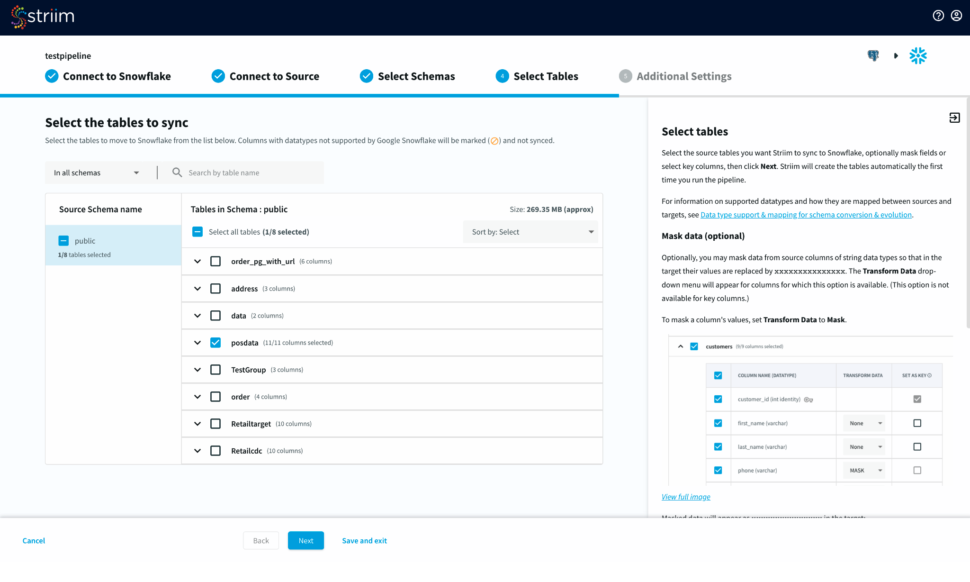
- Select the source schemas containing the tables you want to sync with Snowflake.

- Next, select the tables, optionally you can mask fields or select key columns.
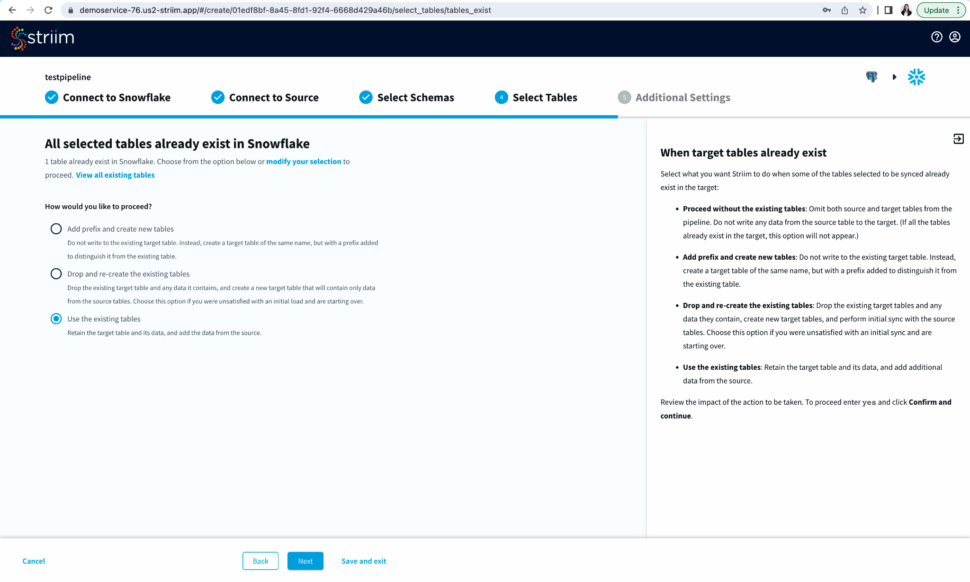
- Striim will now check the target warehouse and give you the option to sync with existing tables or create a new table.
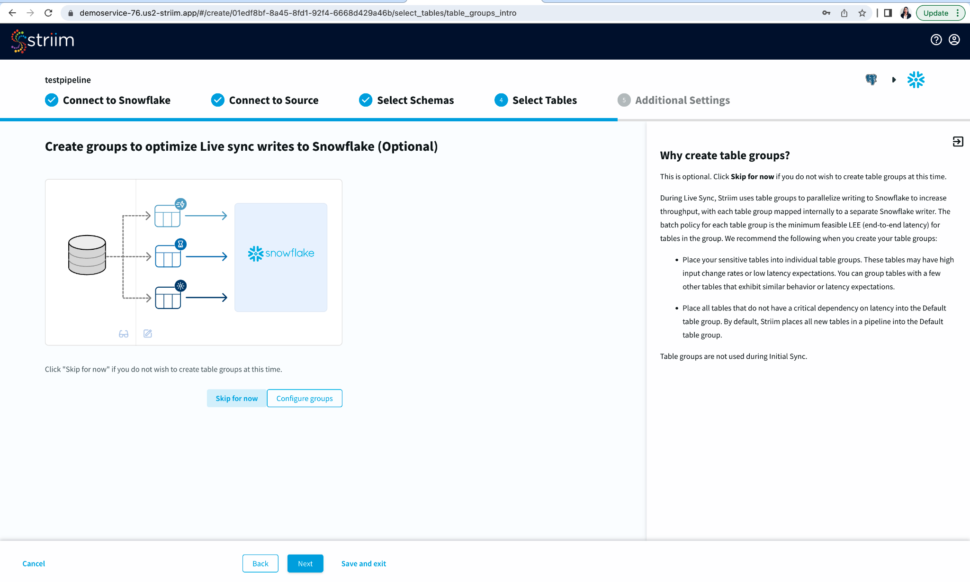
- You have the option to create table groups based on input change rates and low latency expectations.
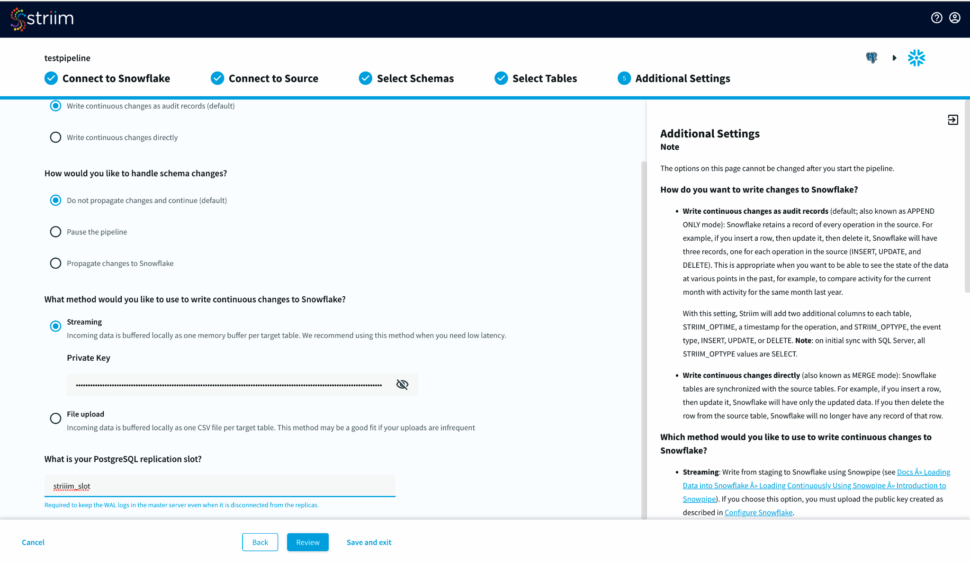
Step 4: Input Additional Settings to complete your CDC pipeline
- You have options to write changes as audit records or directly to your target table. You can specify how you want to handle schema changes. For streaming option, enter the private key associated to the public key of your Snowflake user id.

- For the source database, enter your postgreSQL replication slot that is required to keep the WAL logs in the master server.
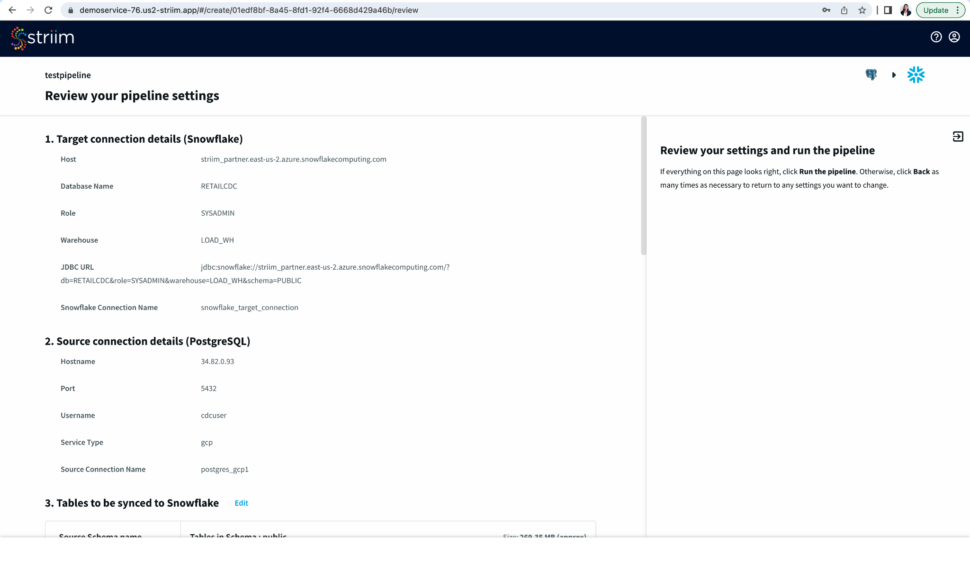
Step 5: Review your Pipeline
- Review your source and target connection before running the pipeline. Make sure that your source and target connection details, selected tables and additional settings are correct.


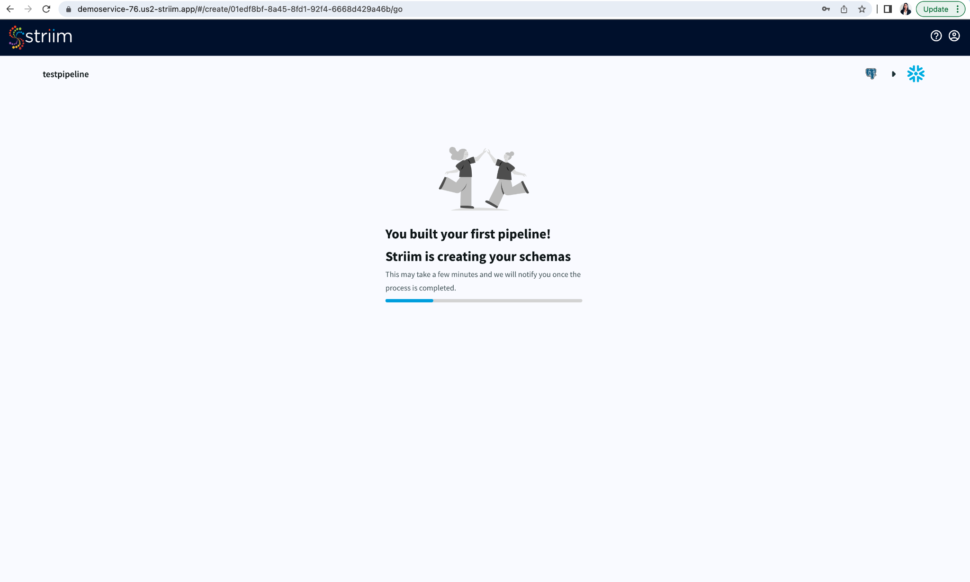
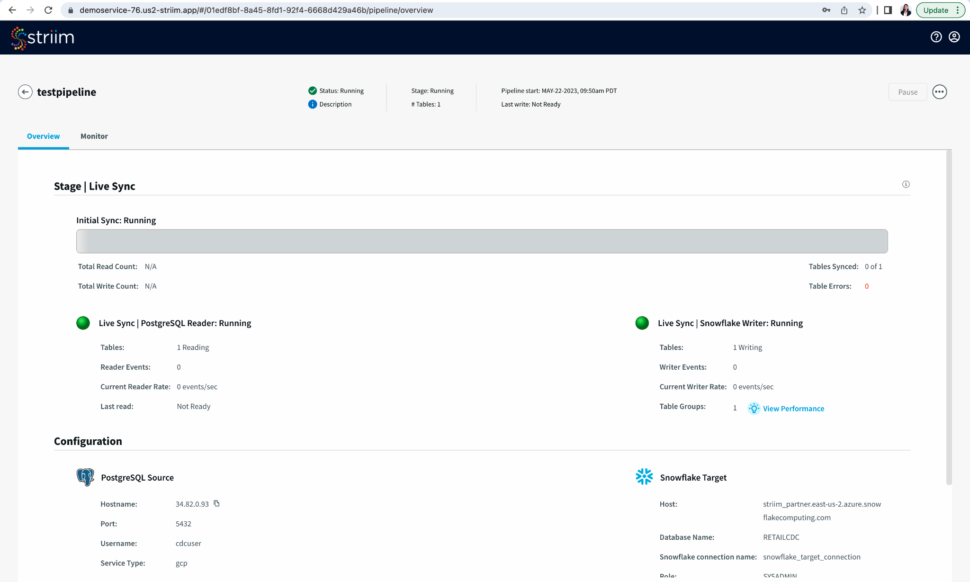
Step 6: Run your pipeline to sync the source and target tables and stream data from your source
- After you have reviewed your pipeline, run your pipeline to sync the table from your source with the target followed by data streaming.


Striim
Striim’s unified data integration and streaming platform connects clouds, data and applications.
Oracle Database
Oracle is a multi-model relational database management system.
Apache Kafka
Apache Kafka is an open-source distributed streaming system used for stream processing, real-time data pipelines, and data integration at scale.
Azure Cosmos
Azure Cosmos is a fully managed NoSQL database.
Azure Blob Storage
Azure Blob Storage is an object store designed to store massive amounts of unstructured data.