Introduction
Initial Load (referred as Fast Snapshot) is generally the first step of any data integration or migration projects. Despite it being a one-time effort, the challenge of doing Initial load revolves around the complexity of the data and the scale of data that needs to be moved. Generally, Initial Snapshot is the most resource intensive activity that any data management application performs, so the ability to optimise this is critical to maximise efficiency and minimise the time taken for the initial load from start to finish. Some of the new features introduced in Striim as part of 5.x are specifically meant for improving the overall experience of performing Initial Load, such as- Fast Snapshot using Parallel Threads
- Fast Snapshot Recovery support
- Fast Snapshot support in Wizard – Validate table compatibility

Step 1 : Initial Load Assessment & Compatibility
Just like any major logistical operation (like shifting houses, office or stocking a new warehouse), the first step for a successful Initial Load is to perform a assessment & compatibility verification.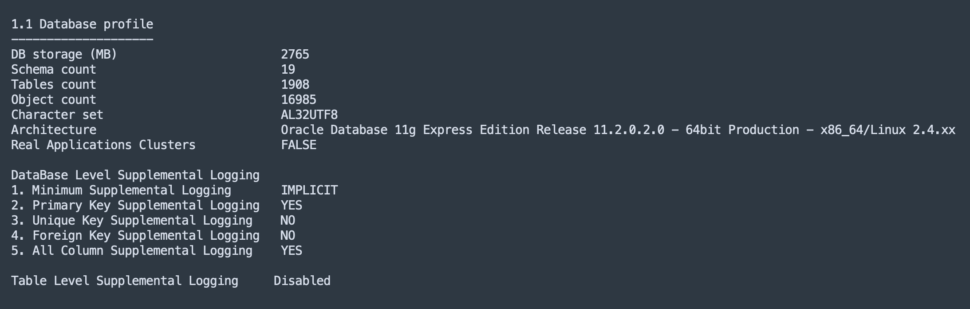


Step 2 : Table Distribution
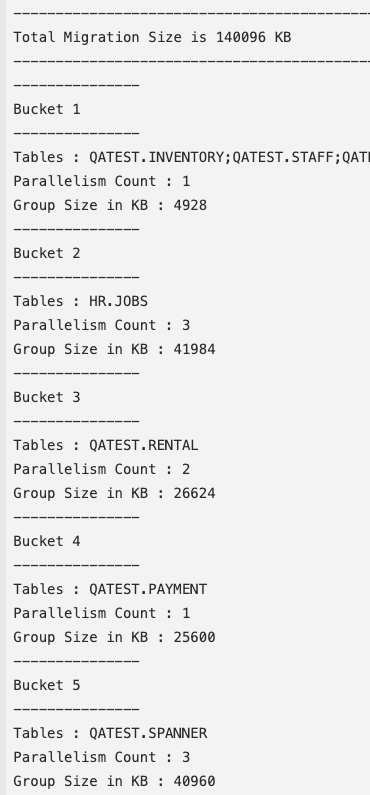
The next step for our Initial Load is finding the right way to distribute your tables such that it minimises the time taken for the available hardware resources.
Luckily to help with this we have another tool, Data Distributor Tool.
- Download the data distributor tool,
and run it from a machine which has access to the source db - The tool provides option to specify the CPU resource available and how much should each CPu for the Striim instance be loaded. (note: it assumes 4GB memory per core)

These parameter would help tune the performance of your Initial Load for your hardware.
The tool will output the Total Initial Load size and the various buckets with the list of tables each.

- Each bucket also comes with a Parallelism Count (a.k.a Parallelism Factor) which will be helpful in further improving performance and reducing the time taken.

Step 3 : Initial Load Application Creation
Using the information now obtained from the assessment/compatibility reports & the data distribution from the previous step we are now ready to start with creating the application in Striim.
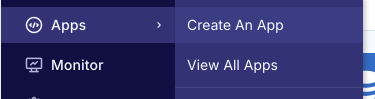
- Go to the Striim UI and login. On the left hand pane click on Apps → Create An App

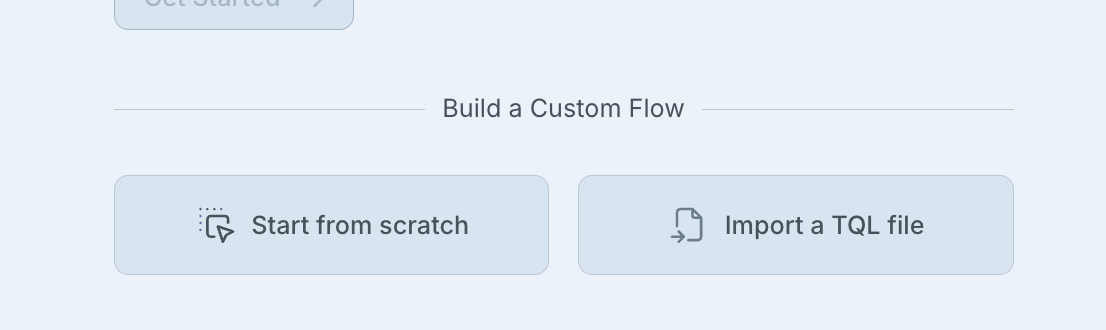
- On the create app screen, on the bottom, click on “Start from scratch”

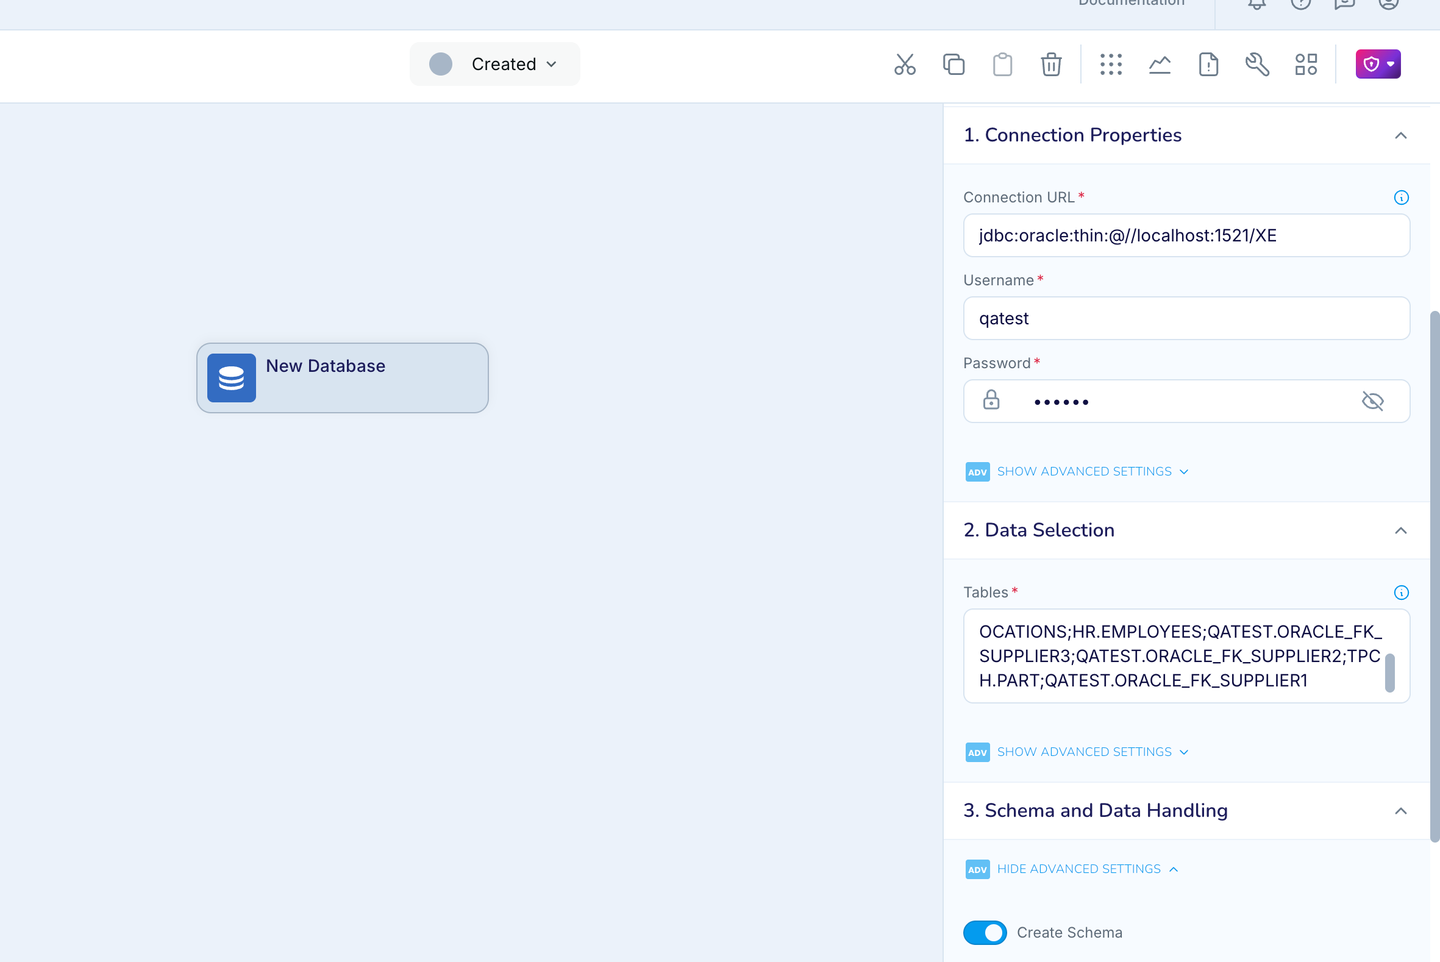
- Give a name to your first IL app. and configure the source as DatabaseReader
- Specify all the connection properties and in the Tables property.

- Important properties to configure
- Tables: Copy the tables list for Bucket 1 from Data Distributor’s output and paste it.
- Create Schema : Enable, If you want striim to create the target table before loading the data.
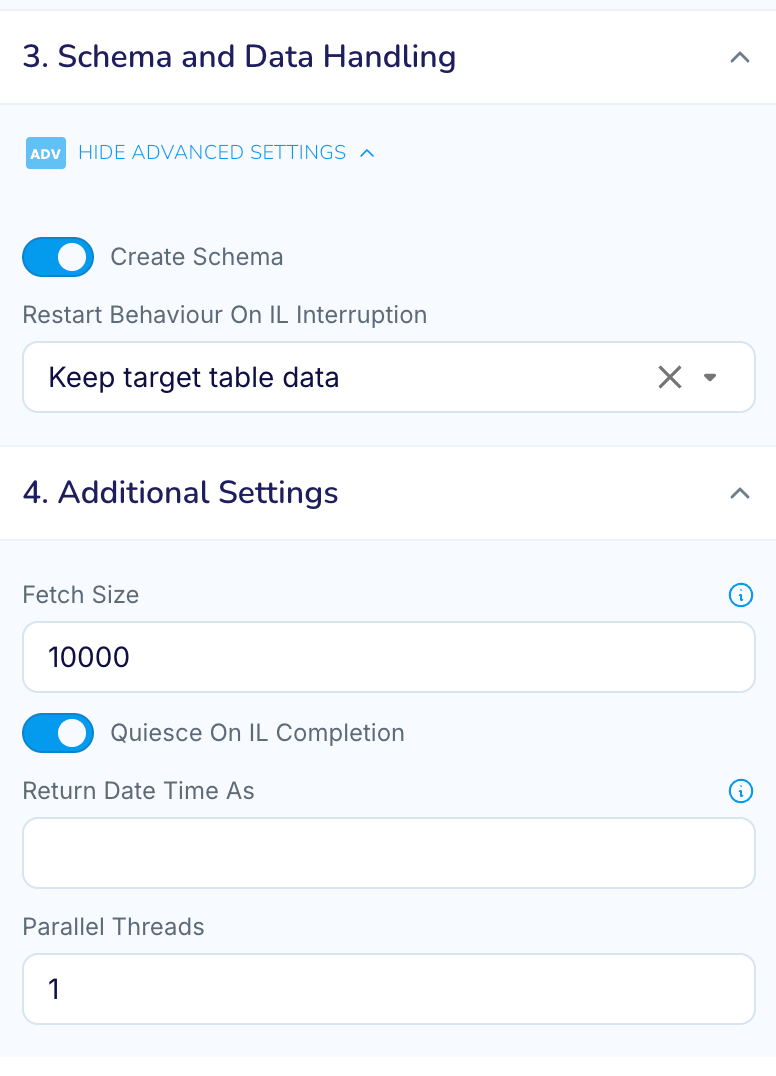
- Fetch Size : if you do not have any LOB tables, then update to 10000
- Quiesce On IL Completion : Enable this to allow app to automatically transition once IL completes.
- ParallelThreads : Set this value to the Parallelism Count (a.k.a Parallelism Factor) for this bucket from the data distributor tool’s output from previous step.
Note: For 5.0.x releases only set this value if your target is a data warehouse (bigquery, snowflake, databricks) and not for databasewriter target.
- Next specify a new name for the output and save.
- Add your Target: Add your target to the output Stream and configure & save it
- Imp: Set the ParallelThreads for the target to the Parallelism Count (a.k.a Parallelism Factor) for this bucket from the data distributor tool’s output
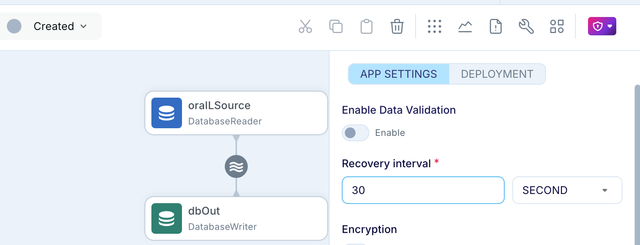
- Enable Application recovery
As of 5.x release Fast Snapshot applications now support Recovery. So ensure to enable recovery for the Initial Load (Snapshot) apps in the application settings.

- Duplicate above app for all other buckets from the data tool.
- Export the application tql.
- Make a copy of the tql for each bucket for the previous step
- Update the source databasereader tables property which the inidividual bucket’s tql
- Also update the app name, source, target * stream name with _bucket<number>
- Import all the tqls in Striim, so you now have 1 app per bucket.

Step 4 : Initial Load Monitoring & Management
Now that we have all the initial load apps created as per our plan, we are good to start the actual data movement.
- First deploy all the initial load applications, then begin to start the applications one-by-one.
- Once all the apps are running your tables should start being replicated to the target.
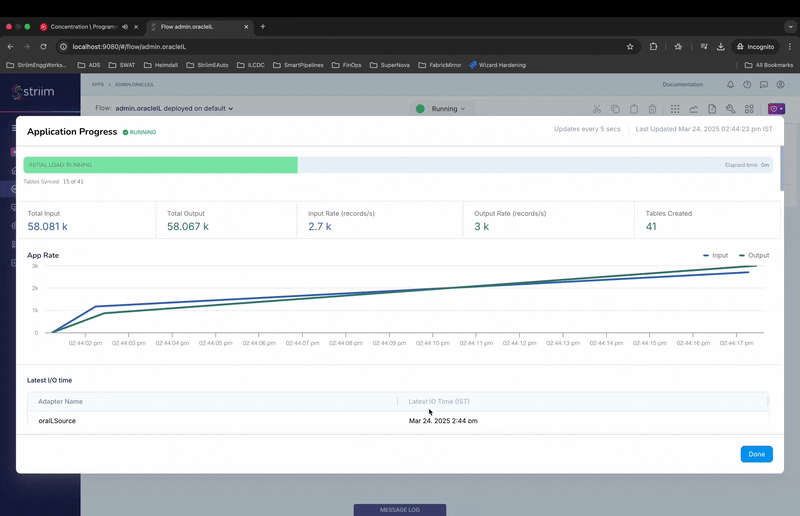
- Initial Load Monitoring: Starting 5.x, we have improved Initial load progress monitoring.
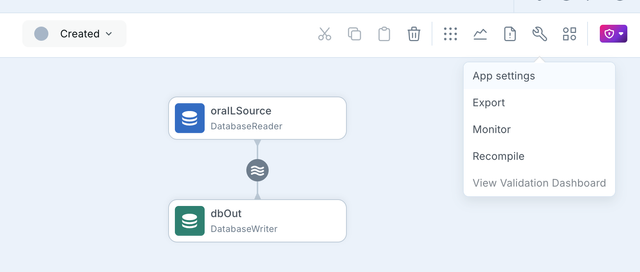
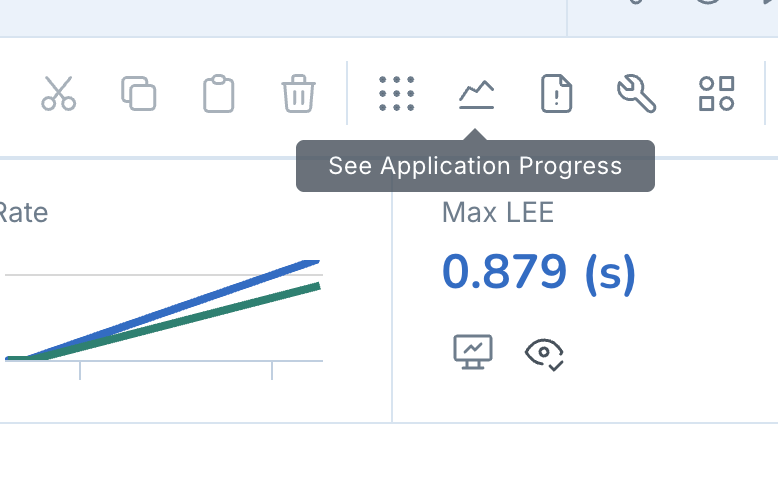
- To monitor the initial load for a Initial load app, go to the app screen and click on the
 chart icon on the top right hand side.
- This will show the new application progress screen with monitoring details for the IL progress at table level.

- The Top progress bar indicates the overall progress for the application.
- The “Table Summary” section shows the individual tables, read and write counts along with progress bar.
- To monitor the initial load for a Initial load app, go to the app screen and click on the
Step 5 : Initial Load Restart Handling
With support for Fast Snapshot recovery added as part of 5.x, handling restarts for Initial load applications has been simplified with automatic handling for partially loaded tables.
DatabaseReader exposes property called RestartBehaviourOnILInteruption. The value supports the below 3 values which dictates the behaviour of the Initial load application on handling the partially loaded tables in the target in case of restarts.
- Keep target table : In this option the IL application will not perform any automated action, and when tis value is set for the property the expectation is for users to manually identify and truncate/replace partially loaded target tables before restart.
- Replace target table : This option makes the IL app automatically replace (drop & create) the target tables which were partially loaded before the restart. The application is able to automatically detect which tables are partially loaded and will perform the replace action automatically on restart and reloaded the tables with data.
This option is recommended for Initial load application where CreateSchema is enabled to ensure the latest schema is move to the target - Truncate target table: This option, is similar in all aspects to the previous one, except that when this option is selected the target tables are truncated instead of replace(drop/create) after restart.
This option is suitable when createSchema is not enabled on source.
Conclusion
In this blog, we went over the steps to perform Initial Load with Striim with proper planning and execution. The end goal is to ensure that our Initial load pipelines are error-free & highly performant. And also using the Fast Snapshot Recovery feature we are also able to handle any cases which requires restarting the pipeline.