Managing vaults
Vaults provide secure storage for any sensitive information, such as passwords, tokens, or keys. You can use a vault to secure the value of any property in Validata. Vaults store sensitive information as encrypted key-value pairs.
Validata's native vault encrypts the values using AES-256 and stores key-value pairs in the Validata Historian.
Alternatively, you may store key-value pairs in an Azure Key Vault, Google Secrets Manager, or Hashicorp Vault's KV Secrets Engine Version 2. Validata does not support Azure Key Vault endpoints in Azure Government, Google Secrets Manager endpoints in Google Cloud for Government, or HashiCorp Vault endpoints in AWS GovCloud, Azure Government or Google Cloud for Government
Validata native vaults
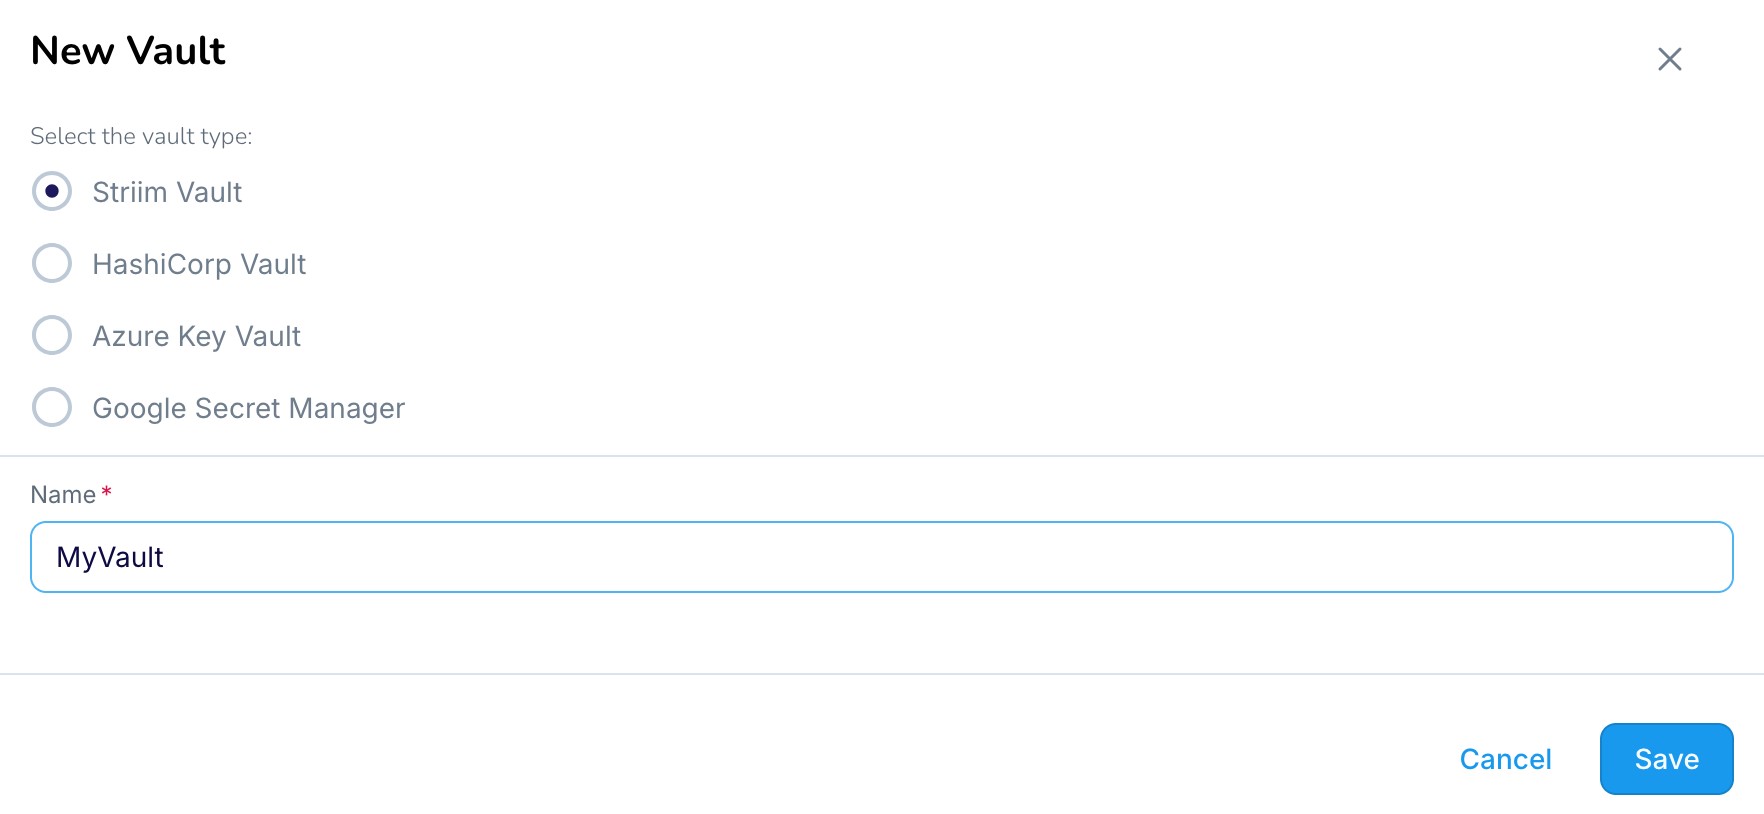
To create a Validata native vault, select Vaults > New vault, enter a name for the vault, select the namespace in which to create it, and click Confirm:
To add an entry to a Validata native vault, select Add Vault Value, enter a name for the vault key, select STRING or FILE as the value type, enter the string or select the file, and click ✓ to save it.

Azure Key Vault
To create a vault component that makes an existing Azure Key Vault secrets available for use in Validata, select Vaults > New vault > Azure Key Vault, enter the required properties, and click Save.
The values to specify are:
Name: a name for the vault to be used in Validata
ConnectionURL: from the Overview page for your Key Vault
ClientID: the Application (client) ID from the Overview page for the Azure Active Directory application with read permission on the vault (applications are listed on the Active Directory "App registrations" page)
ClientSecret: The Value from the "Certificates & secrets" page for the Active Directory application with read permission on the vault.
TenantID: the Directory (tenant) ID from the Overview page for the Azure Active Directory application with read permission on the vault
You cannot add a key to an Azure Key Vault in Validata. See Microsoft's Add a secret to Key Vault for instructions on adding keys.
Google Secret Manager
To create a vault component that makes existing Google Secret Manager secrets available for use in Validata, select Vaults > New vault > Vault, enter the required properties, and click Save
The values to specify are:
Name: a name for the vault to be used in Validata
Project ID: the ID of the Google Cloud project that contains your Secret Manager service
Service Account Key: click Select File and upload a service account key associated with your Secret Manager instance. The service account must have the Secret Manager Secret Accessor role
You cannot add a secret to Google Secret Manager in Validata. See Secret Manager > Documentation > Guides > Create and access a secret using Secret Manager for instructions on adding secrets to Google Secret Manager.
Vault by HashiCorp
To create a vault component that makes existing Vault by HashiCorp KV version 2 secrets available for use in Validata, select Vaults > New vault > HashiCorp Vault, enter the required properties, and click Save.
The values to specify are:
Name: a name for the vault to be used in Validata
Connection URL: the network address of your Vault by HashiCorp instance
Port: the port for your Vault by HashiCorp instance (default is 8200)
Engine name: alway
kvPath to Secret: the key path for the KV endpoint (see KV secrets engine)
Access Token: the root token for your Vault by HashiCorp instance (see Root tokens)
Optionally, under Advanced configuration, enable auto-renew:
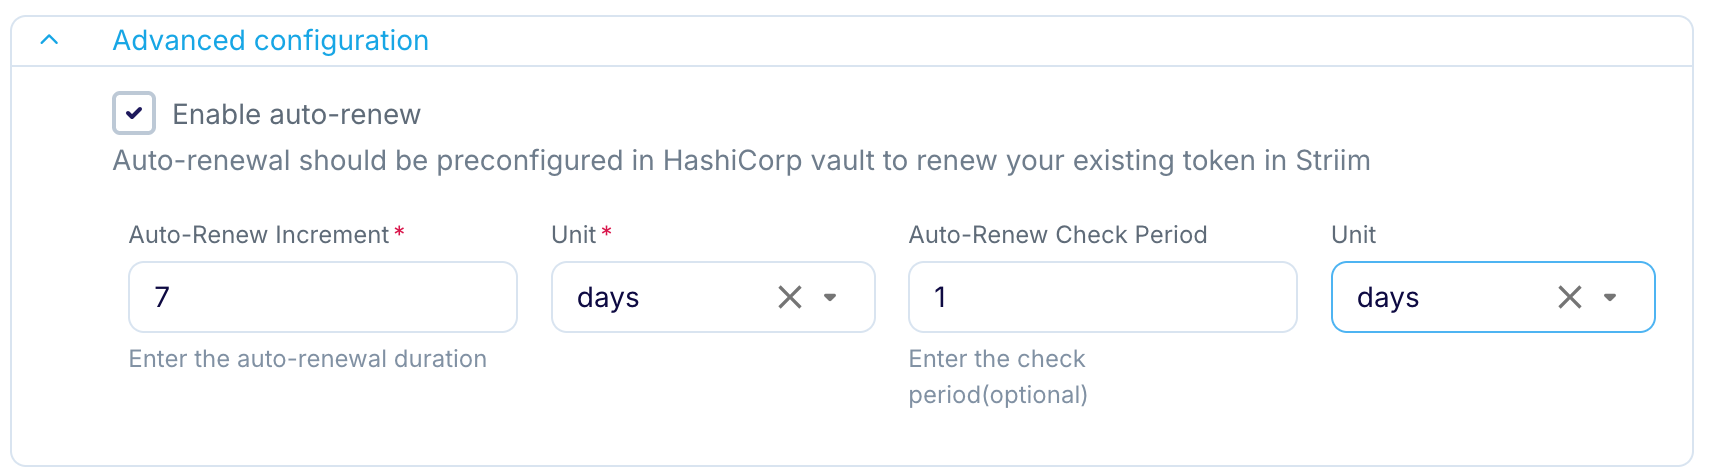
Auto-Renew Increment specifies the time-to-live (expiration) of the tokens (see Token Management).
Auto-Renew Check Period controls how often Validata will check to see if the current token should be renewed.
To ensure that your token is always valid, the Auto-Renew Check Period interval must be shorter than the Auto-Renew Increment interval.
You cannot add a secret to Vault by Hashicorp in Validata. See Hashicorp's Vault Documentation for instructions on adding secrets to KV Secrets Engine Version 2.