Configuring single sign-on
This section describes how to implement single sign-on (SSO) by integrating Validata with Microsoft Entra (formerly Azure AD) or Okta. The Validata admin must first create a SAML-based application integration from the identity provider (IdP) to Validata, configure Validata to use the IdP for SSO, and then authorize the users in the IdP to use Validata.
Once configured, users can access Validata in two ways:
by federating into Validata through the IdP
by directly logging in through the SSO option on the Validata login page
When a user first logs in from the IdP, a matching user account is created in Validata. A Validata administrator may then assign roles to the user (see Managing users).
Enabling single sign-on with Microsoft Entra
Add Validata from the Microsoft Entra Gallery
Sign in to the Microsoft Entra admin center as at least a Cloud Application Administrator.
Browse to Identity > Applications > Enterprise applications > New application.
In the Add from the gallery section, type Striim in the search box.
Select Striim Platform from the results panel and then add the app. Wait a few seconds while the app is added to your tenant.
Configuring Microsoft Entra SSO for Validata
Sign in to the Microsoft Entra admin center as at least a Cloud Application Administrator.
Browse to Identity > Applications > Enterprise applications > Validata > Single sign-on.
On the Select a single sign-on method page, select SAML.
On the Basic SAML Configuration section, the application is pre-configured and the necessary URLs are already pre-populated with Azure. You can save the configuration by clicking Save.
Validata expects the SAML assertions in a specific format, which requires you to add custom attribute mappings to your SAML token attributes configuration. The following are a list of default attributes.
userName
emails[type eq “work”].value
name.givenName
name.familyName
externalId
The values for these mapping are pre-filled. You can verify or modify these mappings.
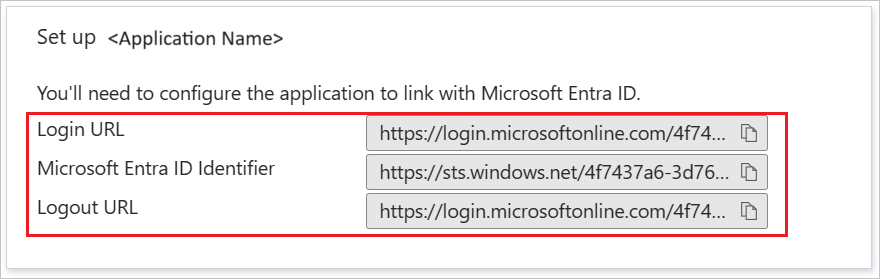
On the Set up single sign-on with SAML page, in the SAML Signing Certificate section, find Certificate (Base64) and select Download to download the certificate and save it on your computer.
On the Set up Validata section, copy the Login URL and Microsoft Entra Identifier values.
Enable Microsoft Entra single sign-on in Validata
Select Users > Single sign-on > Add SSO > Microsoft Entra.
Set Application ID to the Microsoft Entra ID Identifier value from step 7 above.
Click the folder icon to upload the certificate you downloaded in step 6 above.
Set Login URL to the Login URL value from step 7 above.
Click Save.
Enabling single-sign on with Okta
Create a SAML application for Validata in Okta
Log in to your Okta account as an Admin user. Okta may ask you to log in again.
Click the Admin button on the top right corner.
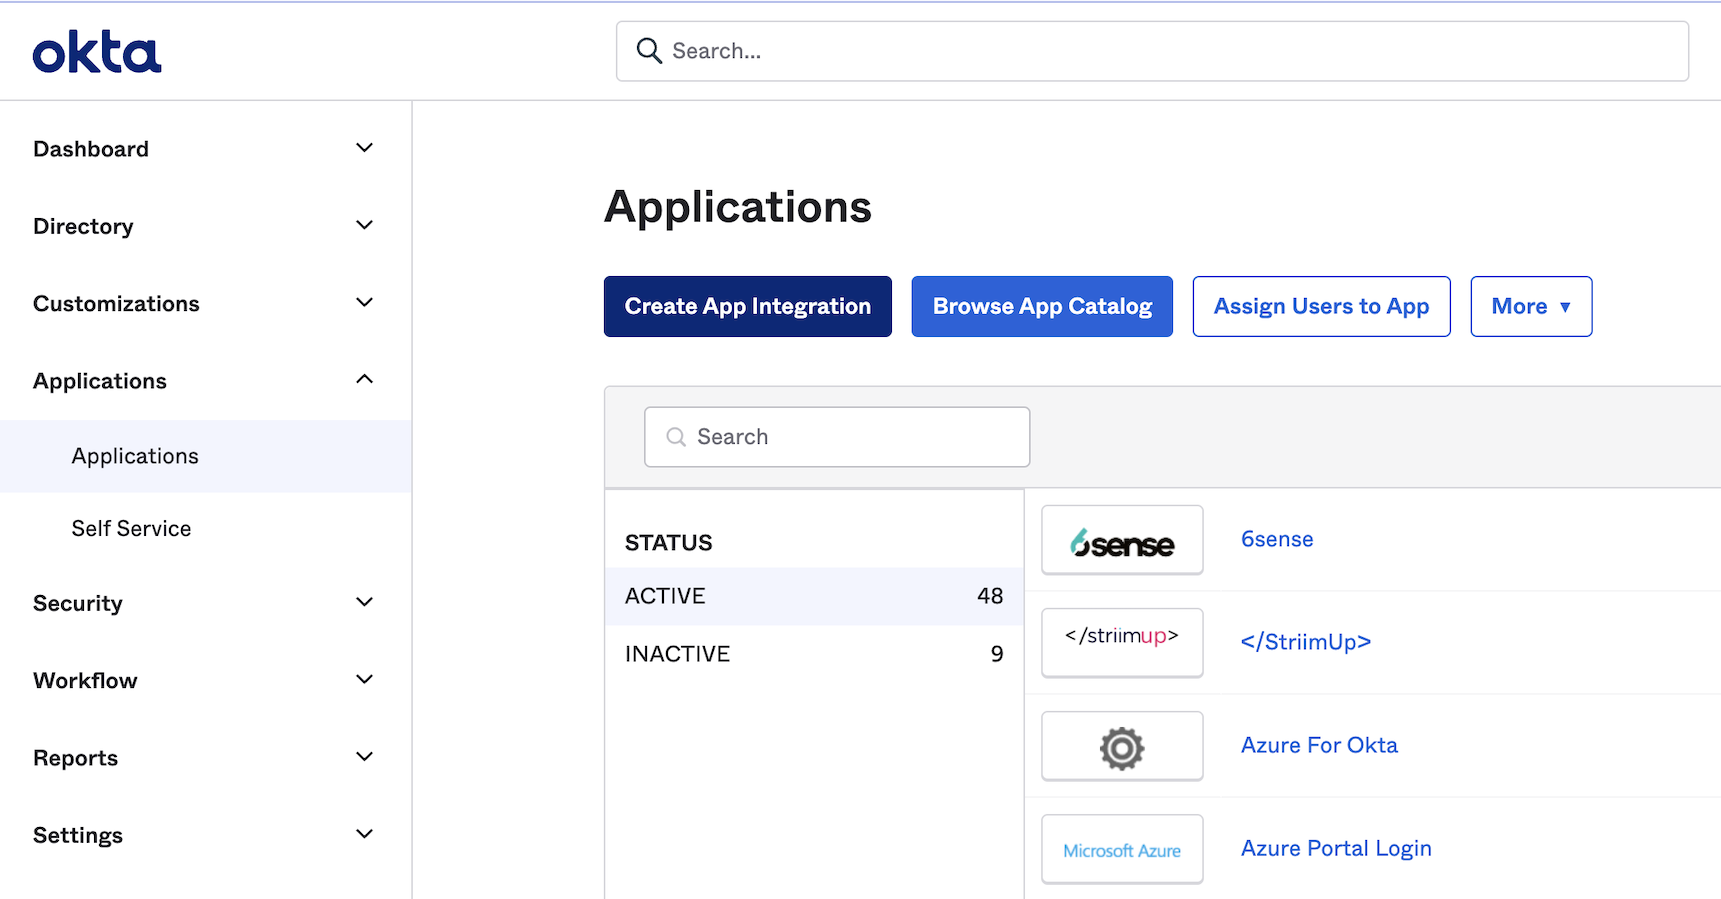
In the left panel, select Applications > Applications, then click Create App Integration.
Choose SAML 2.0 as the sign on method, then click Next.
Name your application and click Next.
Enter the following for Single sign on URL (include
http://orhttps://in the URL):<your Validata login URL>/saml/callback
Check the box Use this for Recipient URL and Destination URL.
Enter the following for Audience URI (SP Entity ID): <your-validata-account-url>
Create the following attribute statements for first name, last name and email, then click Next.
Name
Name format
Value
firstName
Unspecified
user.firstName
lastName
Unspecified
user.lastName
email
Unspecified
user.email
Choose I'm an Okta customer adding an internal app and click Finish.
Go the Sign On tab of the application you just created and click View SAML Setup Instructions.
Copy the values for the Identity Provider Single Sign-On URL and Identity Provider Issuer into a text editor and download the certificate. You’ll need those to enable Okta SSO in Validata.
Assign the Okta application to your users from the Assignments tab of your app.
Enable Okta single sign-on in Validata
Select Users > Single sign-on > Add SS0 > Okta.
Set Issuer URL to your Identity Provider Issuer value from step 12 above.
Click the folder icon to upload the certificate from step 12 above.
Set Sign-on URL to your Identity Provider Single Sign-On URL value from step 12 above.
Click Save.