Build your first validation
This topic walks you through creating a simple validation to compare a source table against a target table.
Walkthrough
This walkthrough guides you through creating a simple validation to compare a source table against a target table. In this example, you will use Vector Validation, the default validation method.
For an interactive version of this walkthrough, see Interactive walkthroughs.
Create a new validation: From the Validata home screen, click Create Validation.
Name: Enter a unique name for your validation.
Scope: Select Quick Start (Validation Pair). This scope is ideal for your first run as it focuses on a single pair of tables—a validation pair—from the source and target.
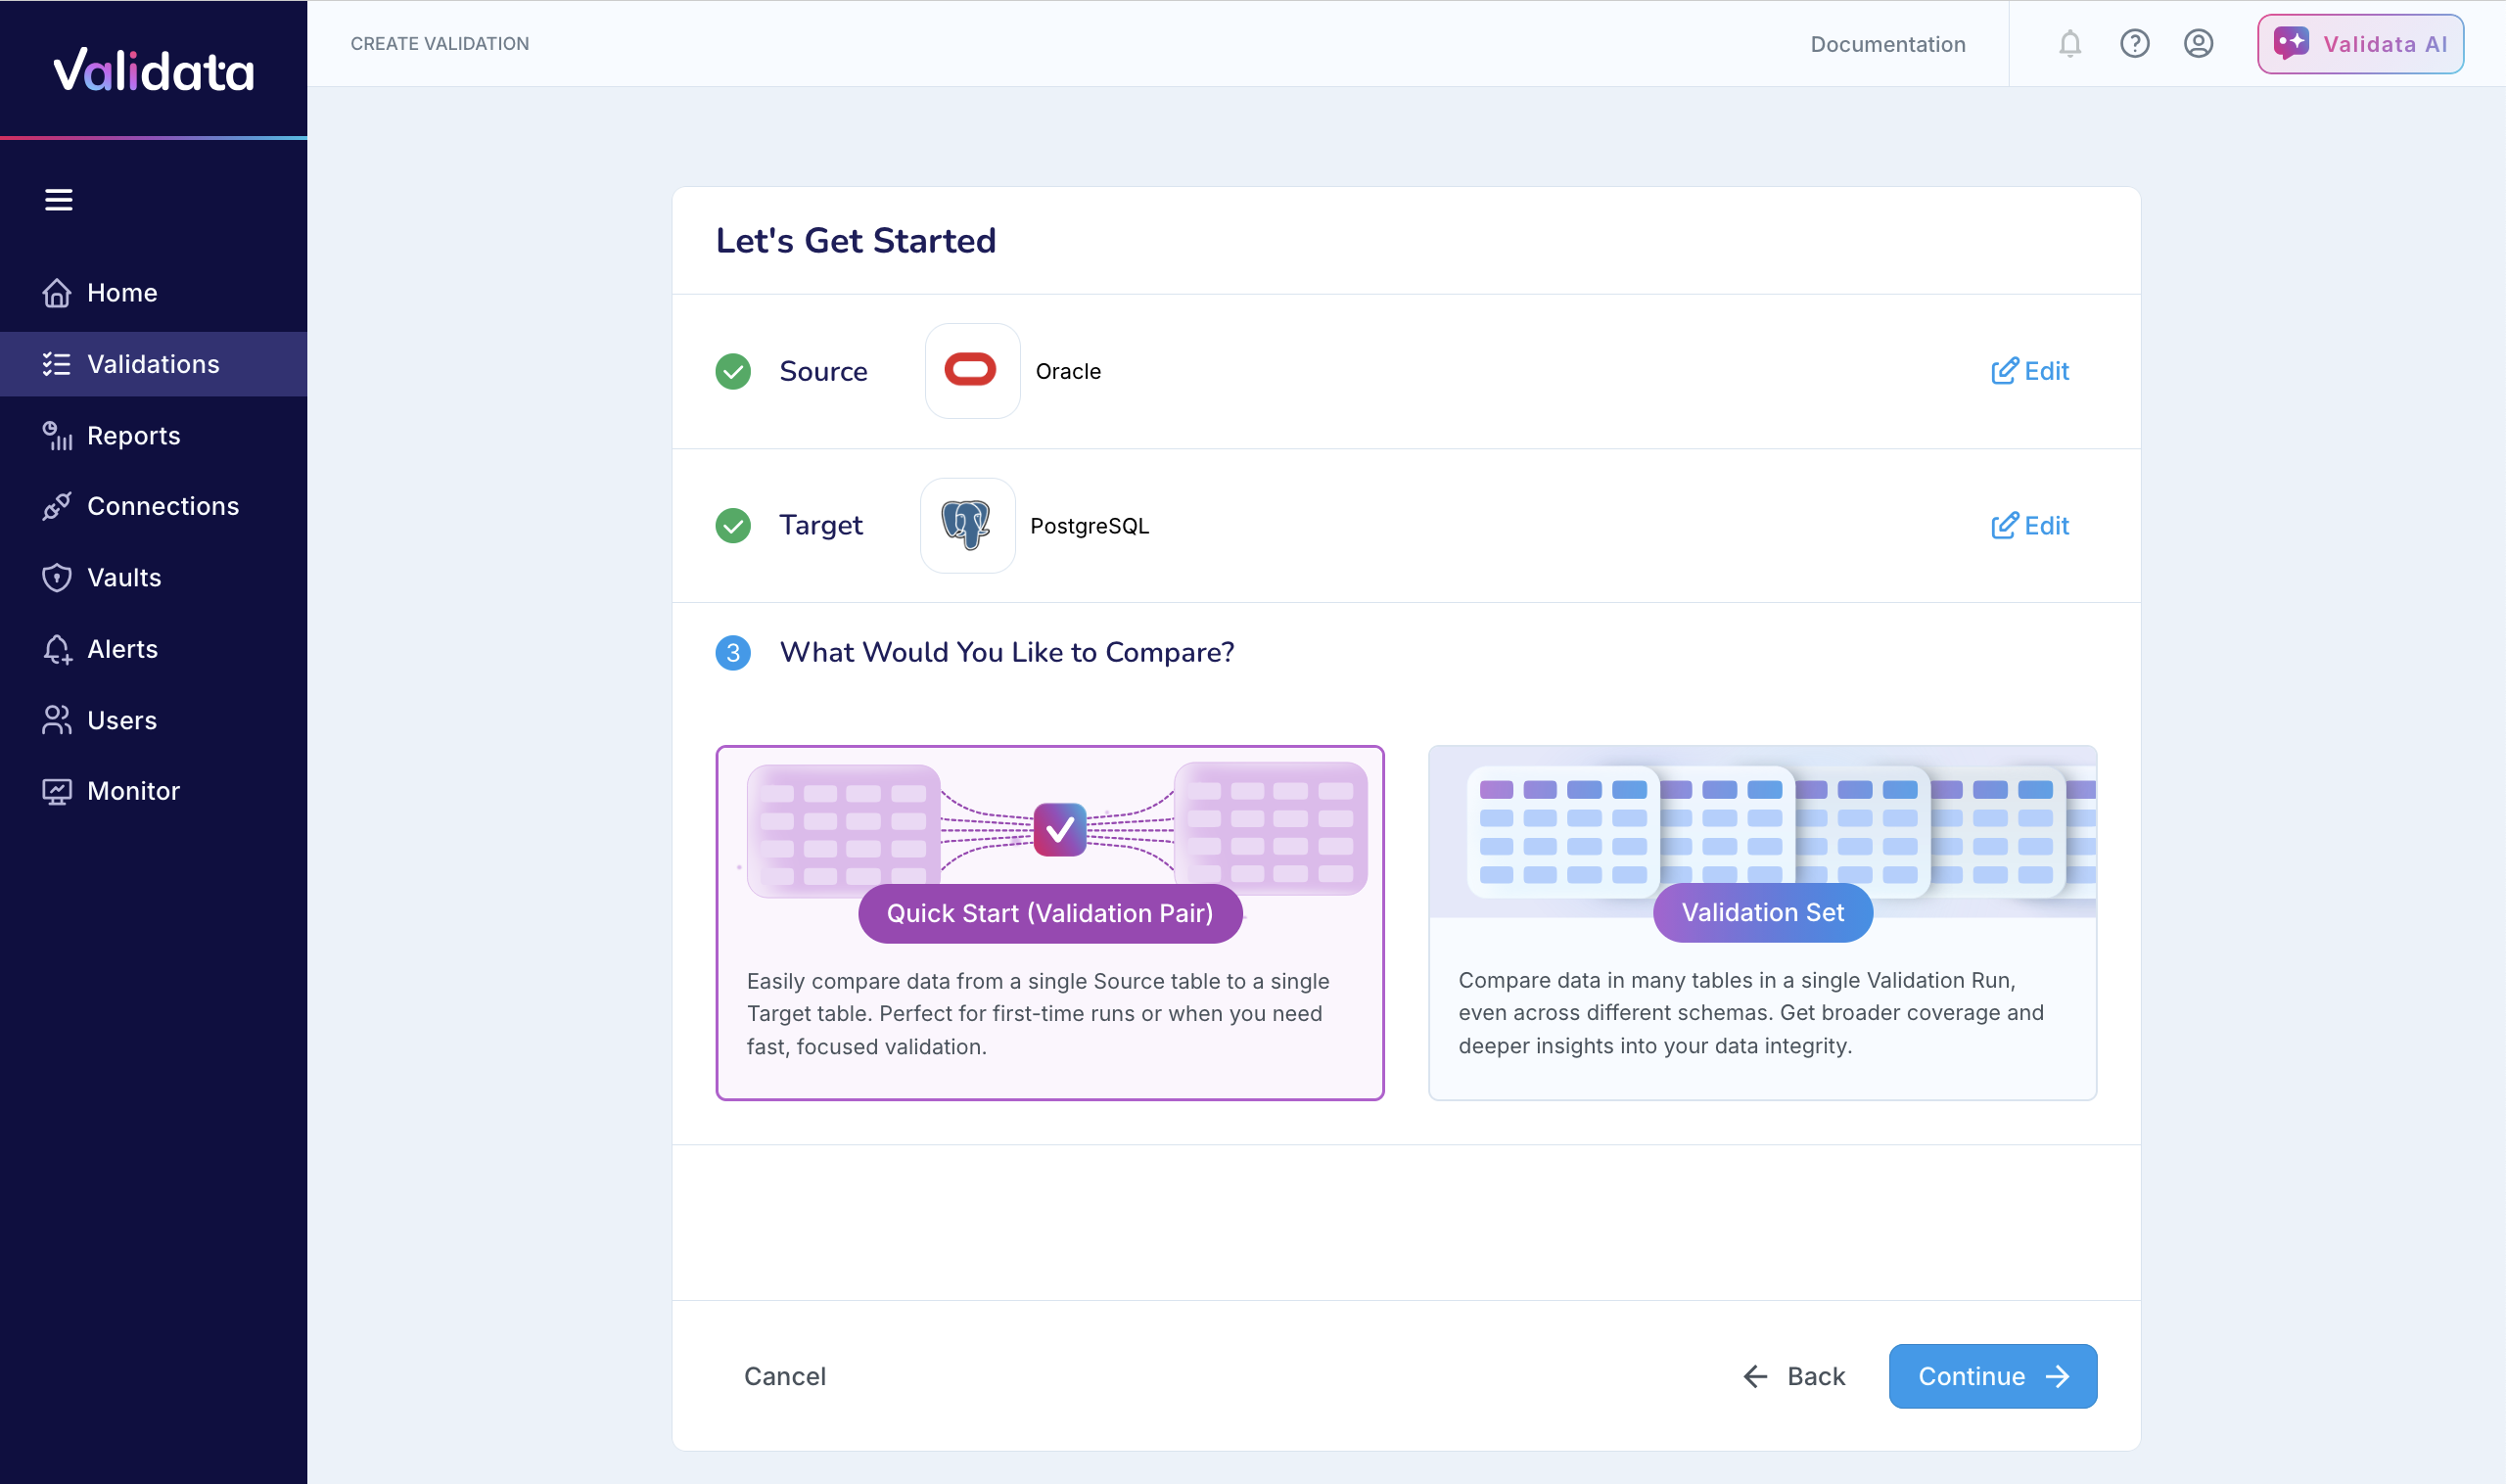
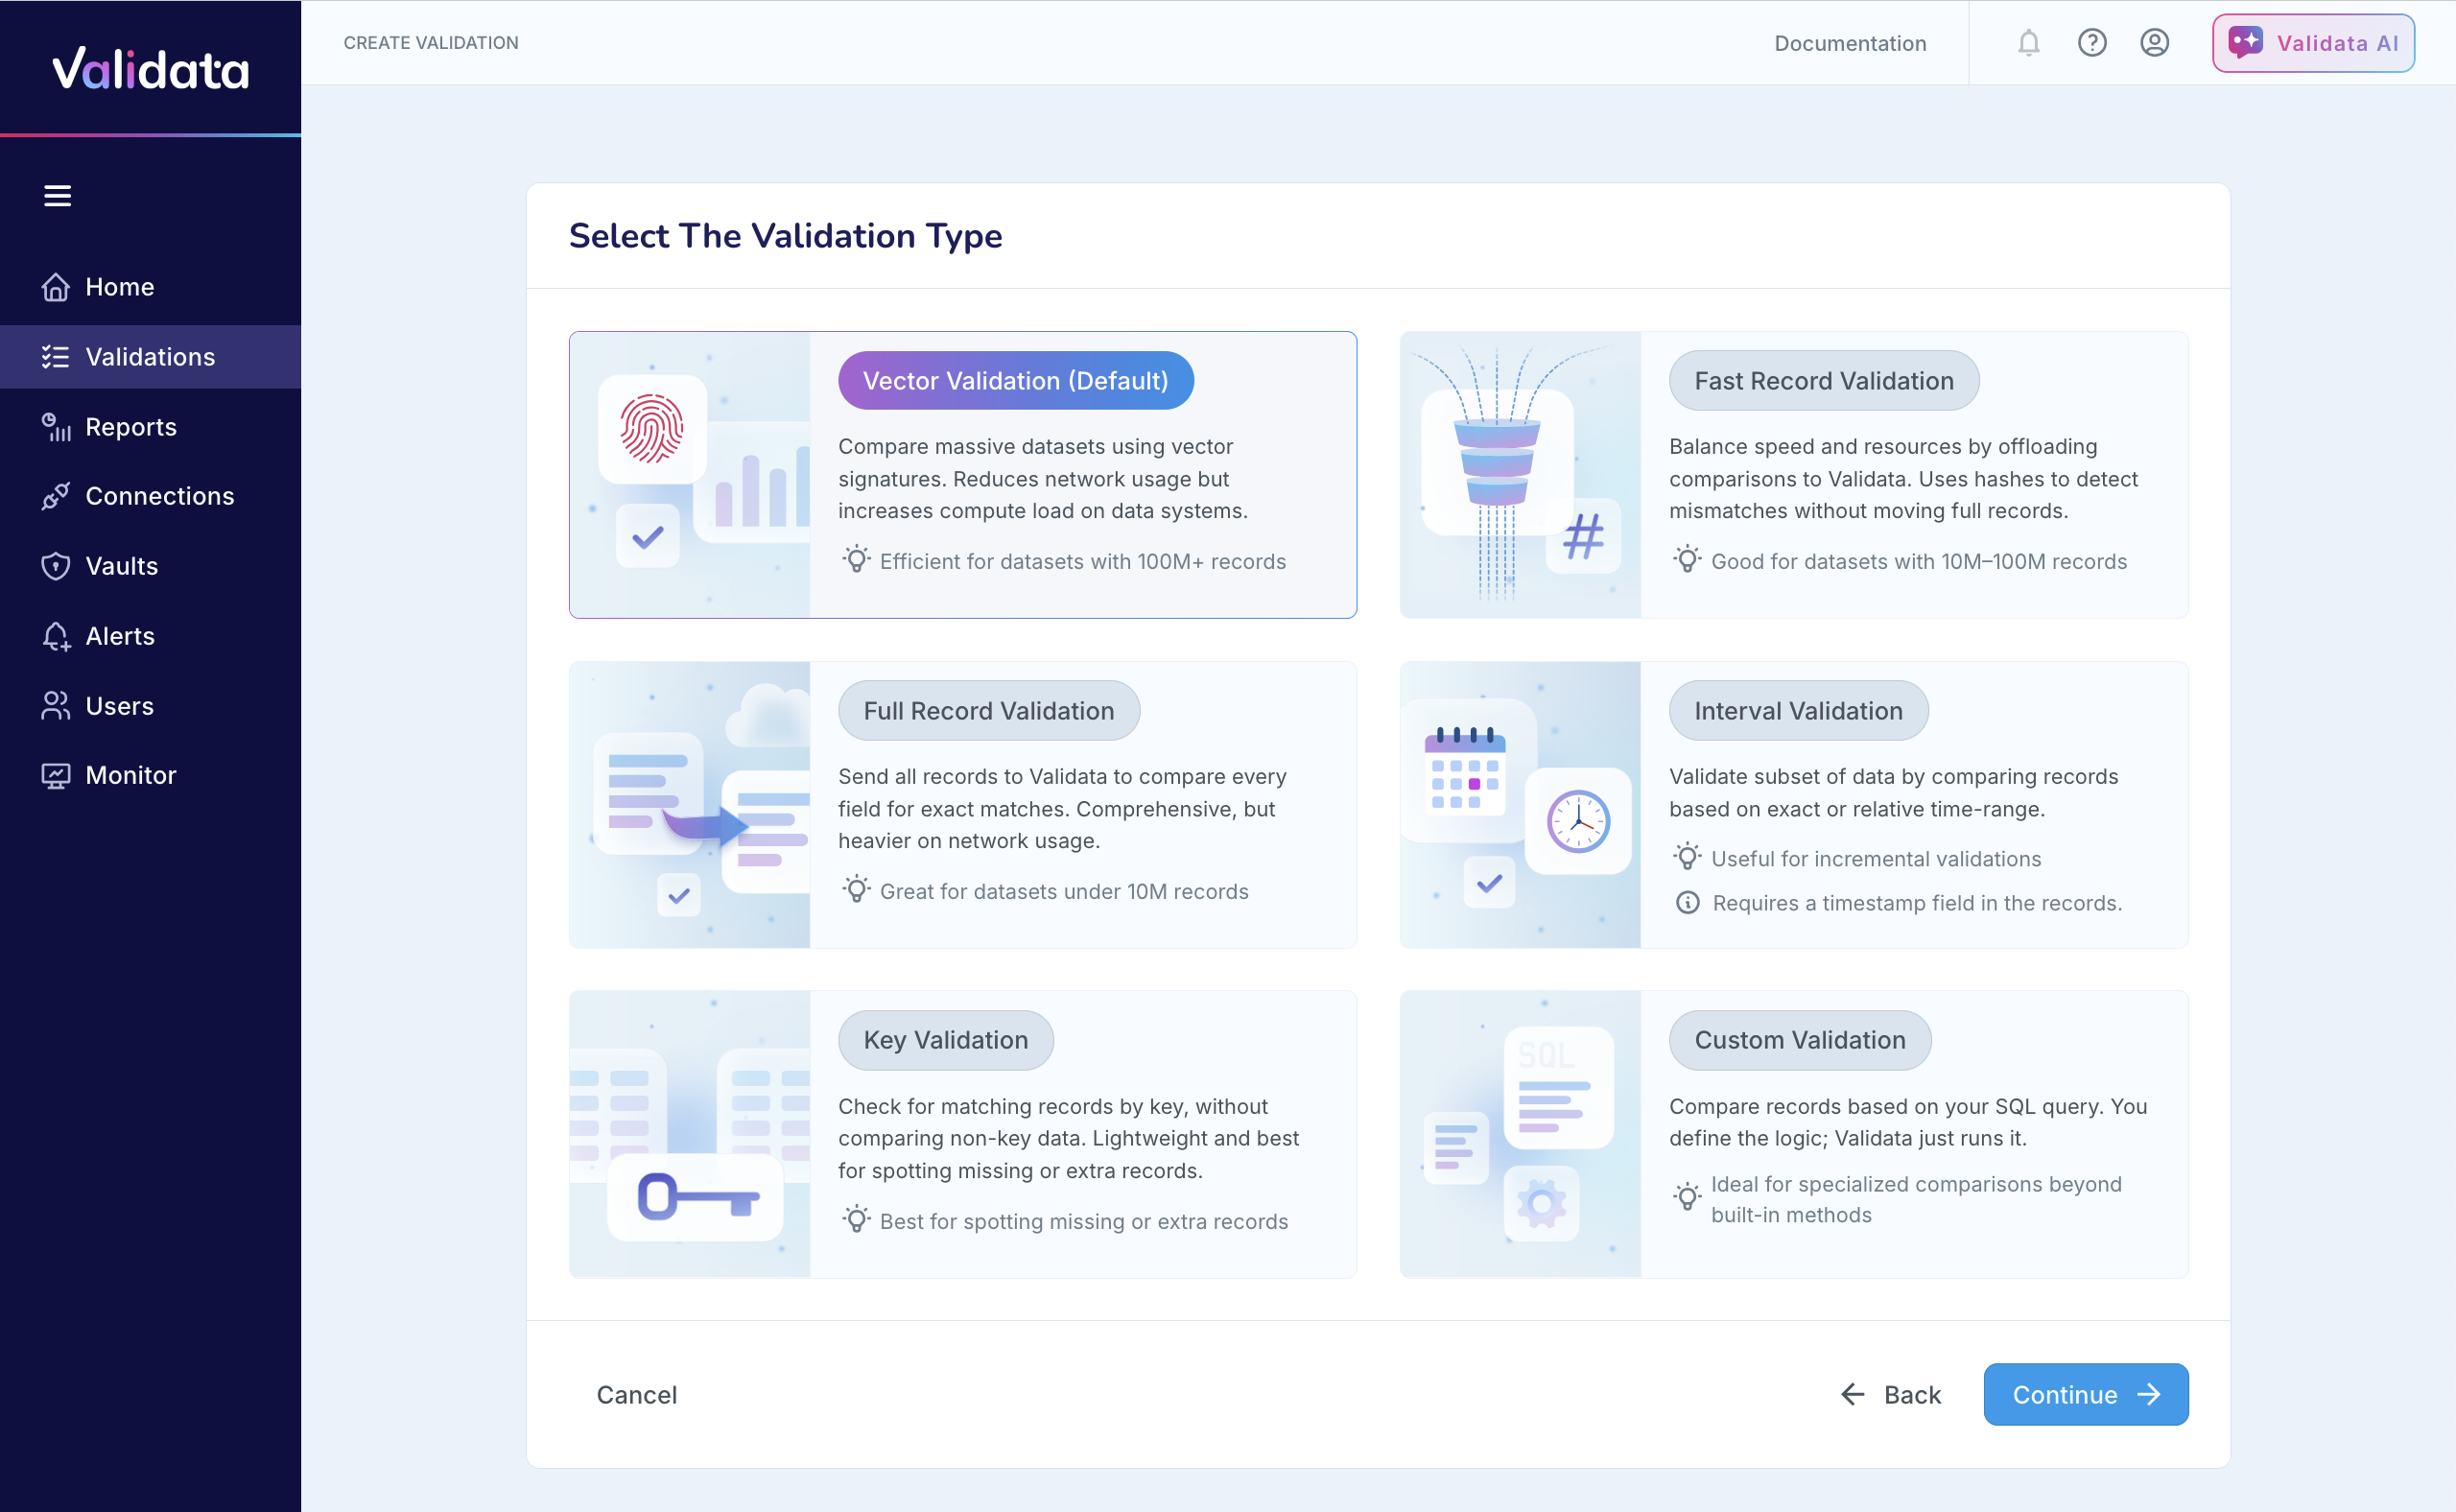
Validation type: Select Vector Validation. This default method computes signatures on the source and target systems to quickly identify discrepancies without transferring large volumes of data to the Validata Server.
Connect to source and target: You must now define where your data lives.
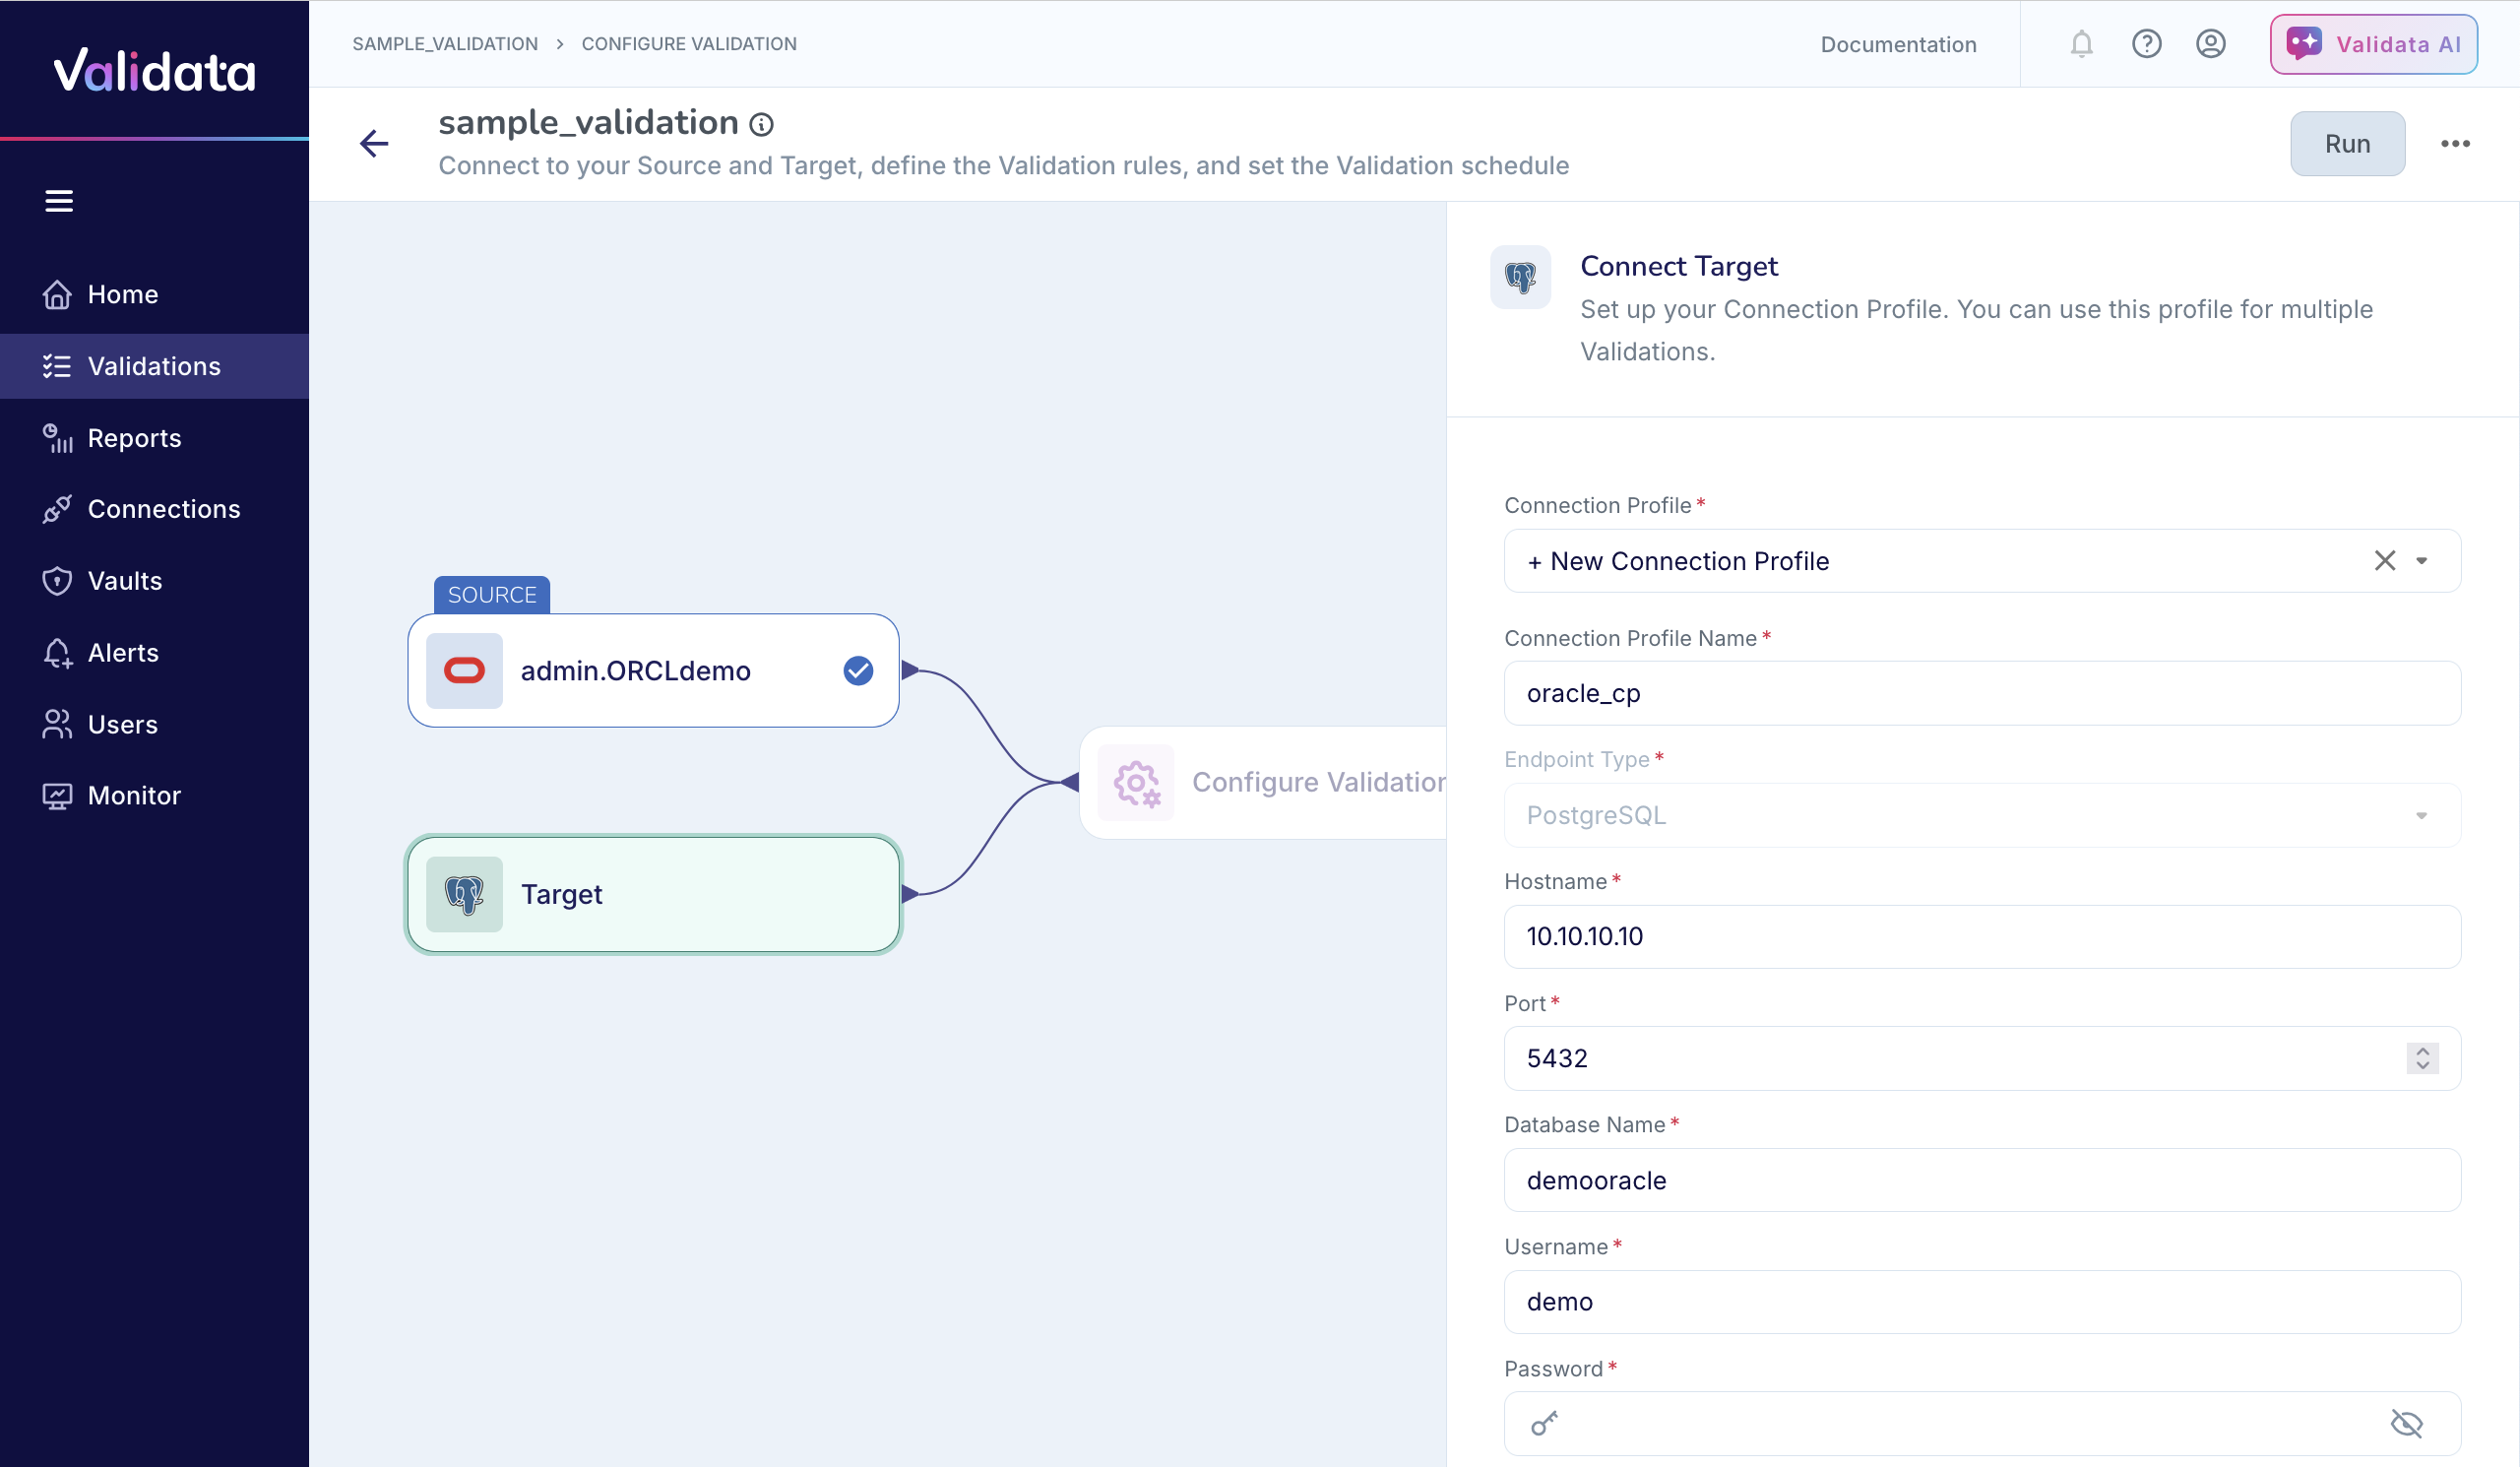
Connect source: Select an existing connection profile or create a new one. Enter the connection details for your source database (for example, Oracle), including hostname, port, and credentials.
Connect target: Repeat the process for your target system (for example, Snowflake).
Test connection: Always click Test Connection to ensure Validata can successfully access both systems before proceeding.
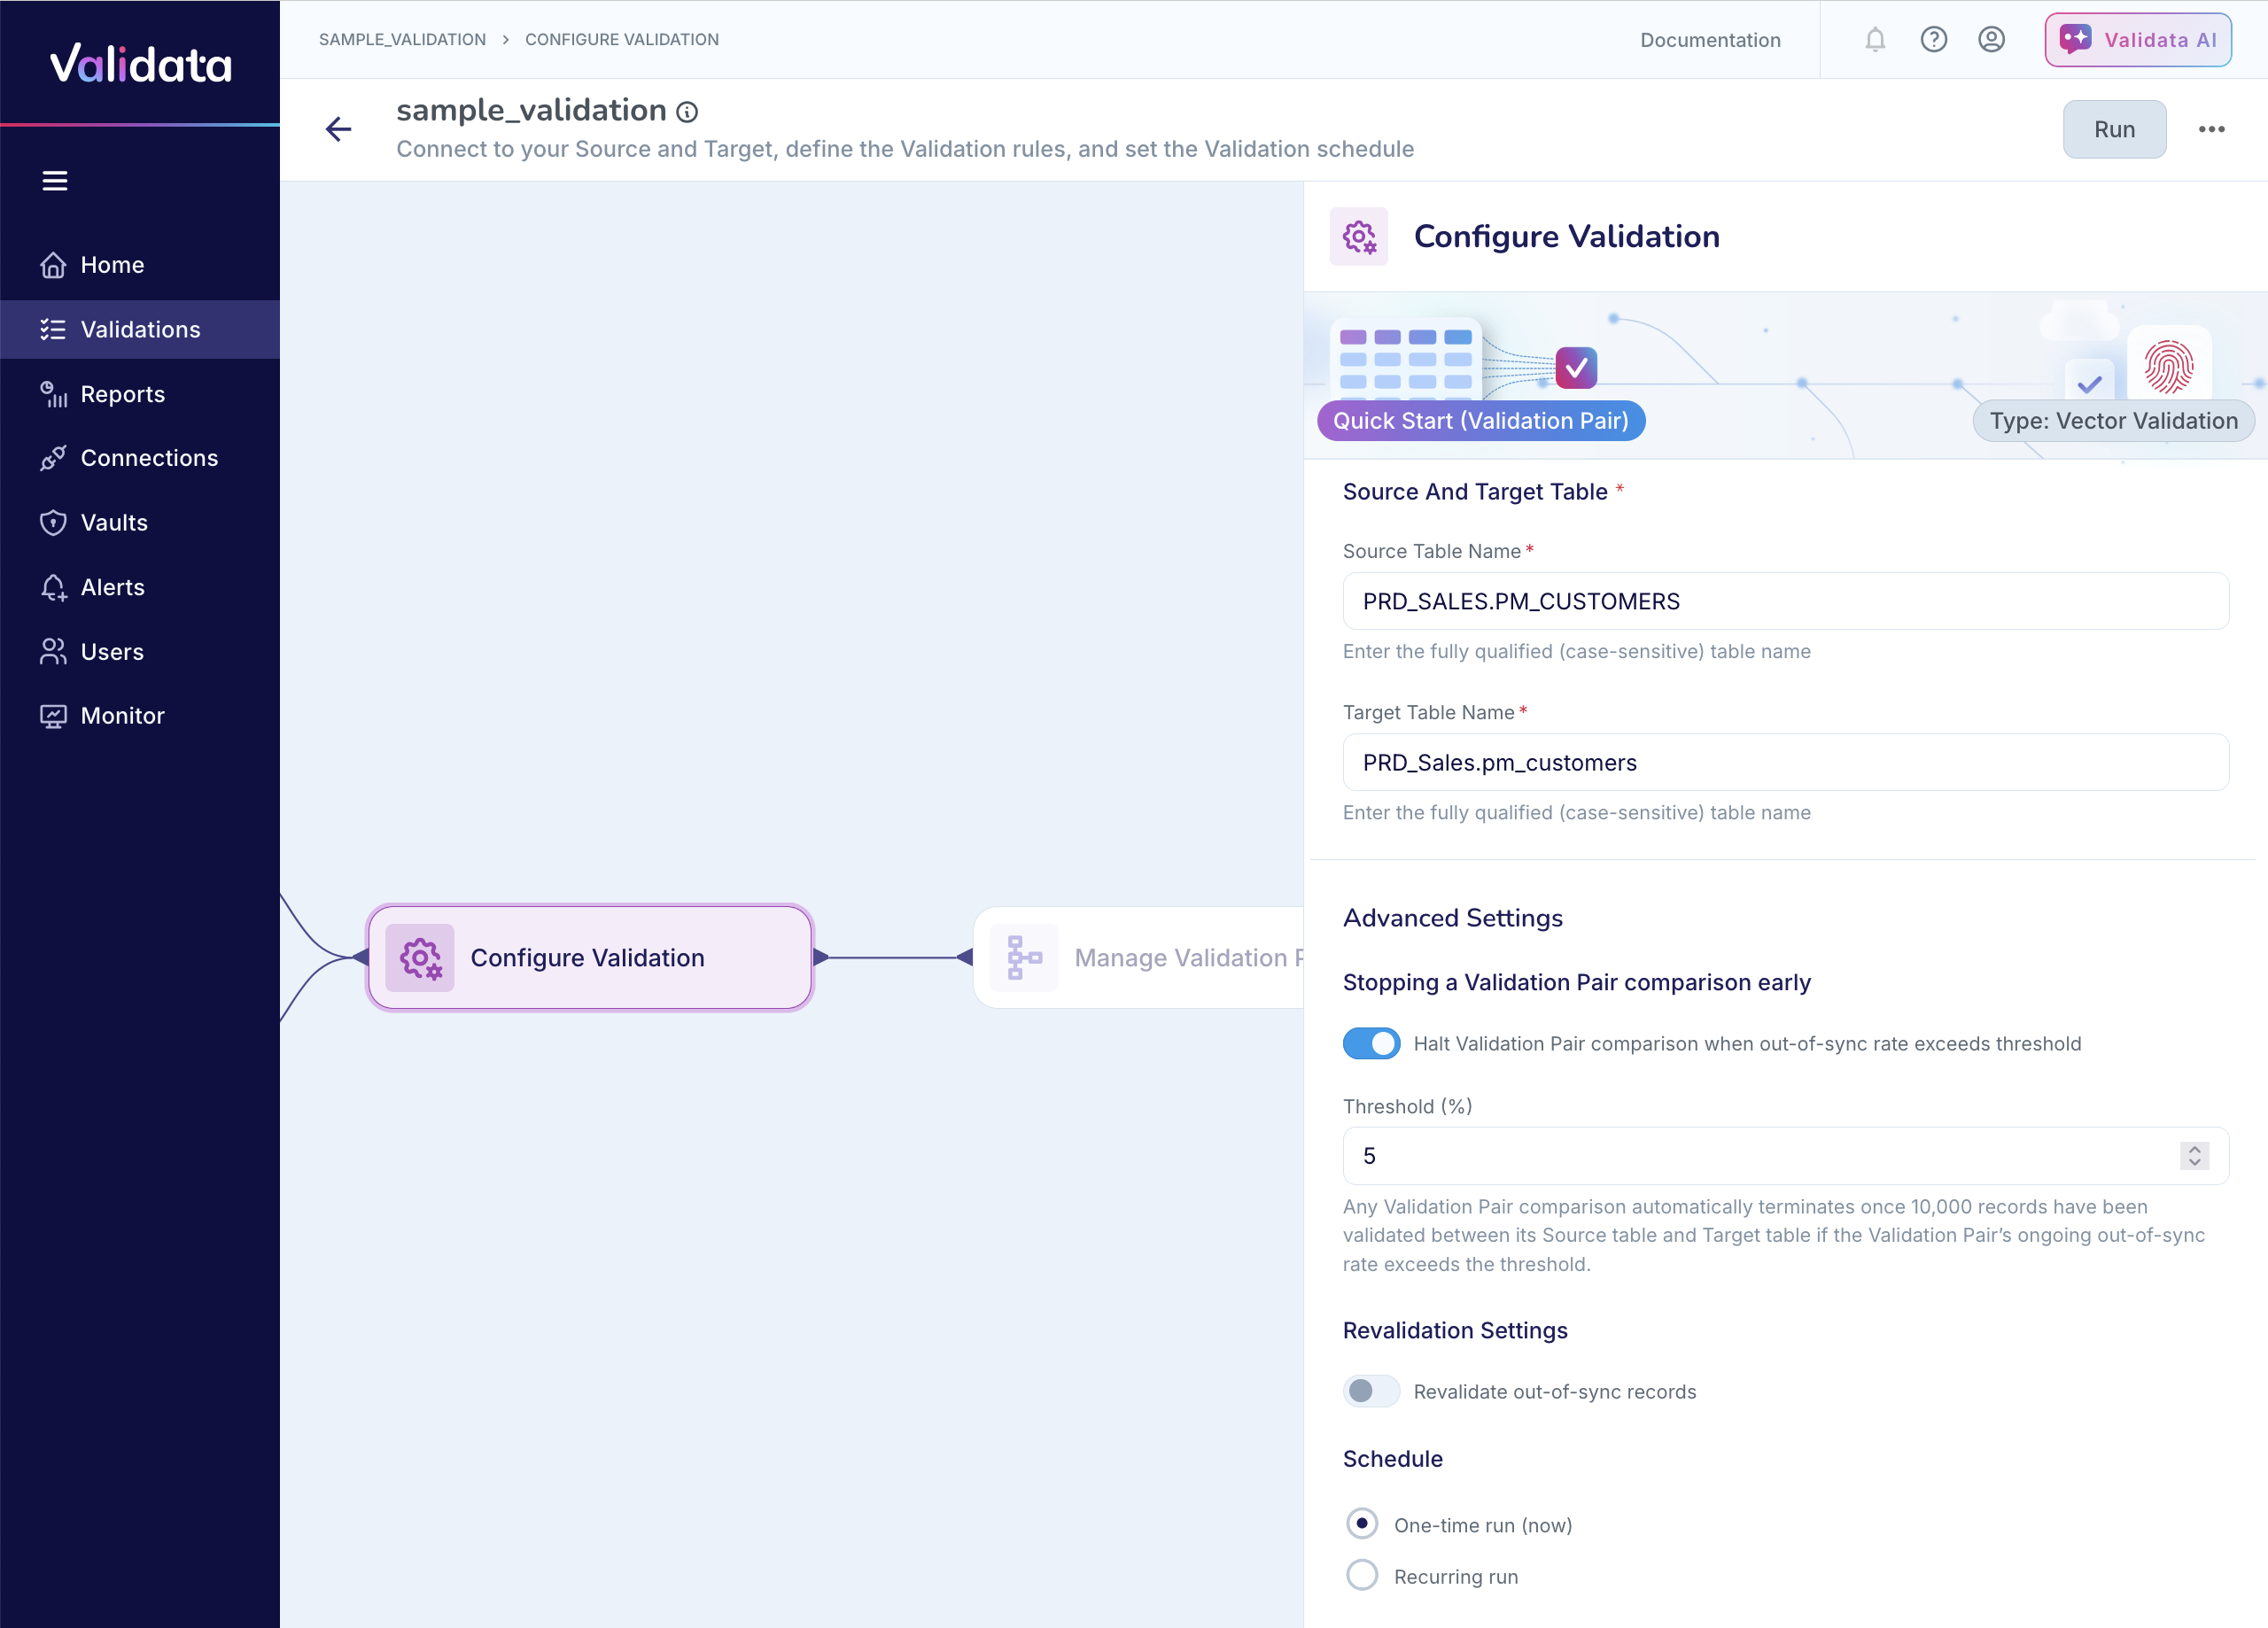
Enter the fully-qualified source and target table names.
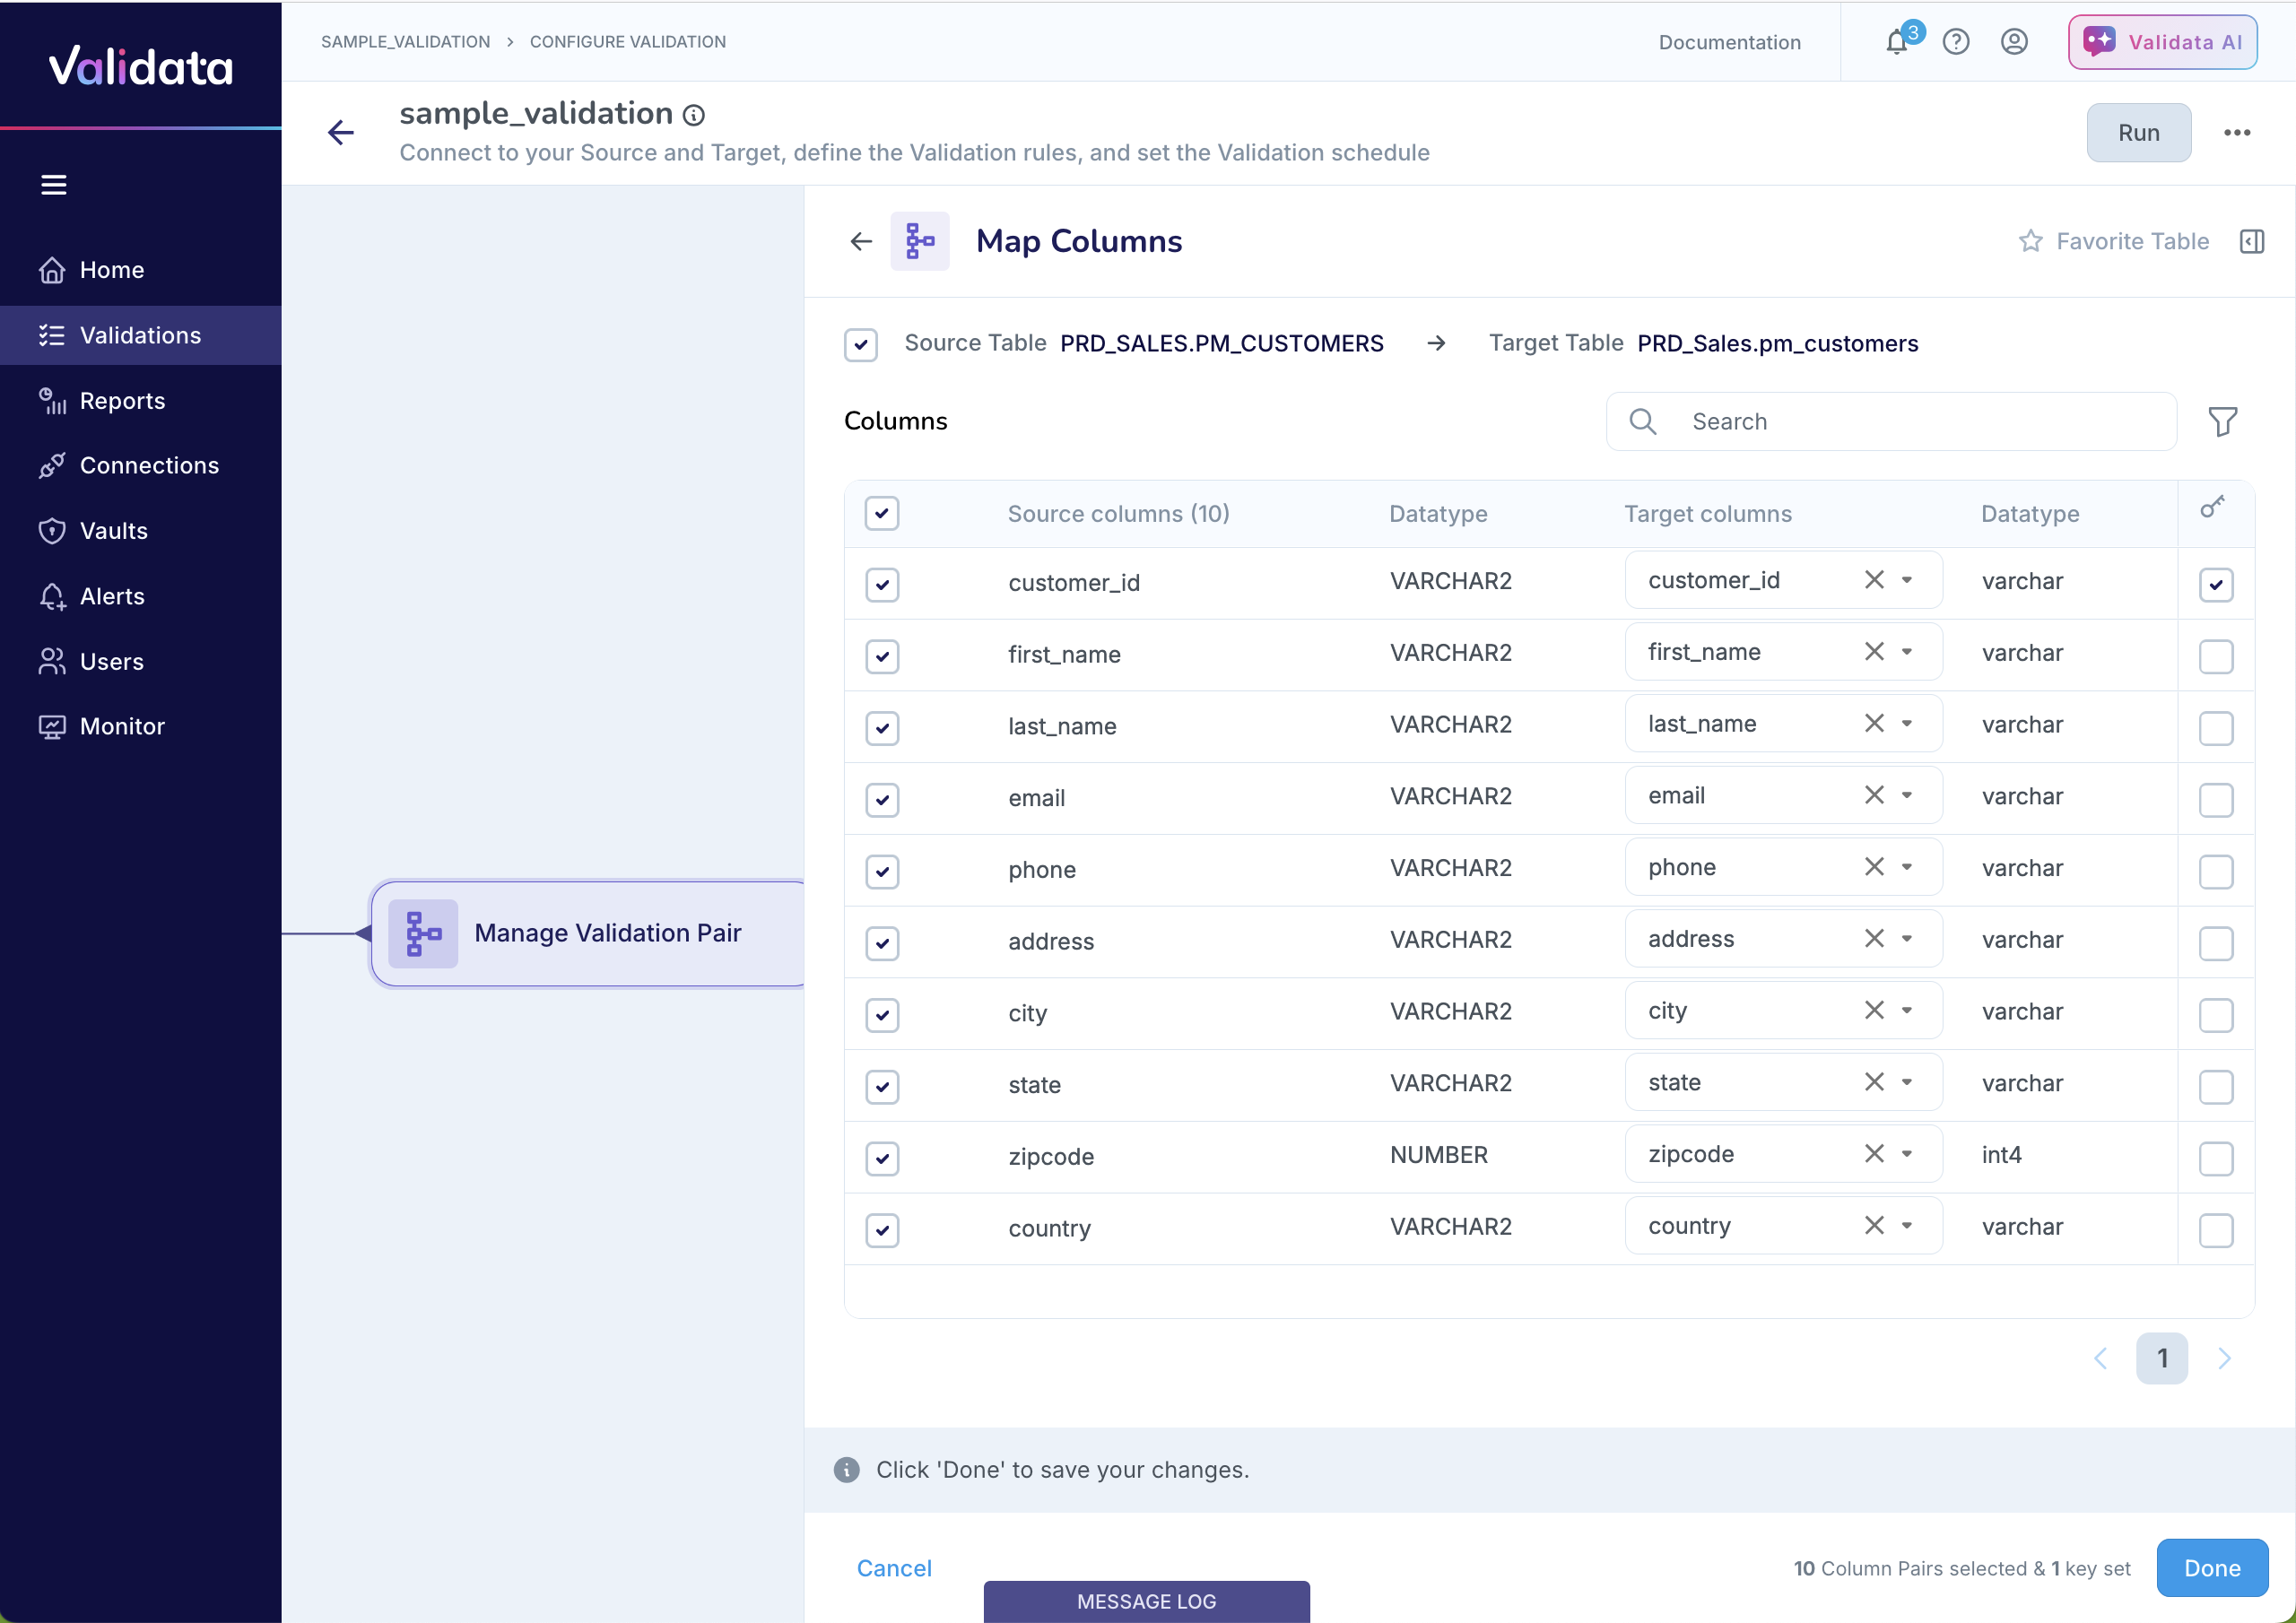
Manage validation pair: Once connected, you must map the columns in the source table to the corresponding columns in the target table. Validata intelligently automaps the source columns to the target columns. You can review and modify the column mappings, and choose which columns to include in the comparison. Validata only compares the columns that are selected and compares them according to the mapping in the validation configuration. If needed, you must also select the comparison key that specifies the columns that Validata must use to compare the tables.
Save and run: Save and run the validation.
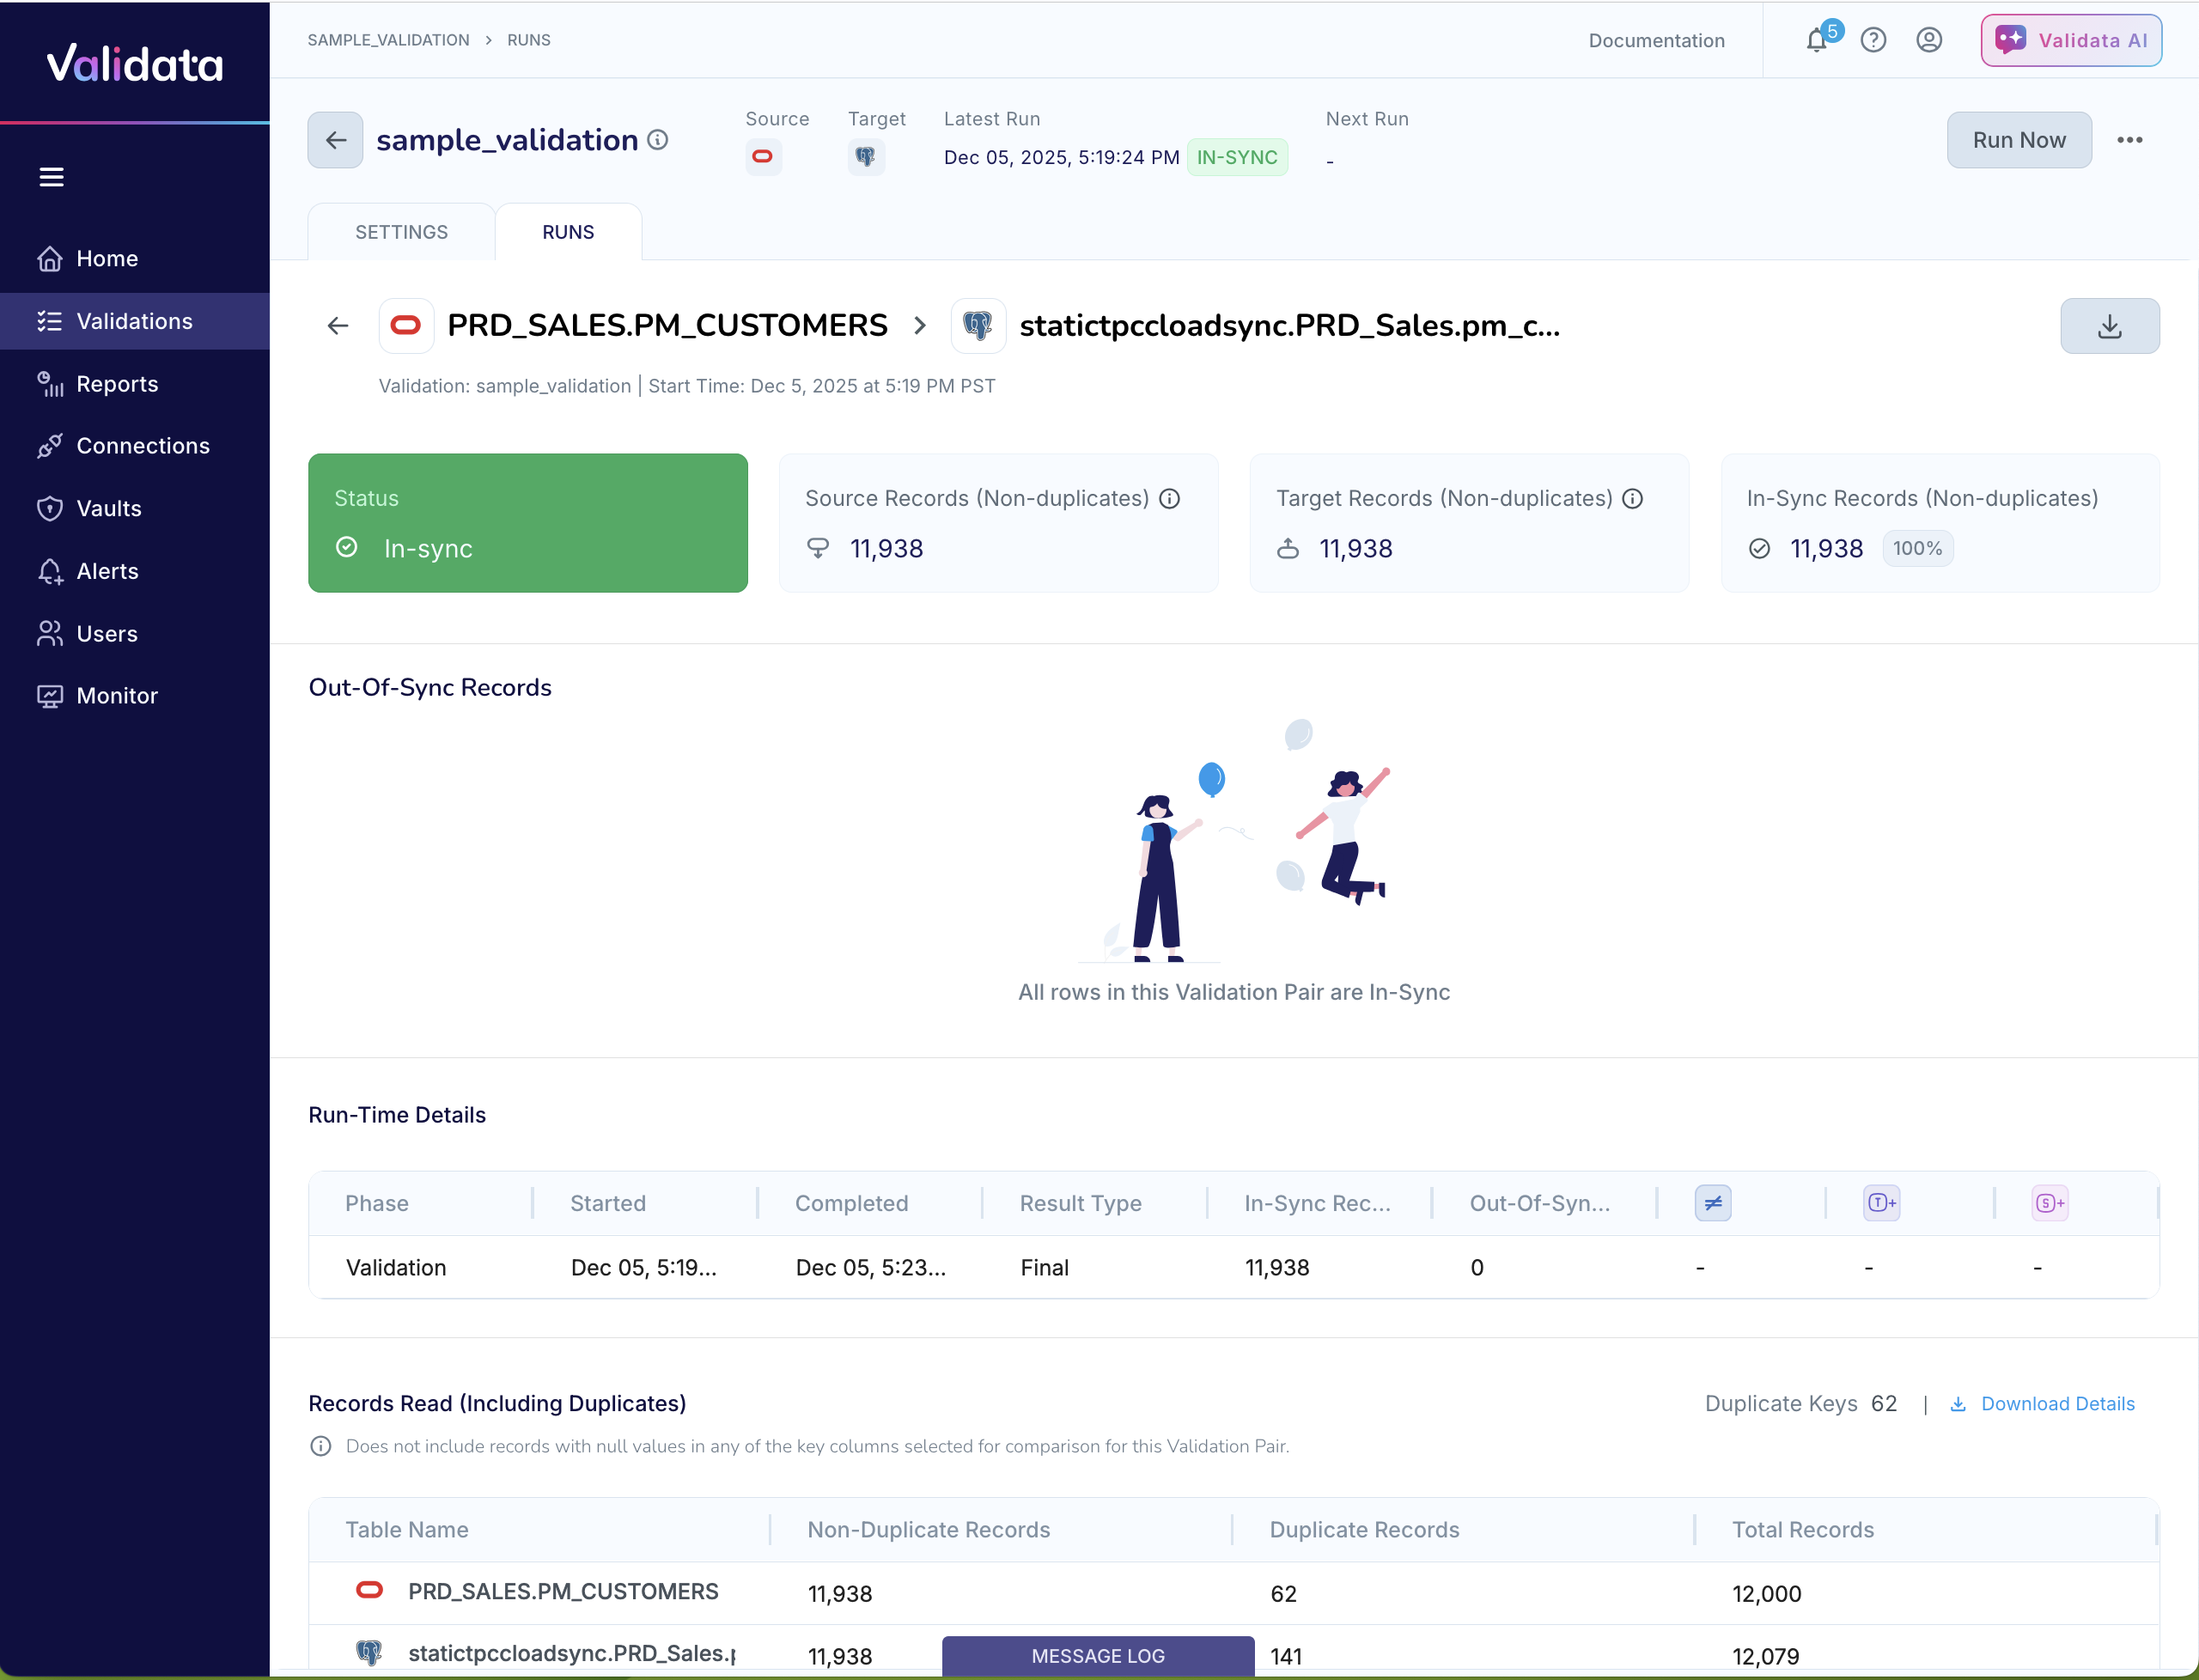
Review results: When the run completes, Validata generates a validation report. If the source and target tables are identical according to the validation configuration (that is, according to the source and target columns selected for comparison), Validata will report that the tables are
In-Sync.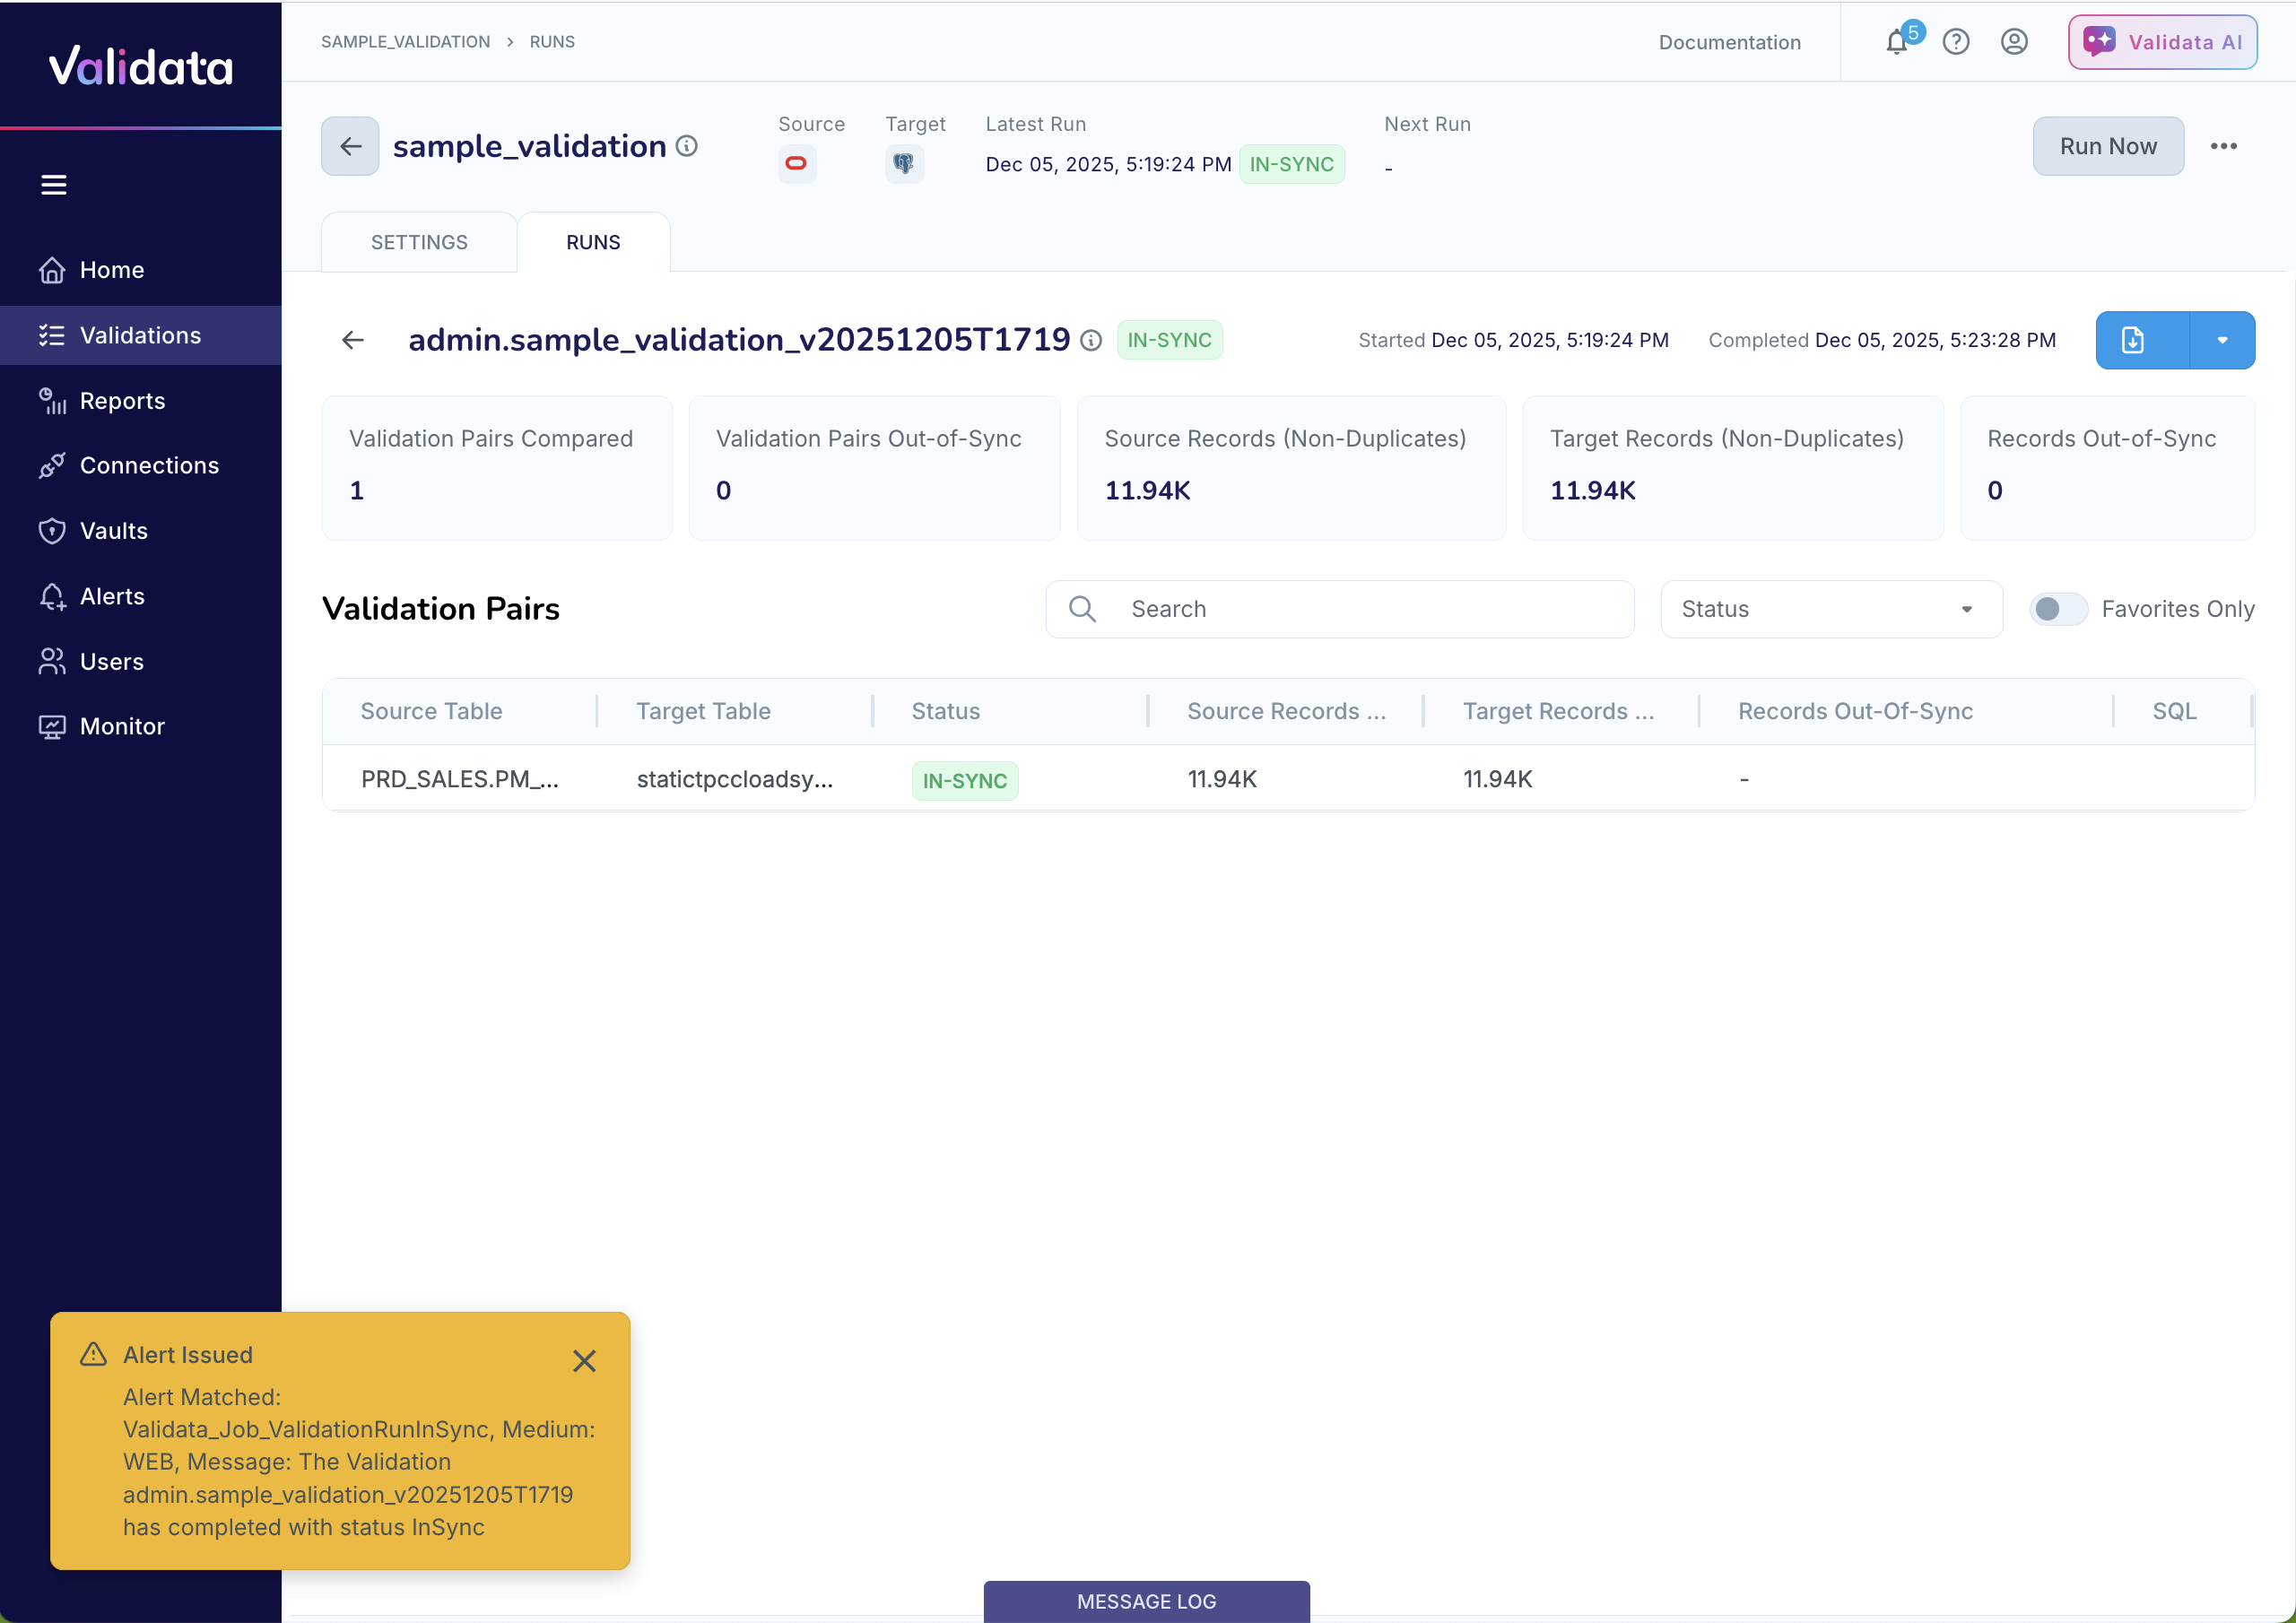
You can download the JSON report for the validation run by clicking the download button to the right of the validation run name.
Testing out-of-sync detection
To see how Validata reports mismatched tables, you can override Validata's automapping and map non-identical columns between the source and target tables.
Open the validation and go to the Map Columns page. Map non-equivalent columns—such as mapping the
first_namecolumn in the source table to thelast_namecolumn in the target table, and thelast_namecolumn in the source table to thefirst_namecolumn in the target table, as shown in the example—to intentionally create a comparison mismatch.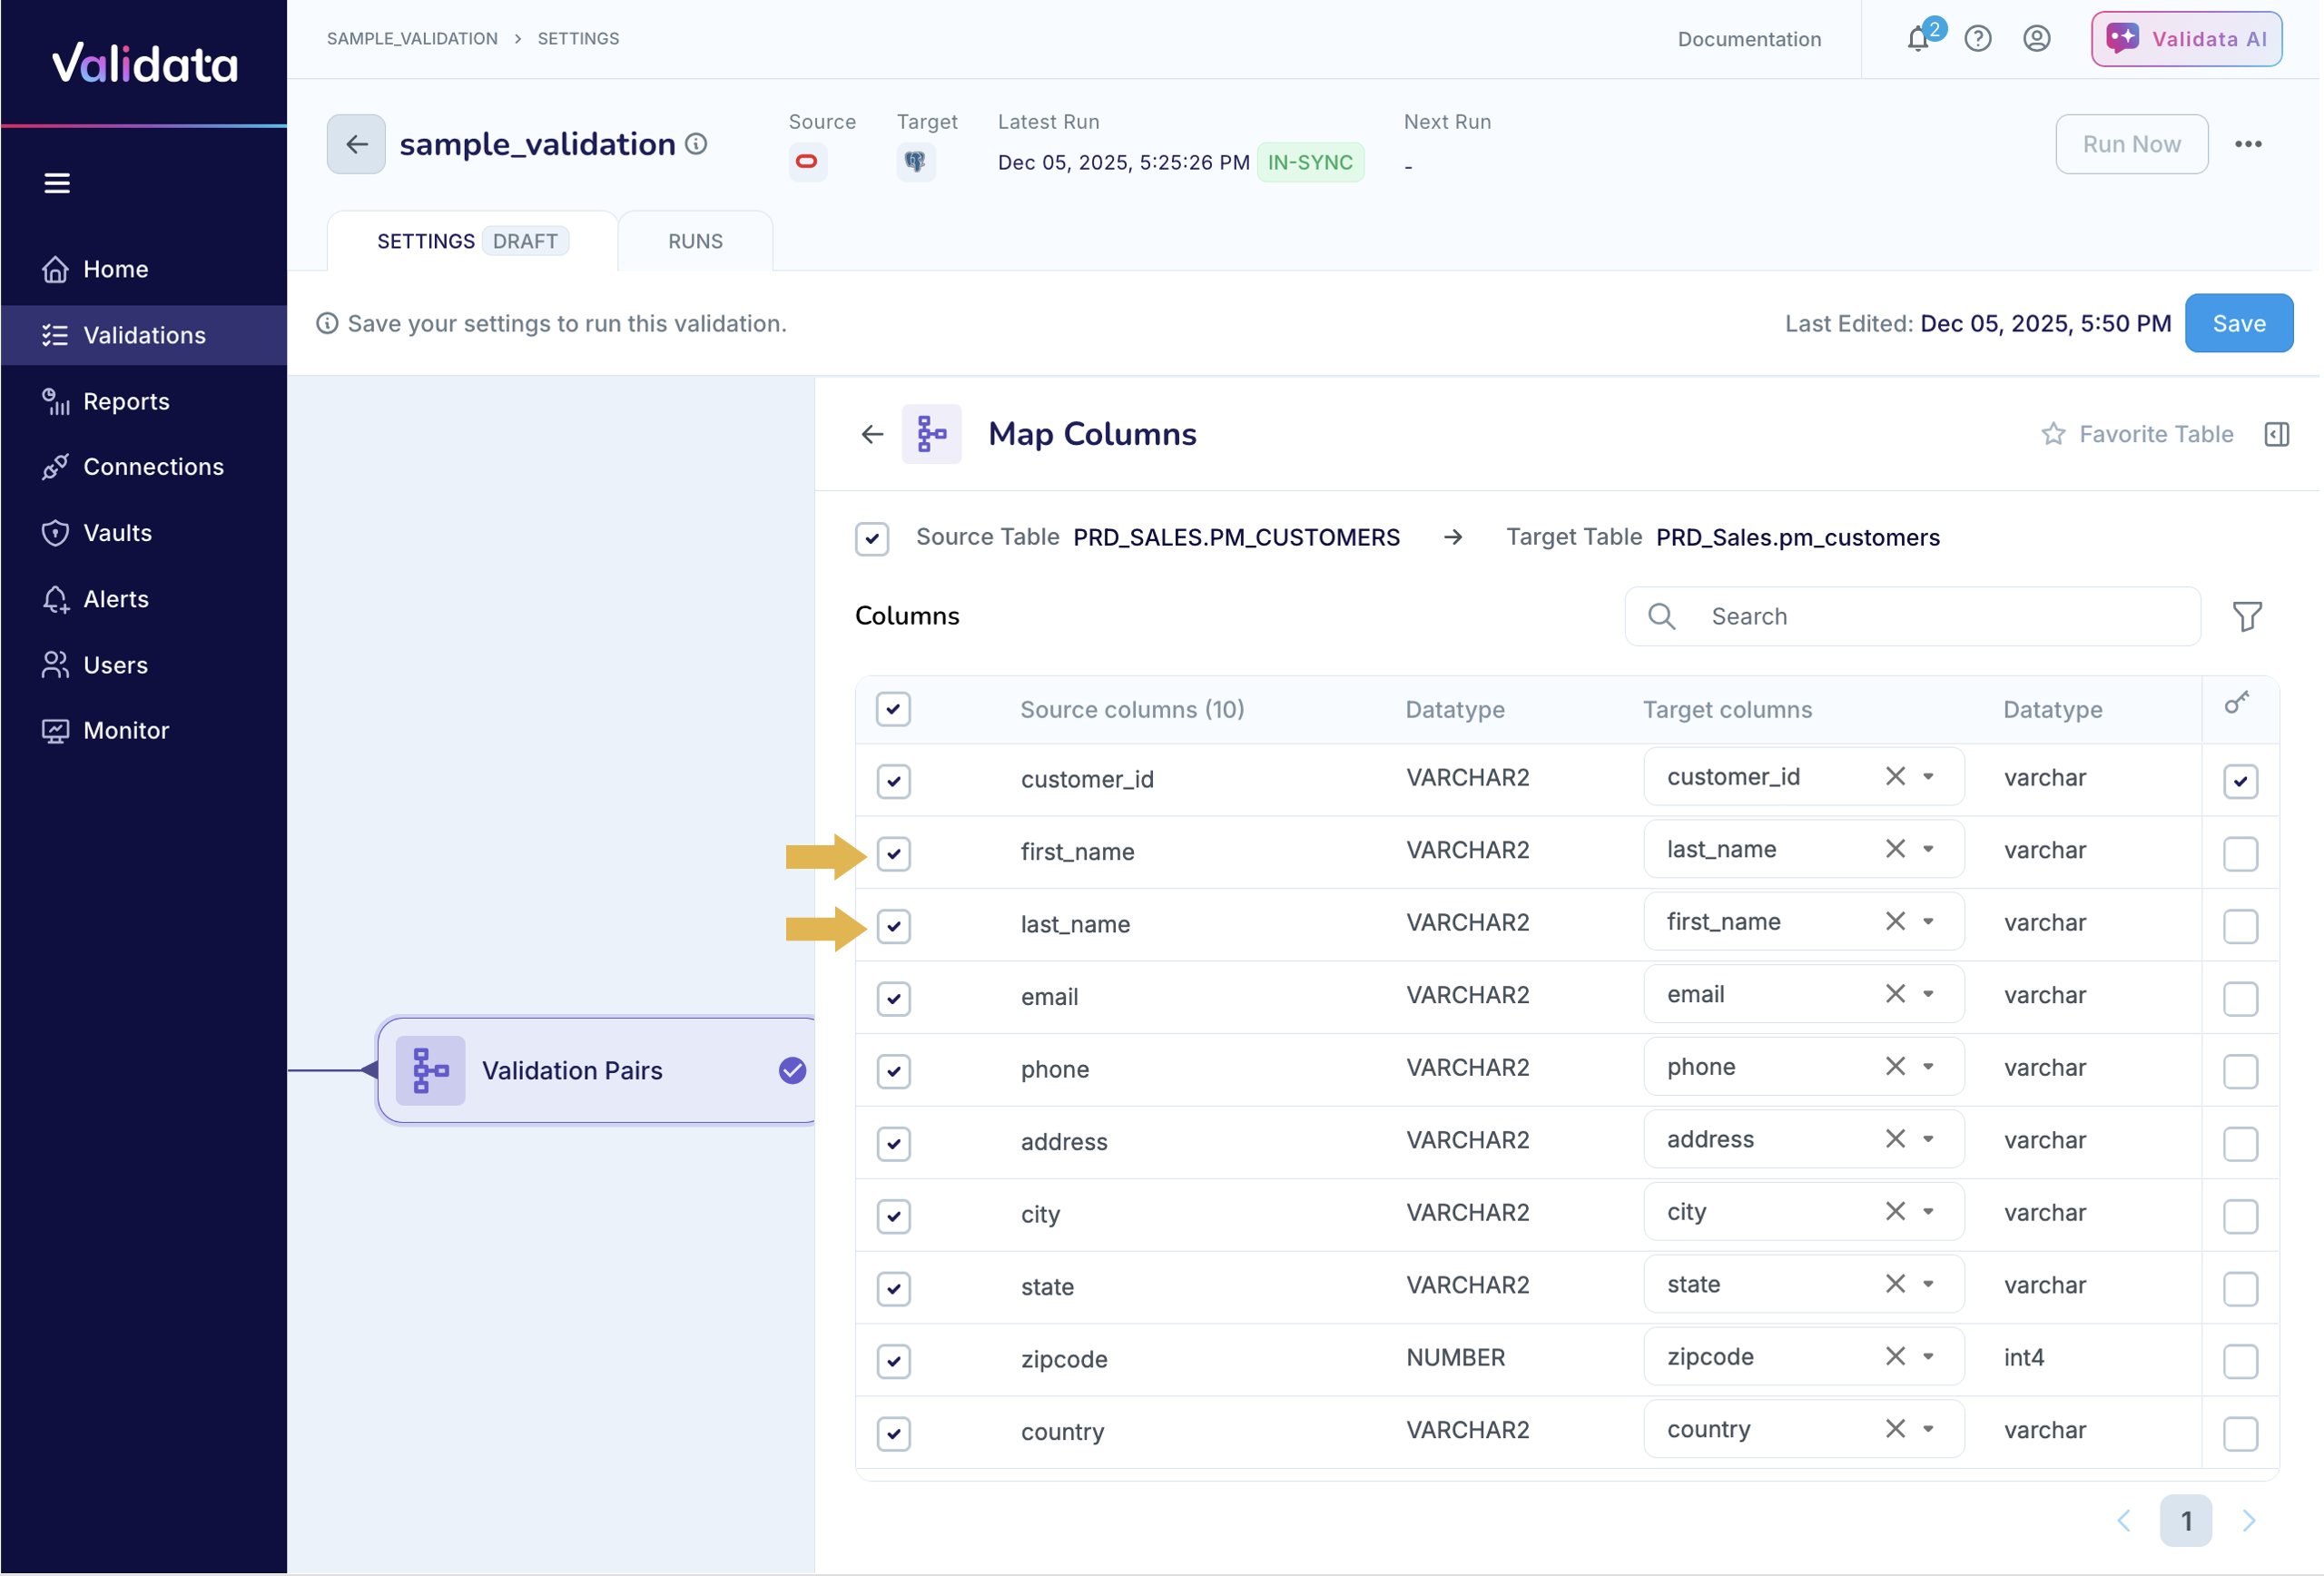
Save and run the validation.
Since you knowingly mapped non-identical columns, Validata reports that the tables are
Out-of-Sync.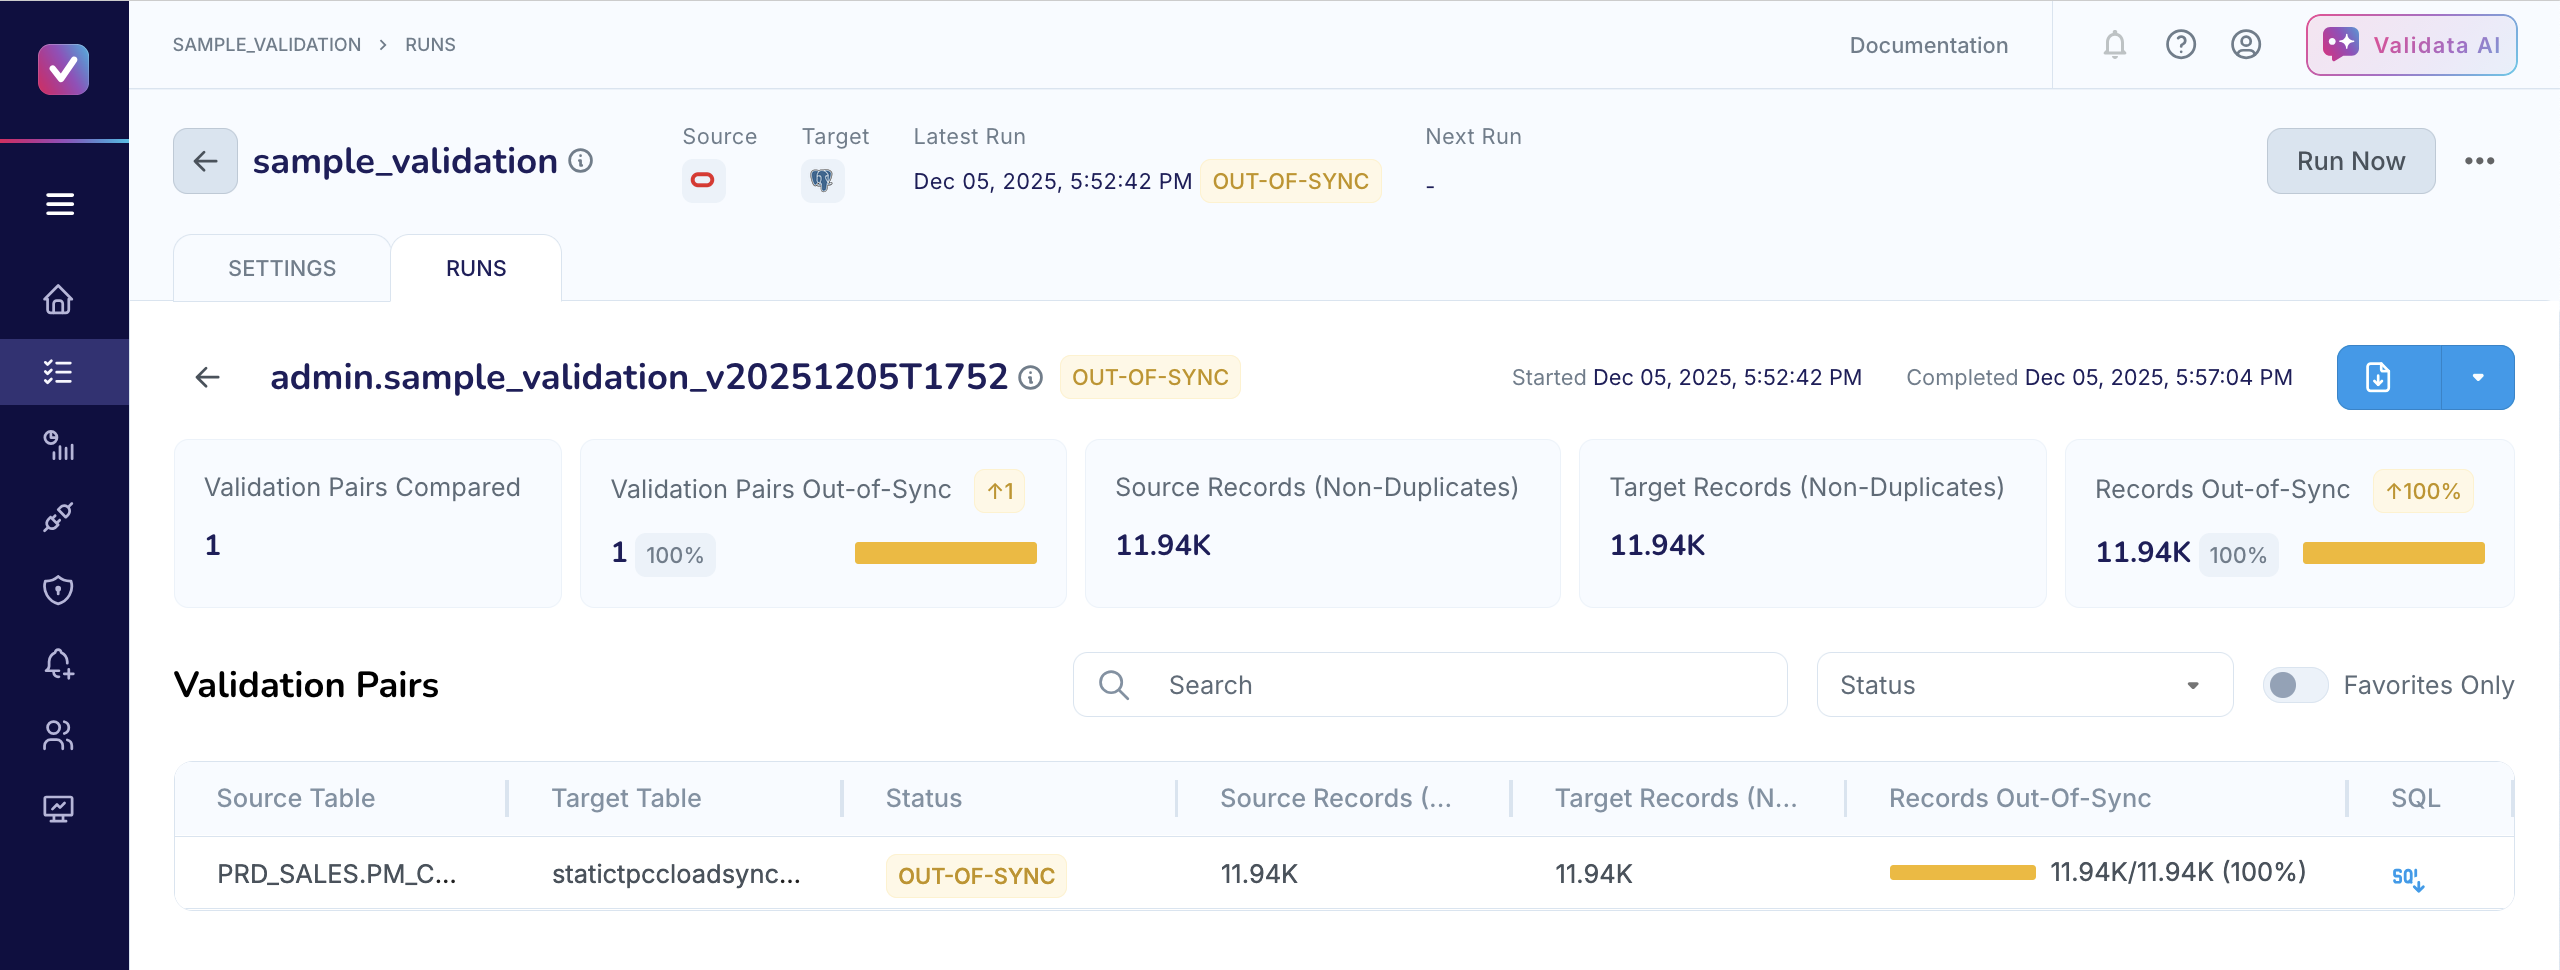
You can analyze the validation pair report to learn more about the mismatches.
The validation pair report shows the key comparison metrics, including the number of source and target records processed and details about the out-of-sync records.
If you view the out-of-sync records by their columns, you can see that the mismatches are created by your mapping the
first_namecolumn tolast_name.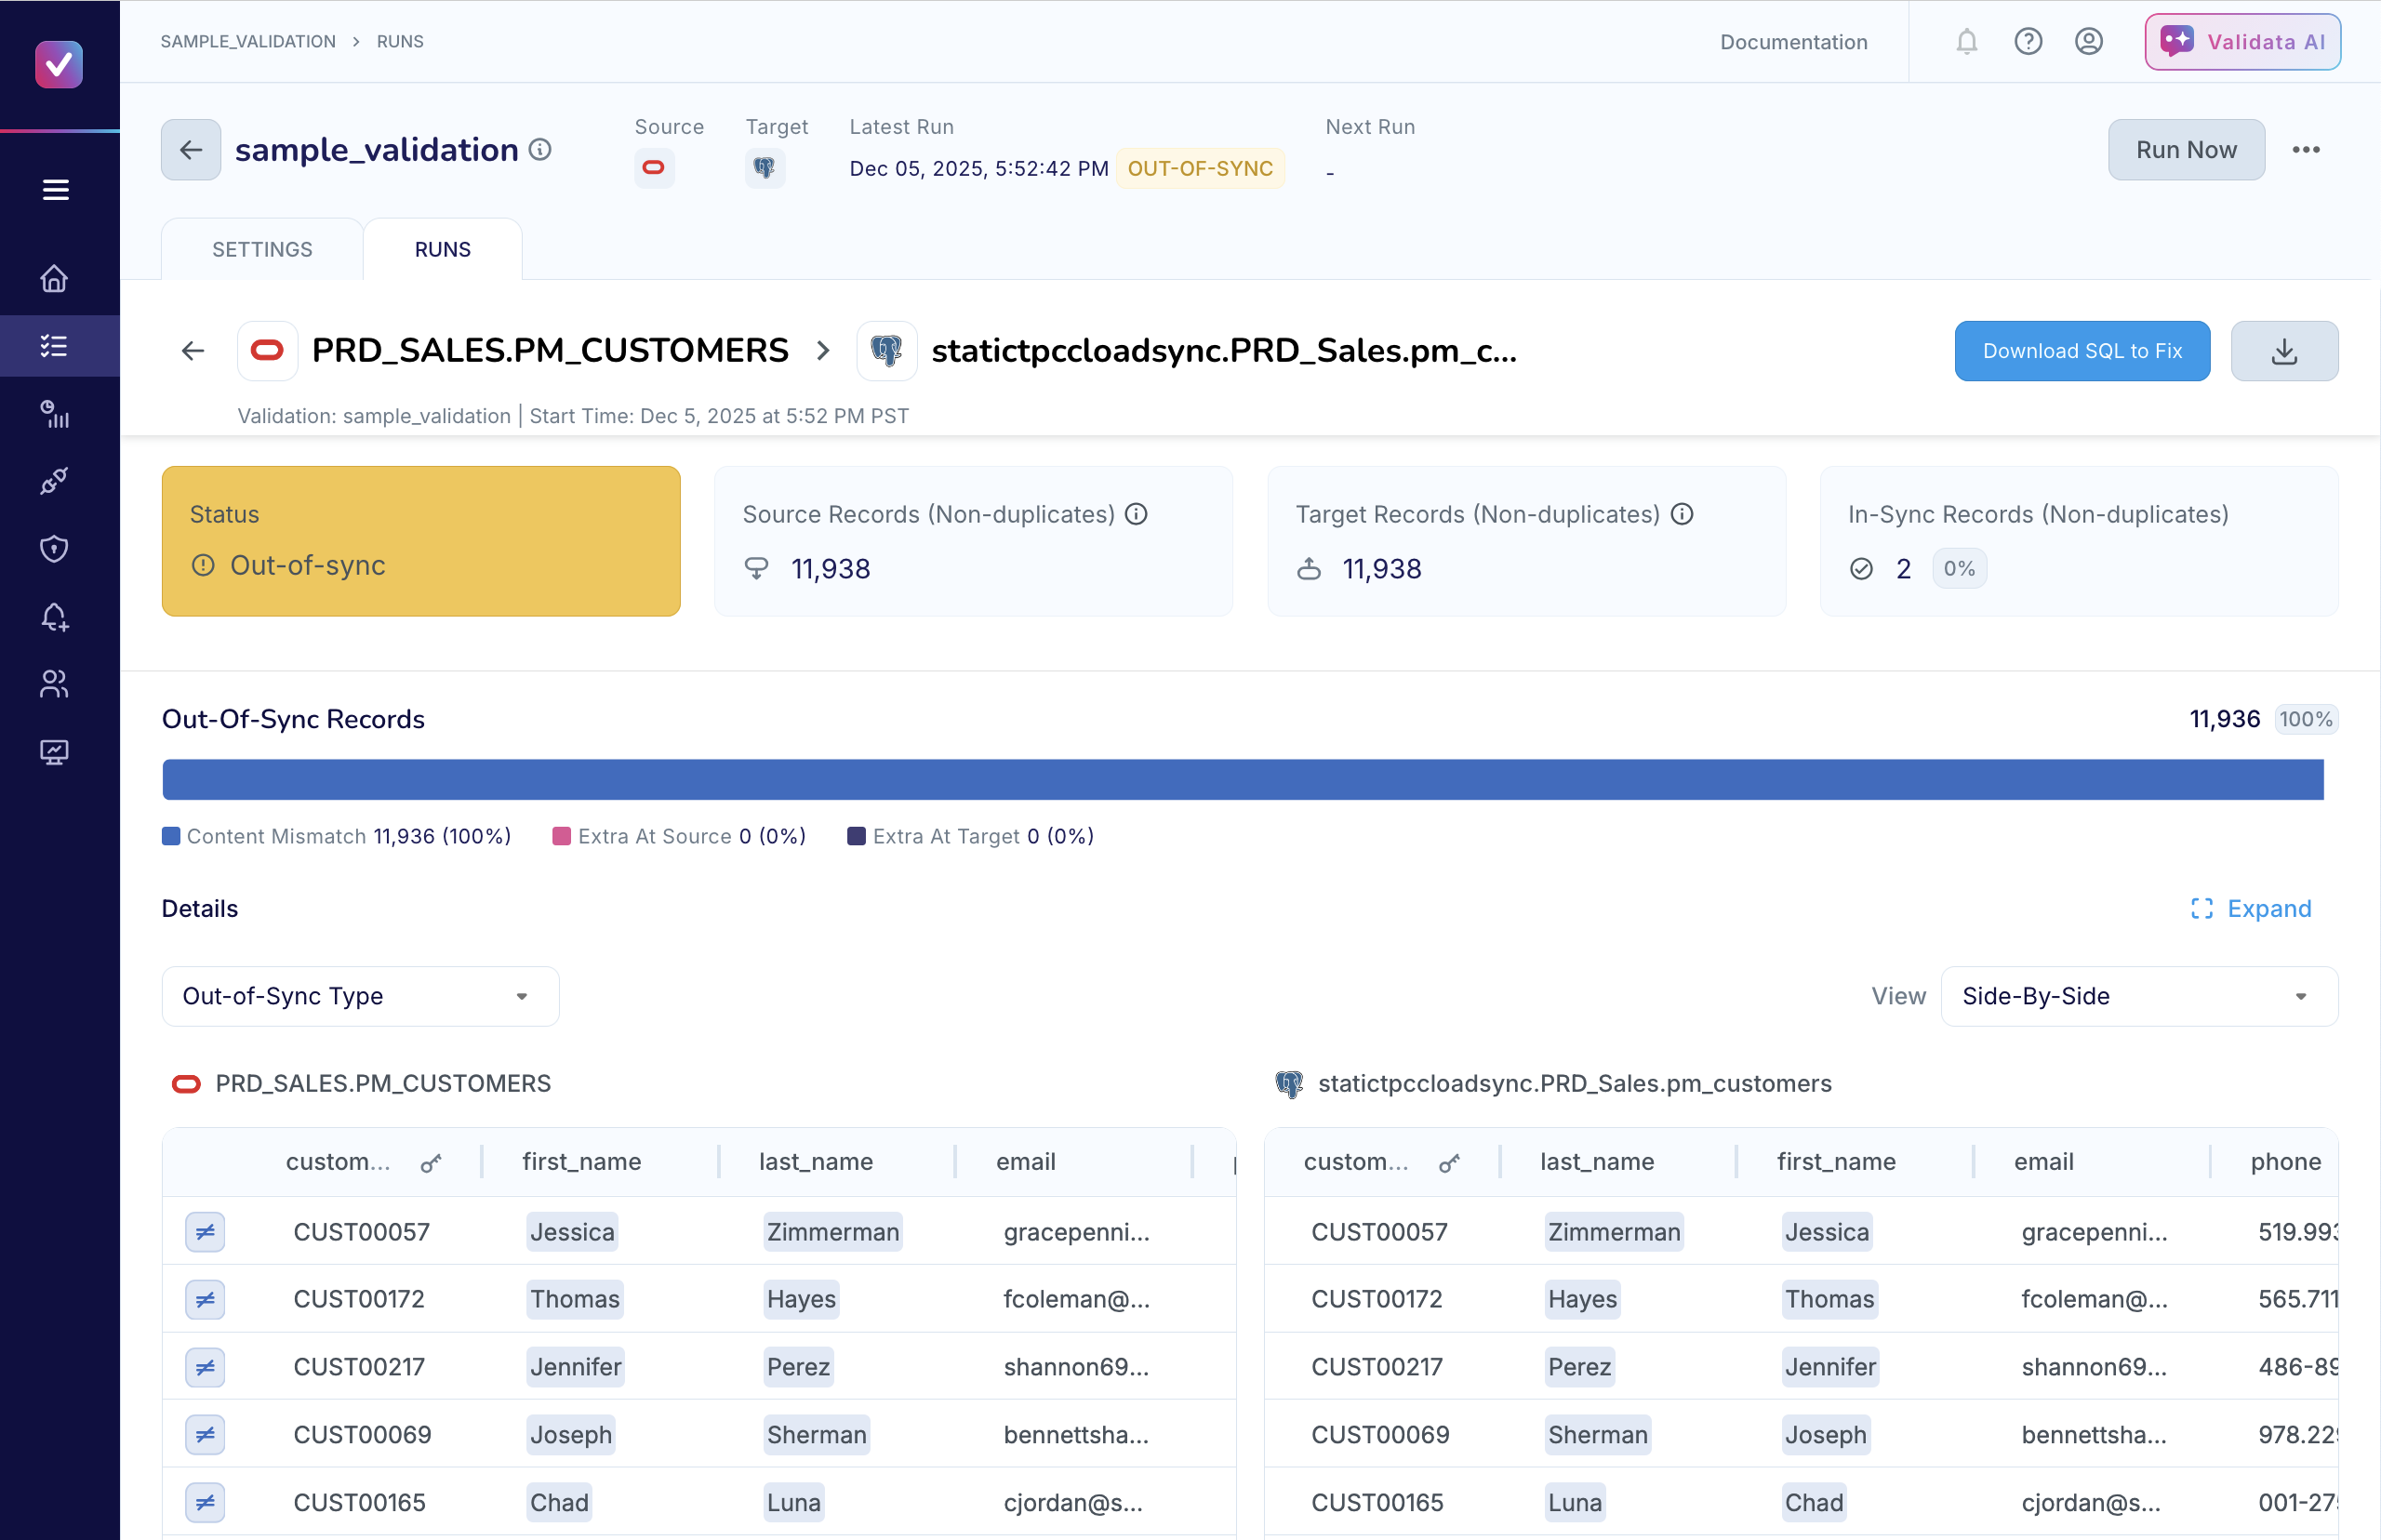
When Validata detects discrepancies in a validation pair, it generates a reconciliation script that you can execute on the target system to align the target table to the source table. Click Download SQL to Fix. The SQL script contains CREATE, INSERT, and UPDATE statements based on the results of the comparison.
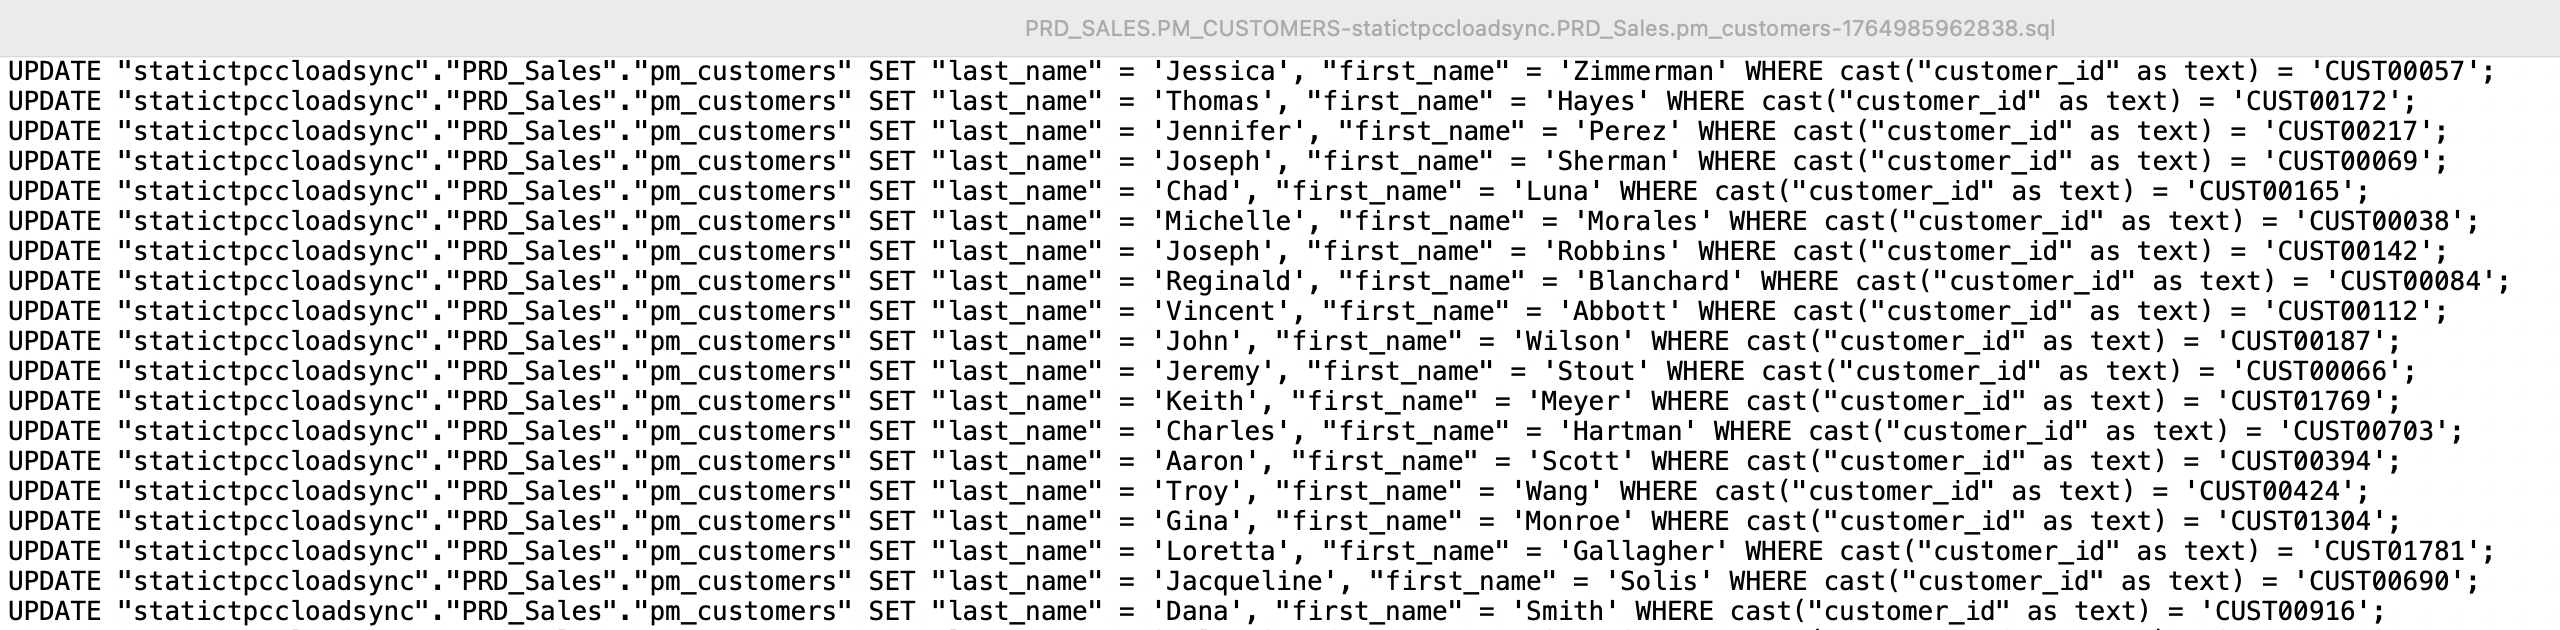
The reconciliation script is based on a point-in-time comparison of the source and target datasets. The SQL script can align the source and target tables only if the source table has not changed since the comparison started.