Connecting Striim Cloud on Google Cloud Platform to self-managed data services
This topic explains how to enable private (non-public) connectivity from Striim Cloud to databases you manage in AWS, Azure, on-premises data centers, or Oracle Cloud Infrastructure (OCI) by leveraging Google Cloud Private Service Connect (PSC) through your own GCP project.
Supported environments
AWS
Azure
Oracle Cloud Infrastructure (OCI)
On-premises data centers
Architecture patterns
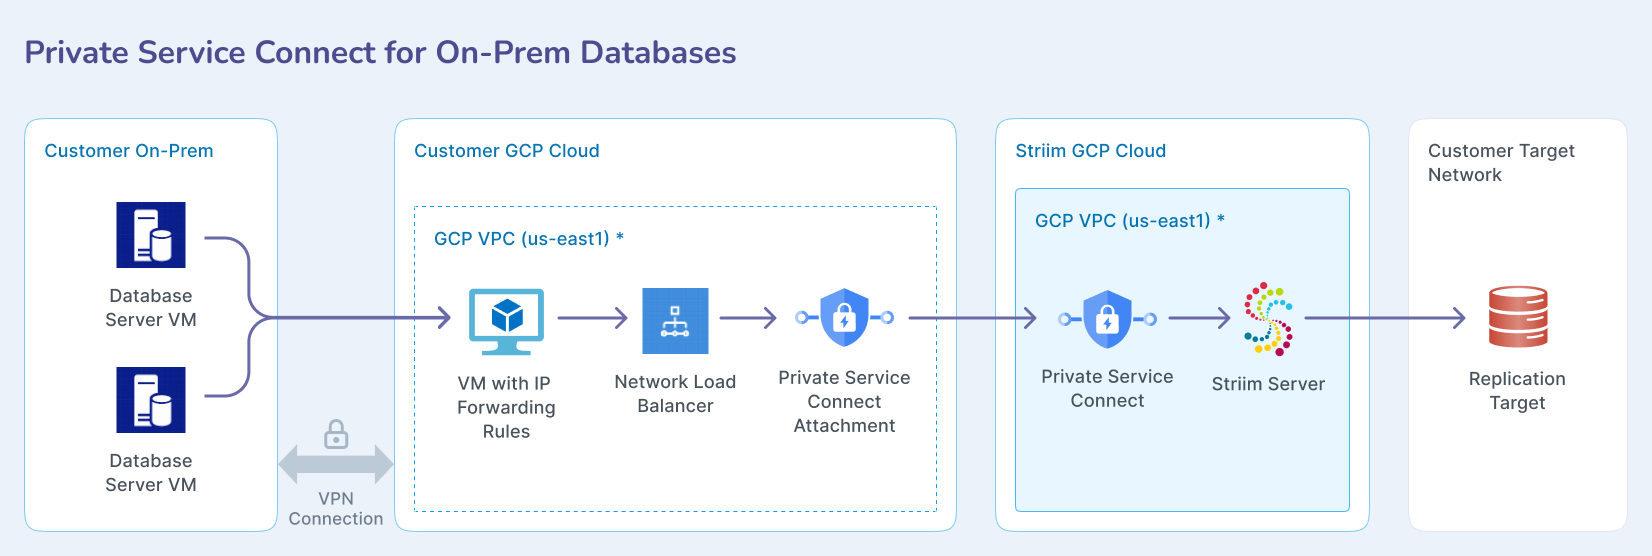
In this pattern, your GCP project exposes a PSC service attachment fronted by a Google Cloud Network Load Balancer. The load balancer targets one or more VMs with IP forwarding that route traffic privately (for example, via a site-to-site VPN/Interconnect) to the destination database or service. Striim Cloud (consumer) connects to the service attachment using a PSC endpoint, so all traffic remains on private links.
Private Service Connect for on-premises databases
The architecture includes three network environments:
Striim GCP VPC: Contains Striim Server with Private Service Connect
Customer GCP VPC: Contains Private Service Connect attachment, Network Load Balancer, and VM with IP Forwarding rules
Customer on-prem: Contains Database Server VMs connected via VPN connection
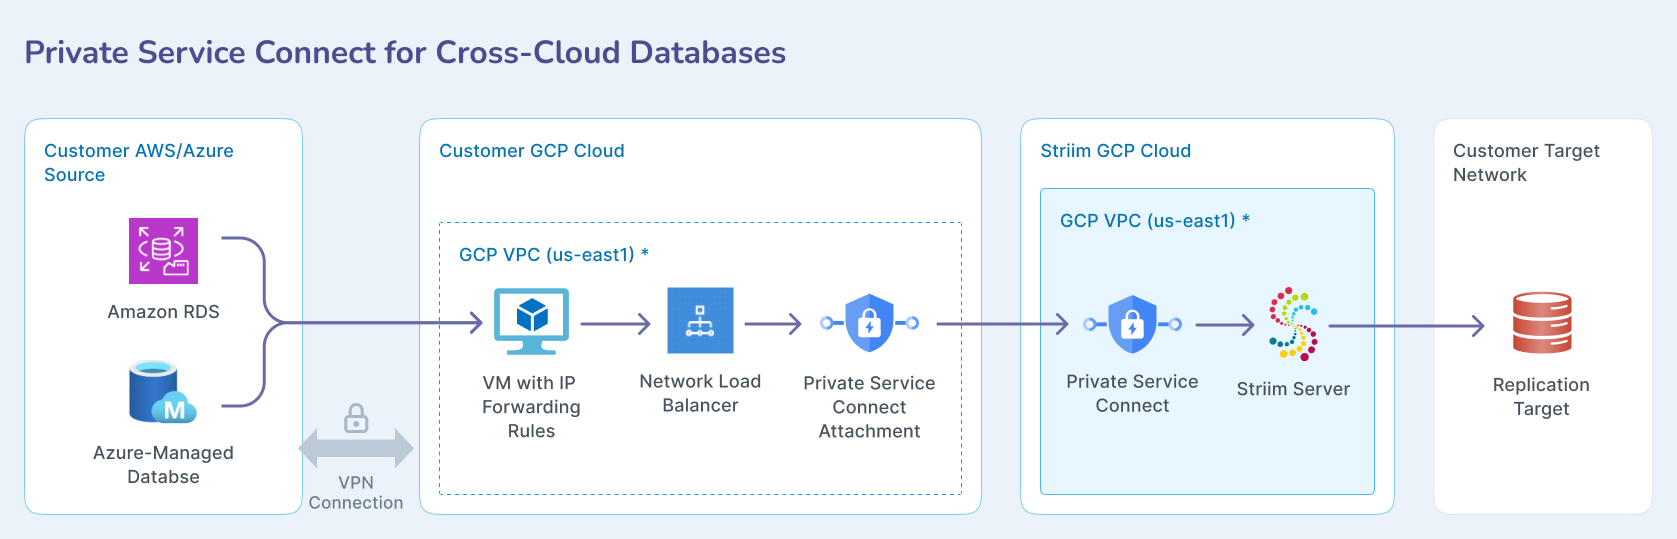
Private Service Connect for cross-cloud databases
For cross-cloud databases, the Customer on-premises environment is replaced with Customer AWS/Azure containing Amazon RDS and Azure Managed Database, connected via VPN connection.
Pre-requisites
A VPC network with one additional subnet for PSC.
IAM rule for the user with above services creation permission.
A VPN / Express-route / Direct connect etc. between customer GCP and on-prem/cross-cloud network.
Prepare customer VPN with On-prem network
Follow the link to setup VPN connection between:
GCP-to-AWS VPN(classic): see Site-to-Site VPN Between GCP and AWS Cloud.
GCP-to-On-prem: see Creating a site-to-site VPN tunnel in Google Cloud (GCP), which involves setting up a Virtual Private Cloud (VPC) network, and configuring a Cloud VPN gateway.
Step-by-step process to setup the network pipeline in customer project
This process sets up the necessary infrastructure in your GCP project to route traffic privately from Striim Cloud to your databases. You'll create a proxy VM, configure load balancing, and establish the Private Service Connect attachment.
Create an Ubuntu VM instance as follows:
A e2-medium should be sufficient for this solution.
Launch the instance in the same VPC network as database.
SSH to the instance and set up an IP forwarding rule to forward all incoming traffic to the database by using below command: (change the IP and Port accordingly for your target database).
Determine if forwarding is currently enabled or disabled. The command below outputs the value of the given parameter. A value of
1indicates that the setting is enabled, while0indicates it is disabled. If you intend to configure forwarding, check that kernel parameter as well.sudo sysctl net.ipv4.ip_forward
Open the file
/etc/sysctl.confusing your preferred command-line editor, such as vi.sudo vi /etc/sysctl.conf
Find the line corresponding with the type of forwarding you wish to enable, uncomment it, and set the value to
1. Alternatively, you can add the lines anywhere in the file.After the changes have been saved, apply the changes by running the following command or by rebooting the machine.
sudo sysctl -p
Review the existing iptables rules. If you are on a fresh installation of Linux and do not have any preconfigured rules, the output of the below command should by empty.
sudo iptables-save
Configure iptables to allow port forwarding. This is the default setting for many systems.
sudo iptables -A FORWARD -j ACCEPT
Run following commands to setup the forwarding rule in the ip-table
sudo iptables -t nat -A PREROUTING -p tcp --dport 5432 -j DNAT --to-destination
sudo iptables -t nat -A POSTROUTING -j MASQUERADE
sudo cat /proc/sys/net/ipv4/ip_forward
sudo sh -c "echo 1 > /proc/sys/net/ipv4/ip_forward"
sudo iptables-save
(Optional) You can add more than one forwarding rule to the same ip-table, by using unique port for each target database IP.
To make this rule persistence during reboot download the
iptables-persistentpackage: (pressyesin the popup window to acknowledge.)sudo apt install iptables-persistent
To review the iptables rule:
iptables -t nat -nvL
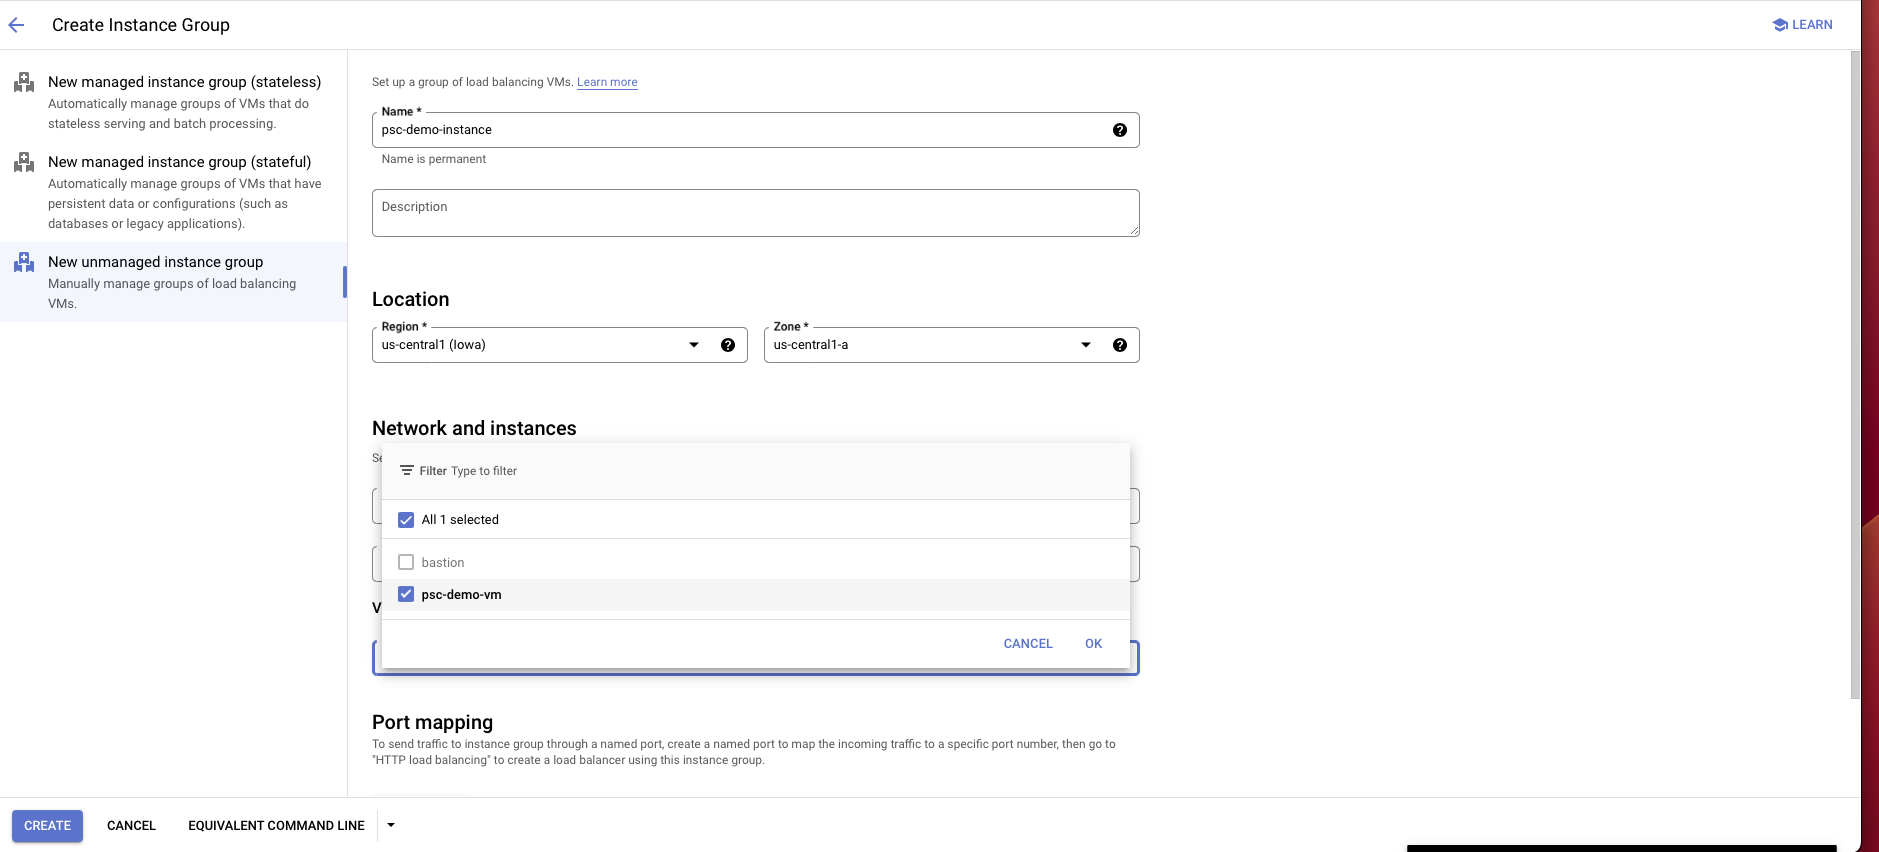
Go to the Compute Engine portal and click on Instance groups on the left panel.
Select Create instance group.
Choose New unmanaged instance group.
Enter an instance group name, location, zone and other information:
For location and zone, choose the same location and zone as proxy instance that you created.
For network interface choose the same VPC, subnet and Instance VM that you created/used earlier for the proxy instance.
Choose Create.
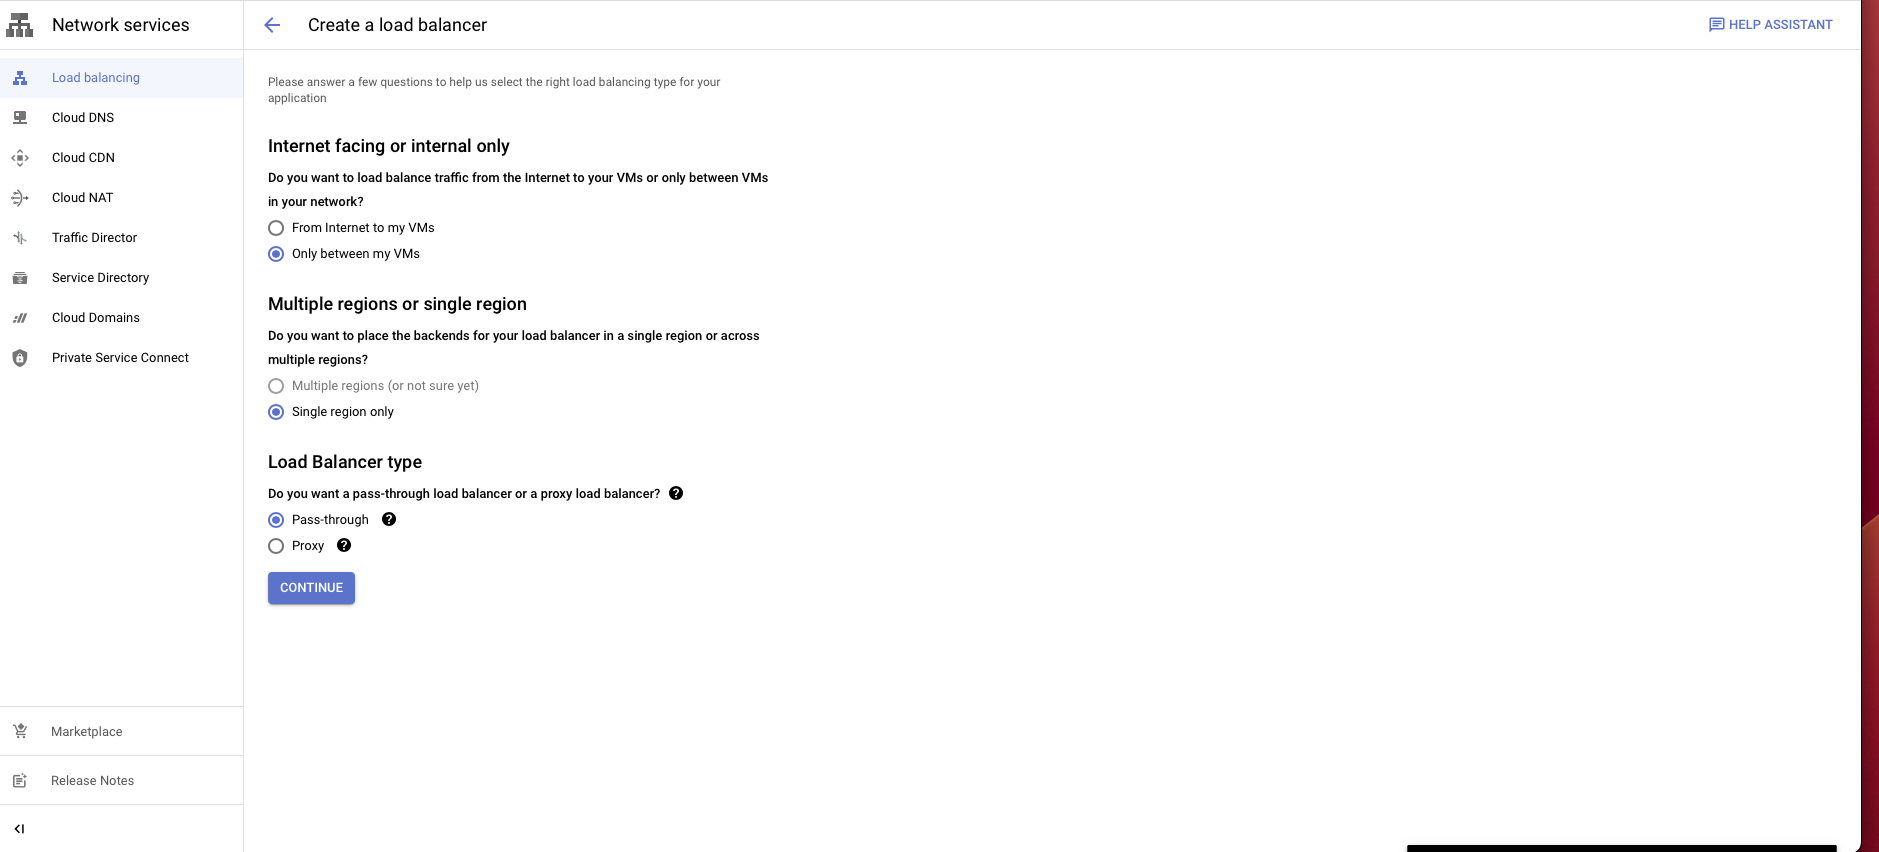
Create a load balancer as follows:
Choose TCP load balancer
Select Only between my VMs, Single region only, Pass-through then choose Continue.
Give it a name and choose the same region and network as proxy VM instance.
In the backend configuration, choose the instance group you have created.
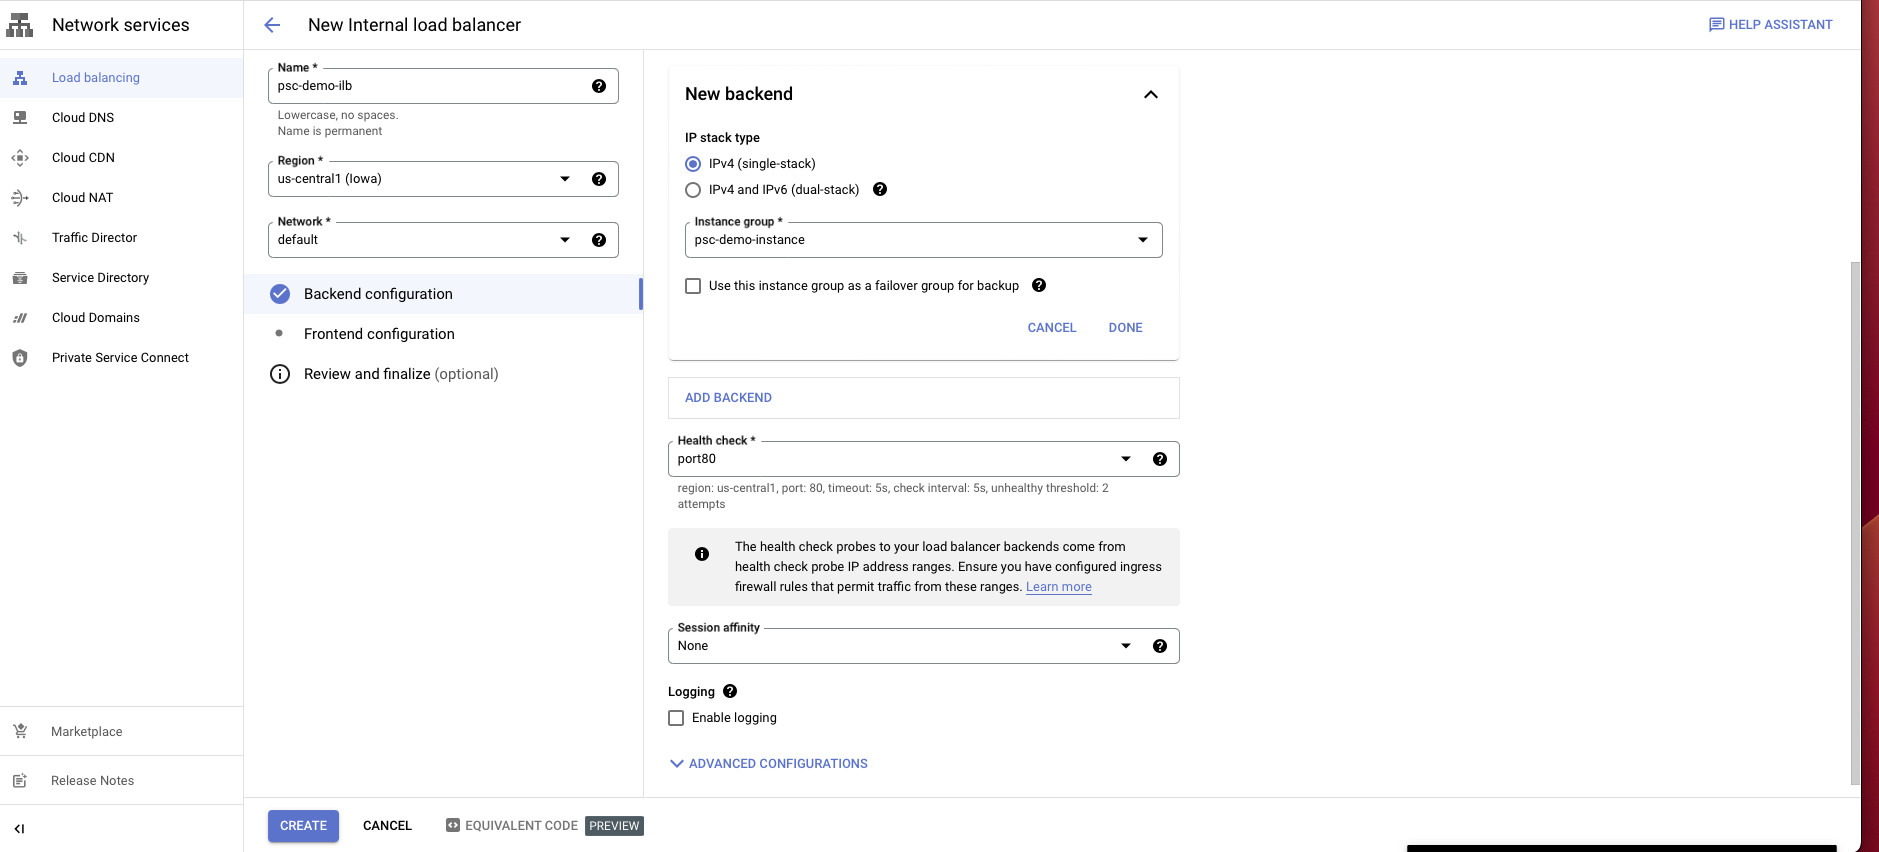
Create a health check probe for the port you assign for your database.
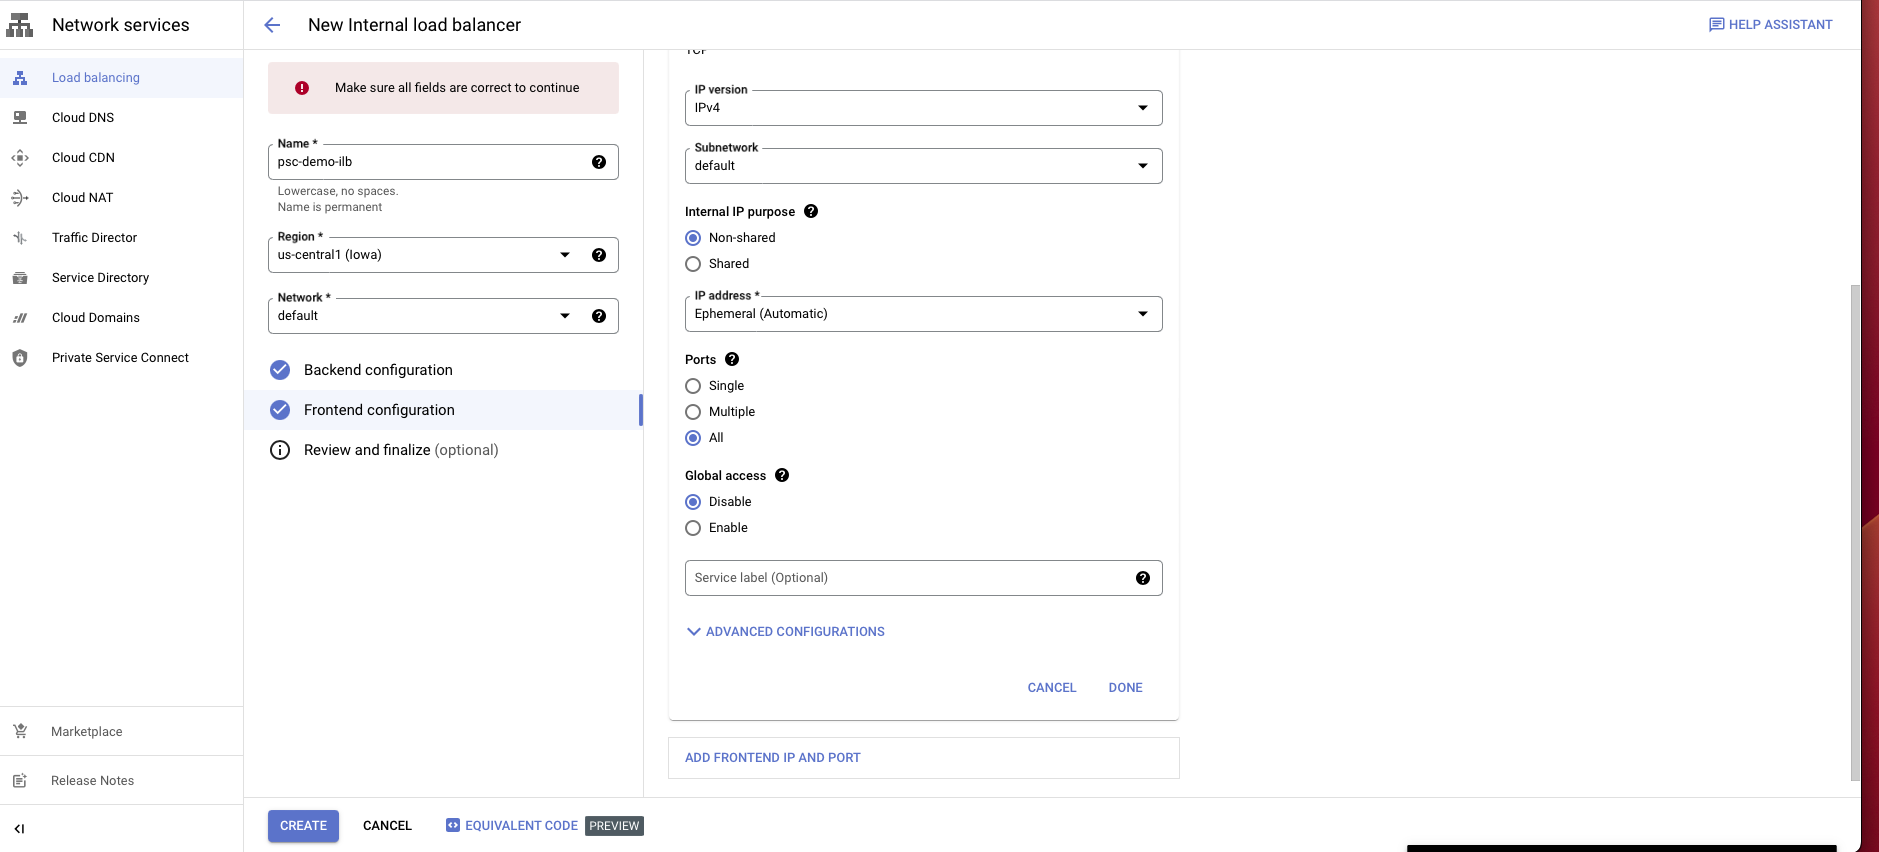
Select Frontend configuration.
Enter a name for the configuration.
Select the same network you have been using.
Choose an internal IP purpose, shared/non-shared.
For ports choose all or any port/s.
Disable global access.
Choose Create.
Go to the Load balancer portal.
Click on Private service connect on the left panel.
Select Published service, then choose Create new.
In the config, choose the load balancer type that you created before and select the load balancer from the dropdown.
Give it a name.
In the subnet section, choose Reserve a subnet for PSC.
Enter a subnet name and a CIDR block with /24.
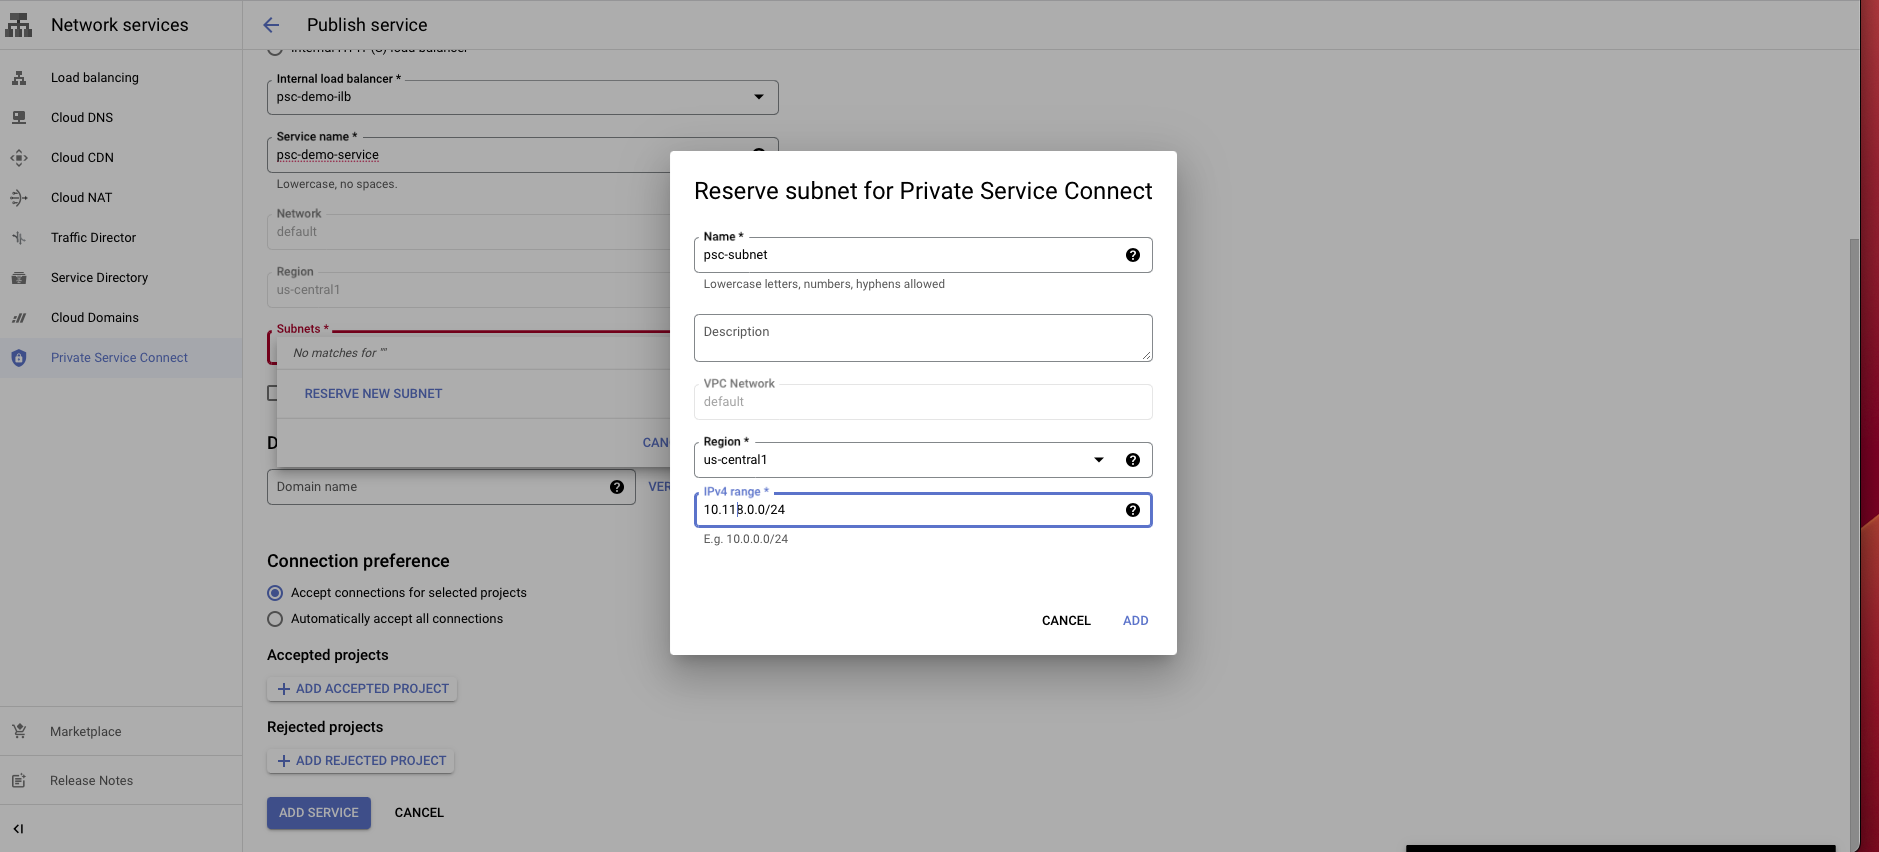
Choose connection preference Accept connections for selected projects.
Click Add service to create this service.
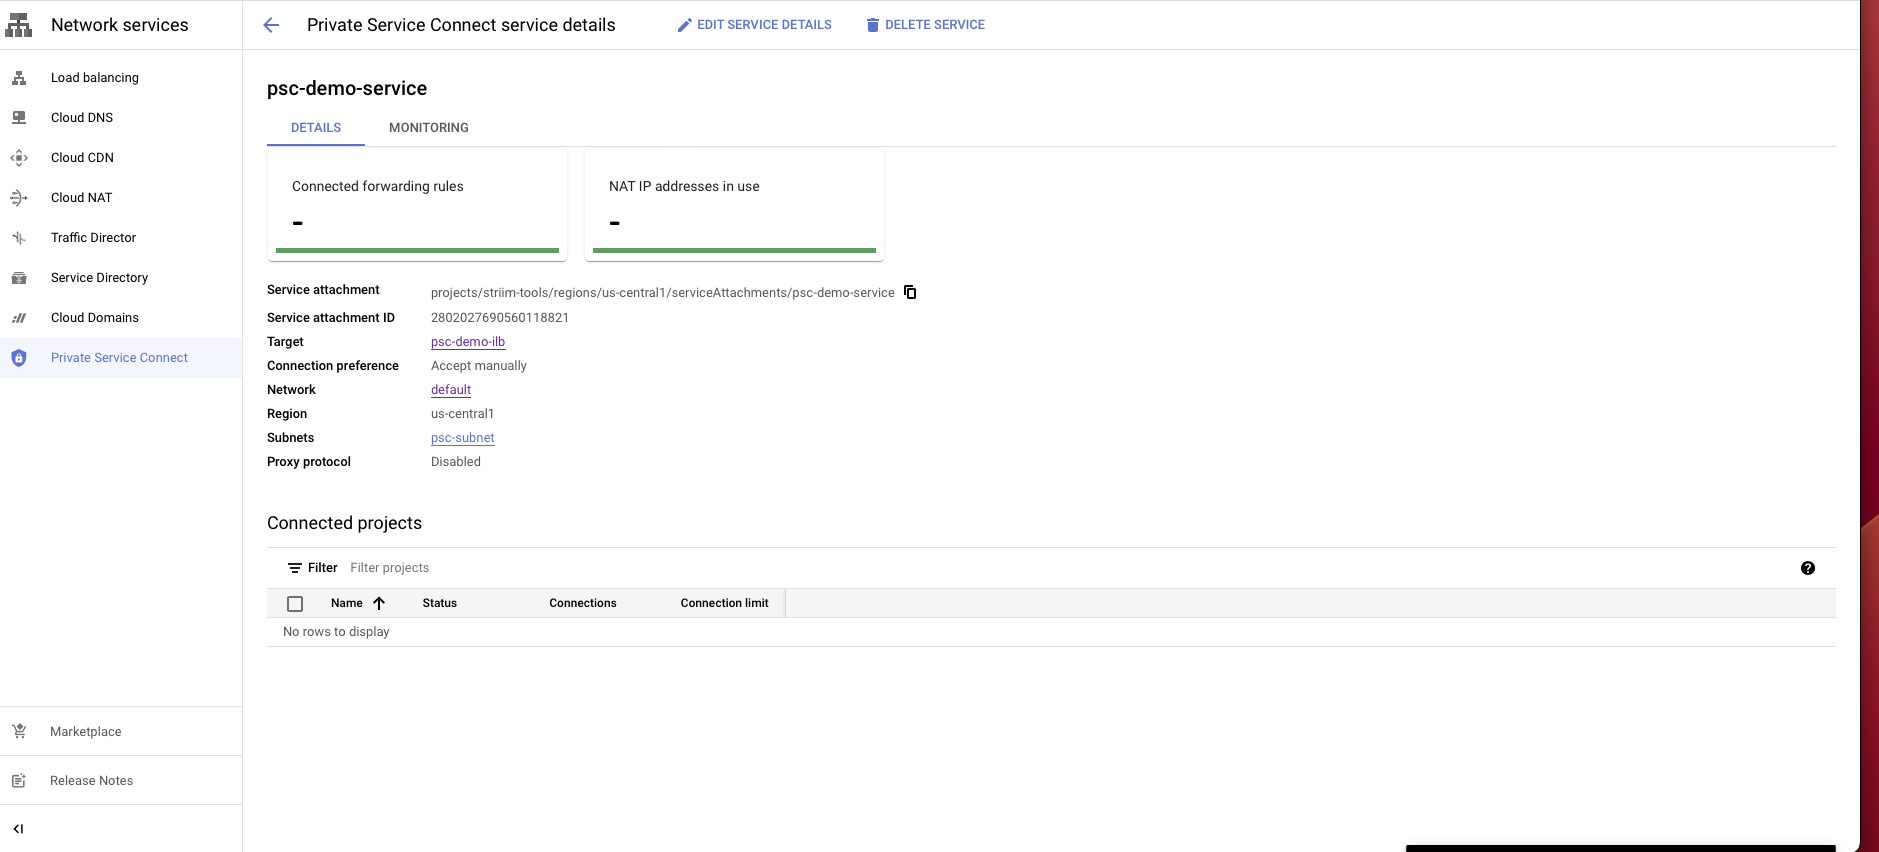
After creating the service, select the service and copy the Service attachment. You will need to use this attachment to create a PSC connection in the Striim Cloud console.
Create a Private Service Connection in the Striim project
This process creates the corresponding PSC endpoint in Striim Cloud to connect to the service attachment you created in your GCP project.
Log in to the Striim Cloud console.
Select the service that you want to create a private service connect from.
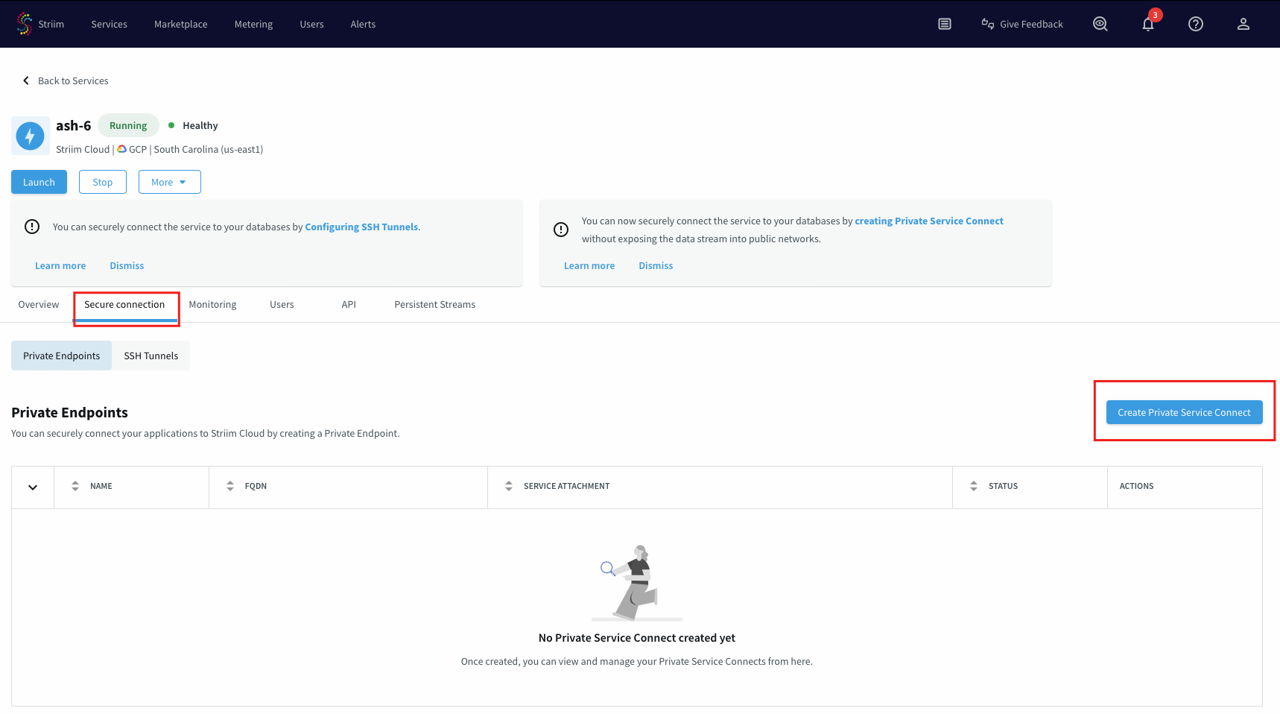
Under the Secure connection tab, click Create Private Service Connect.
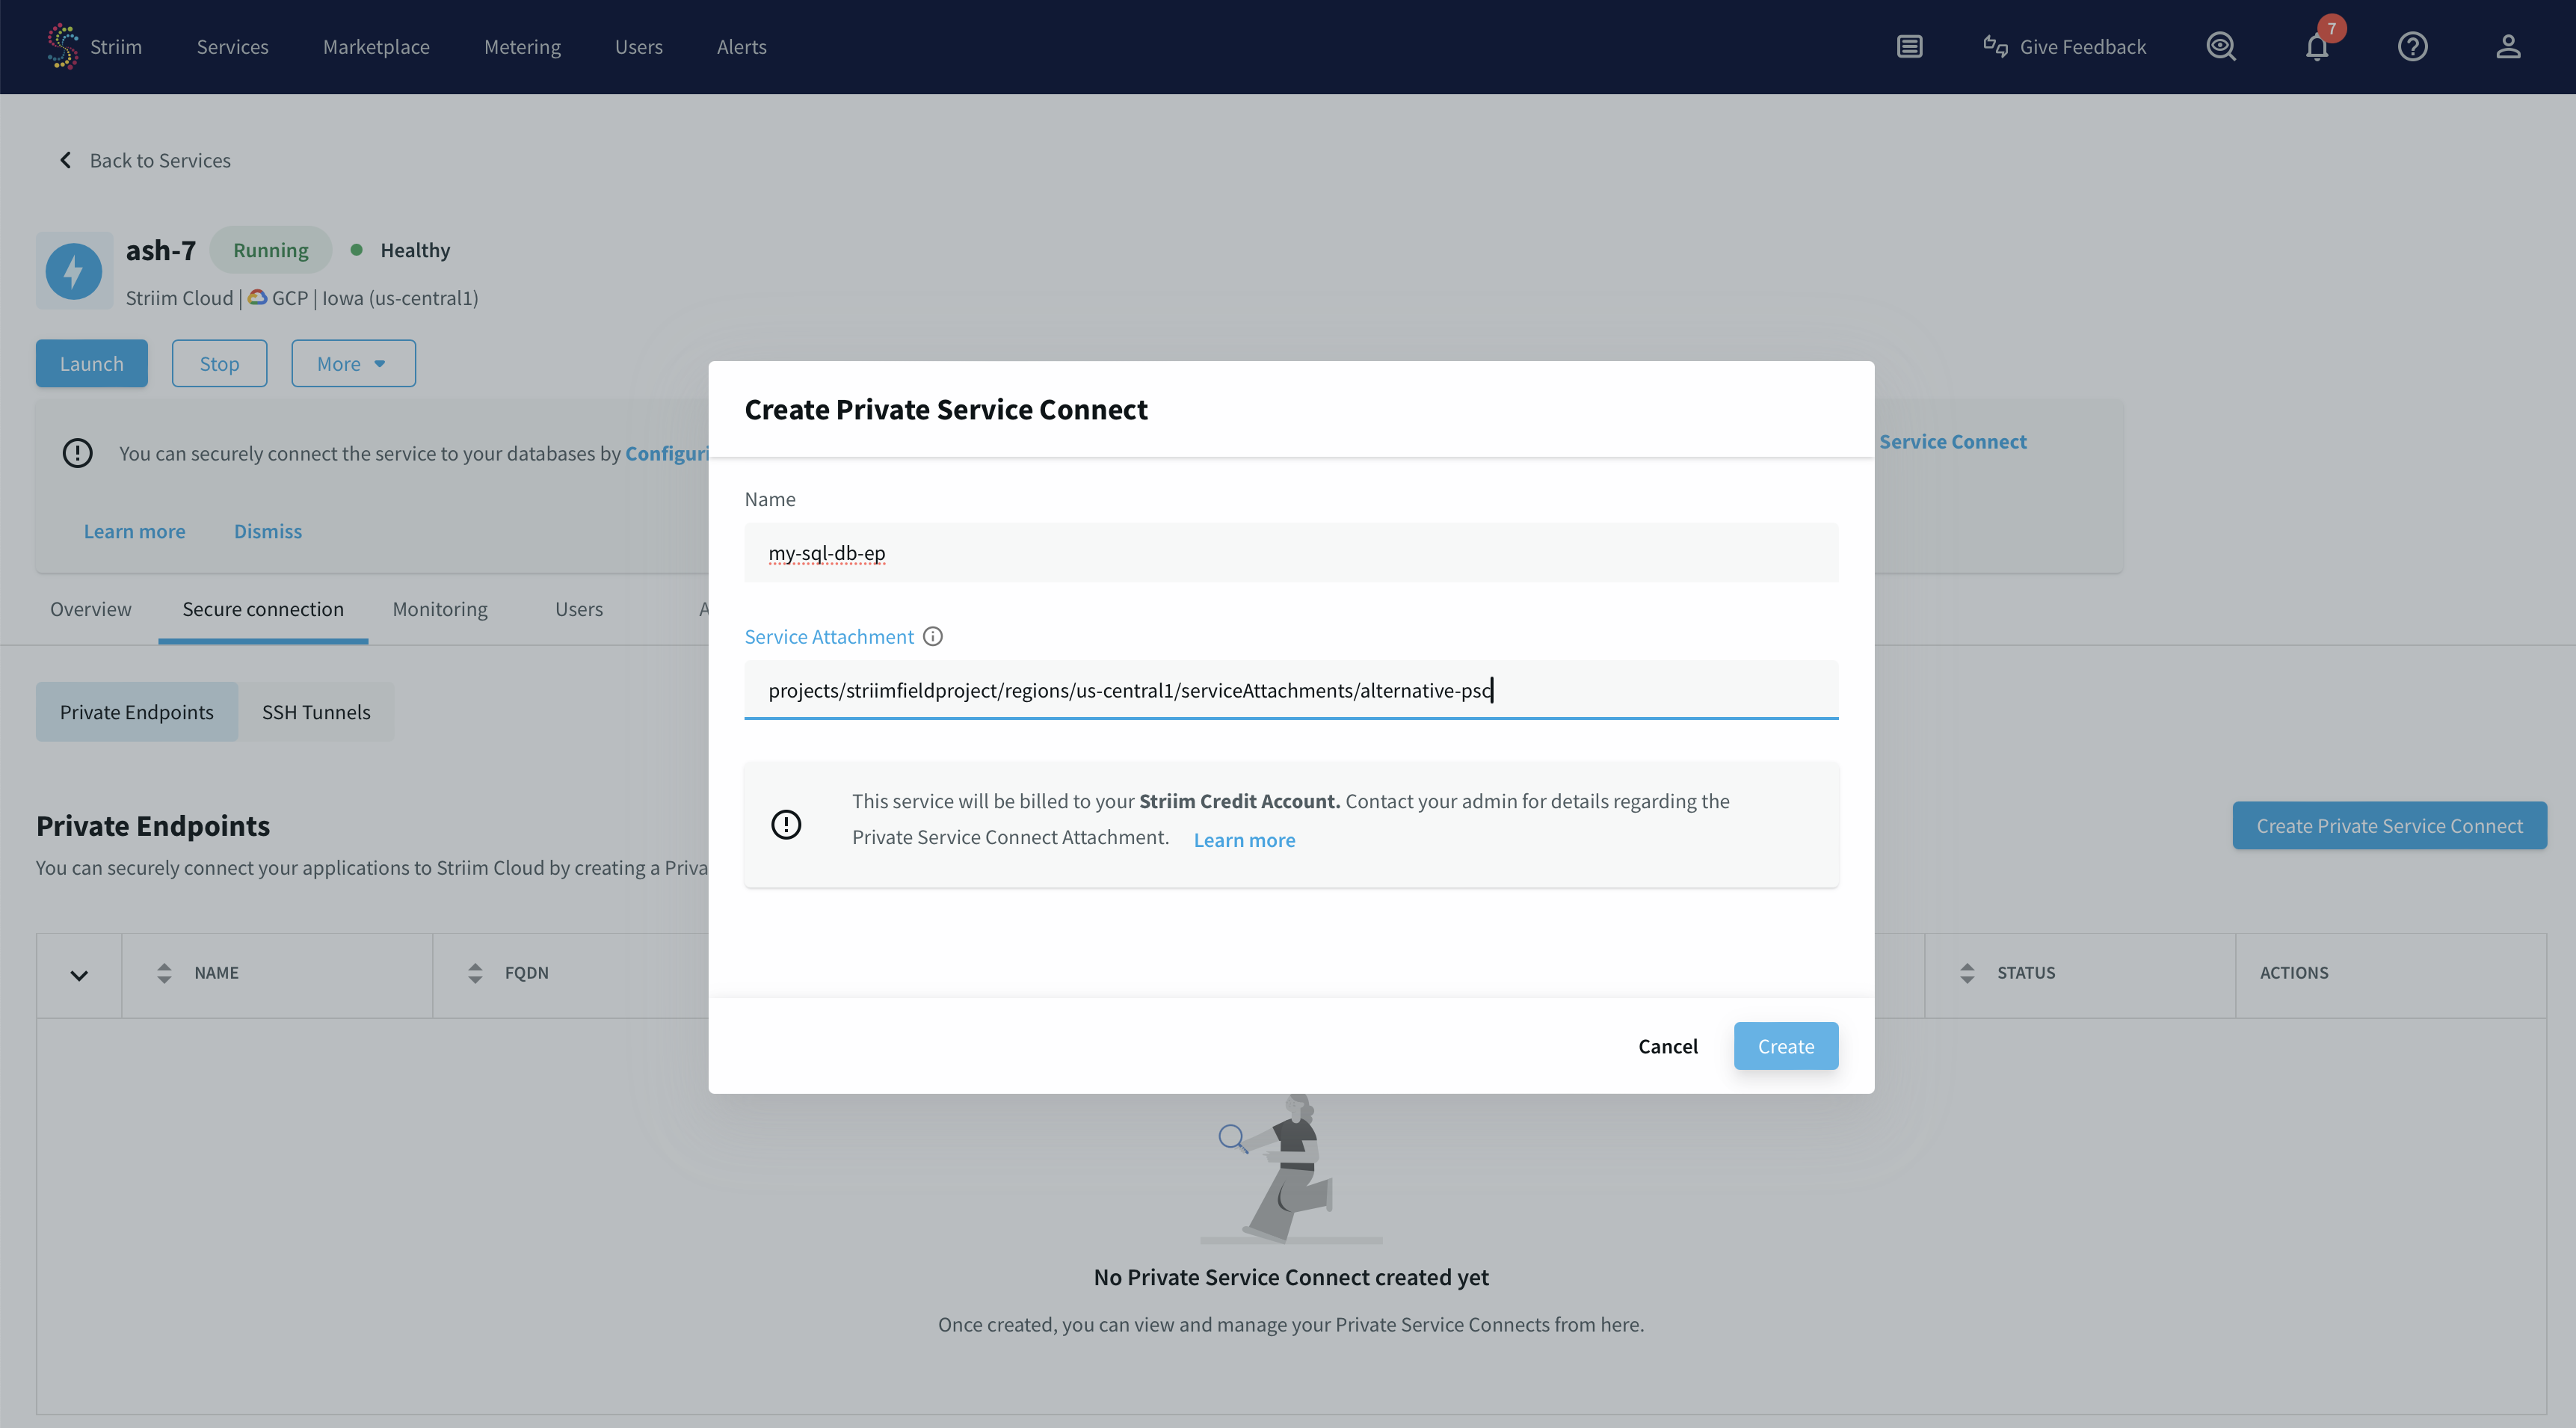
Use a unique name for this connection.
Paste the private service attachment URL that you copied previously and click Create. The attachment looks like:
projects/striim-tools/regions/us-central1/serviceAttachments/psc-demo-service
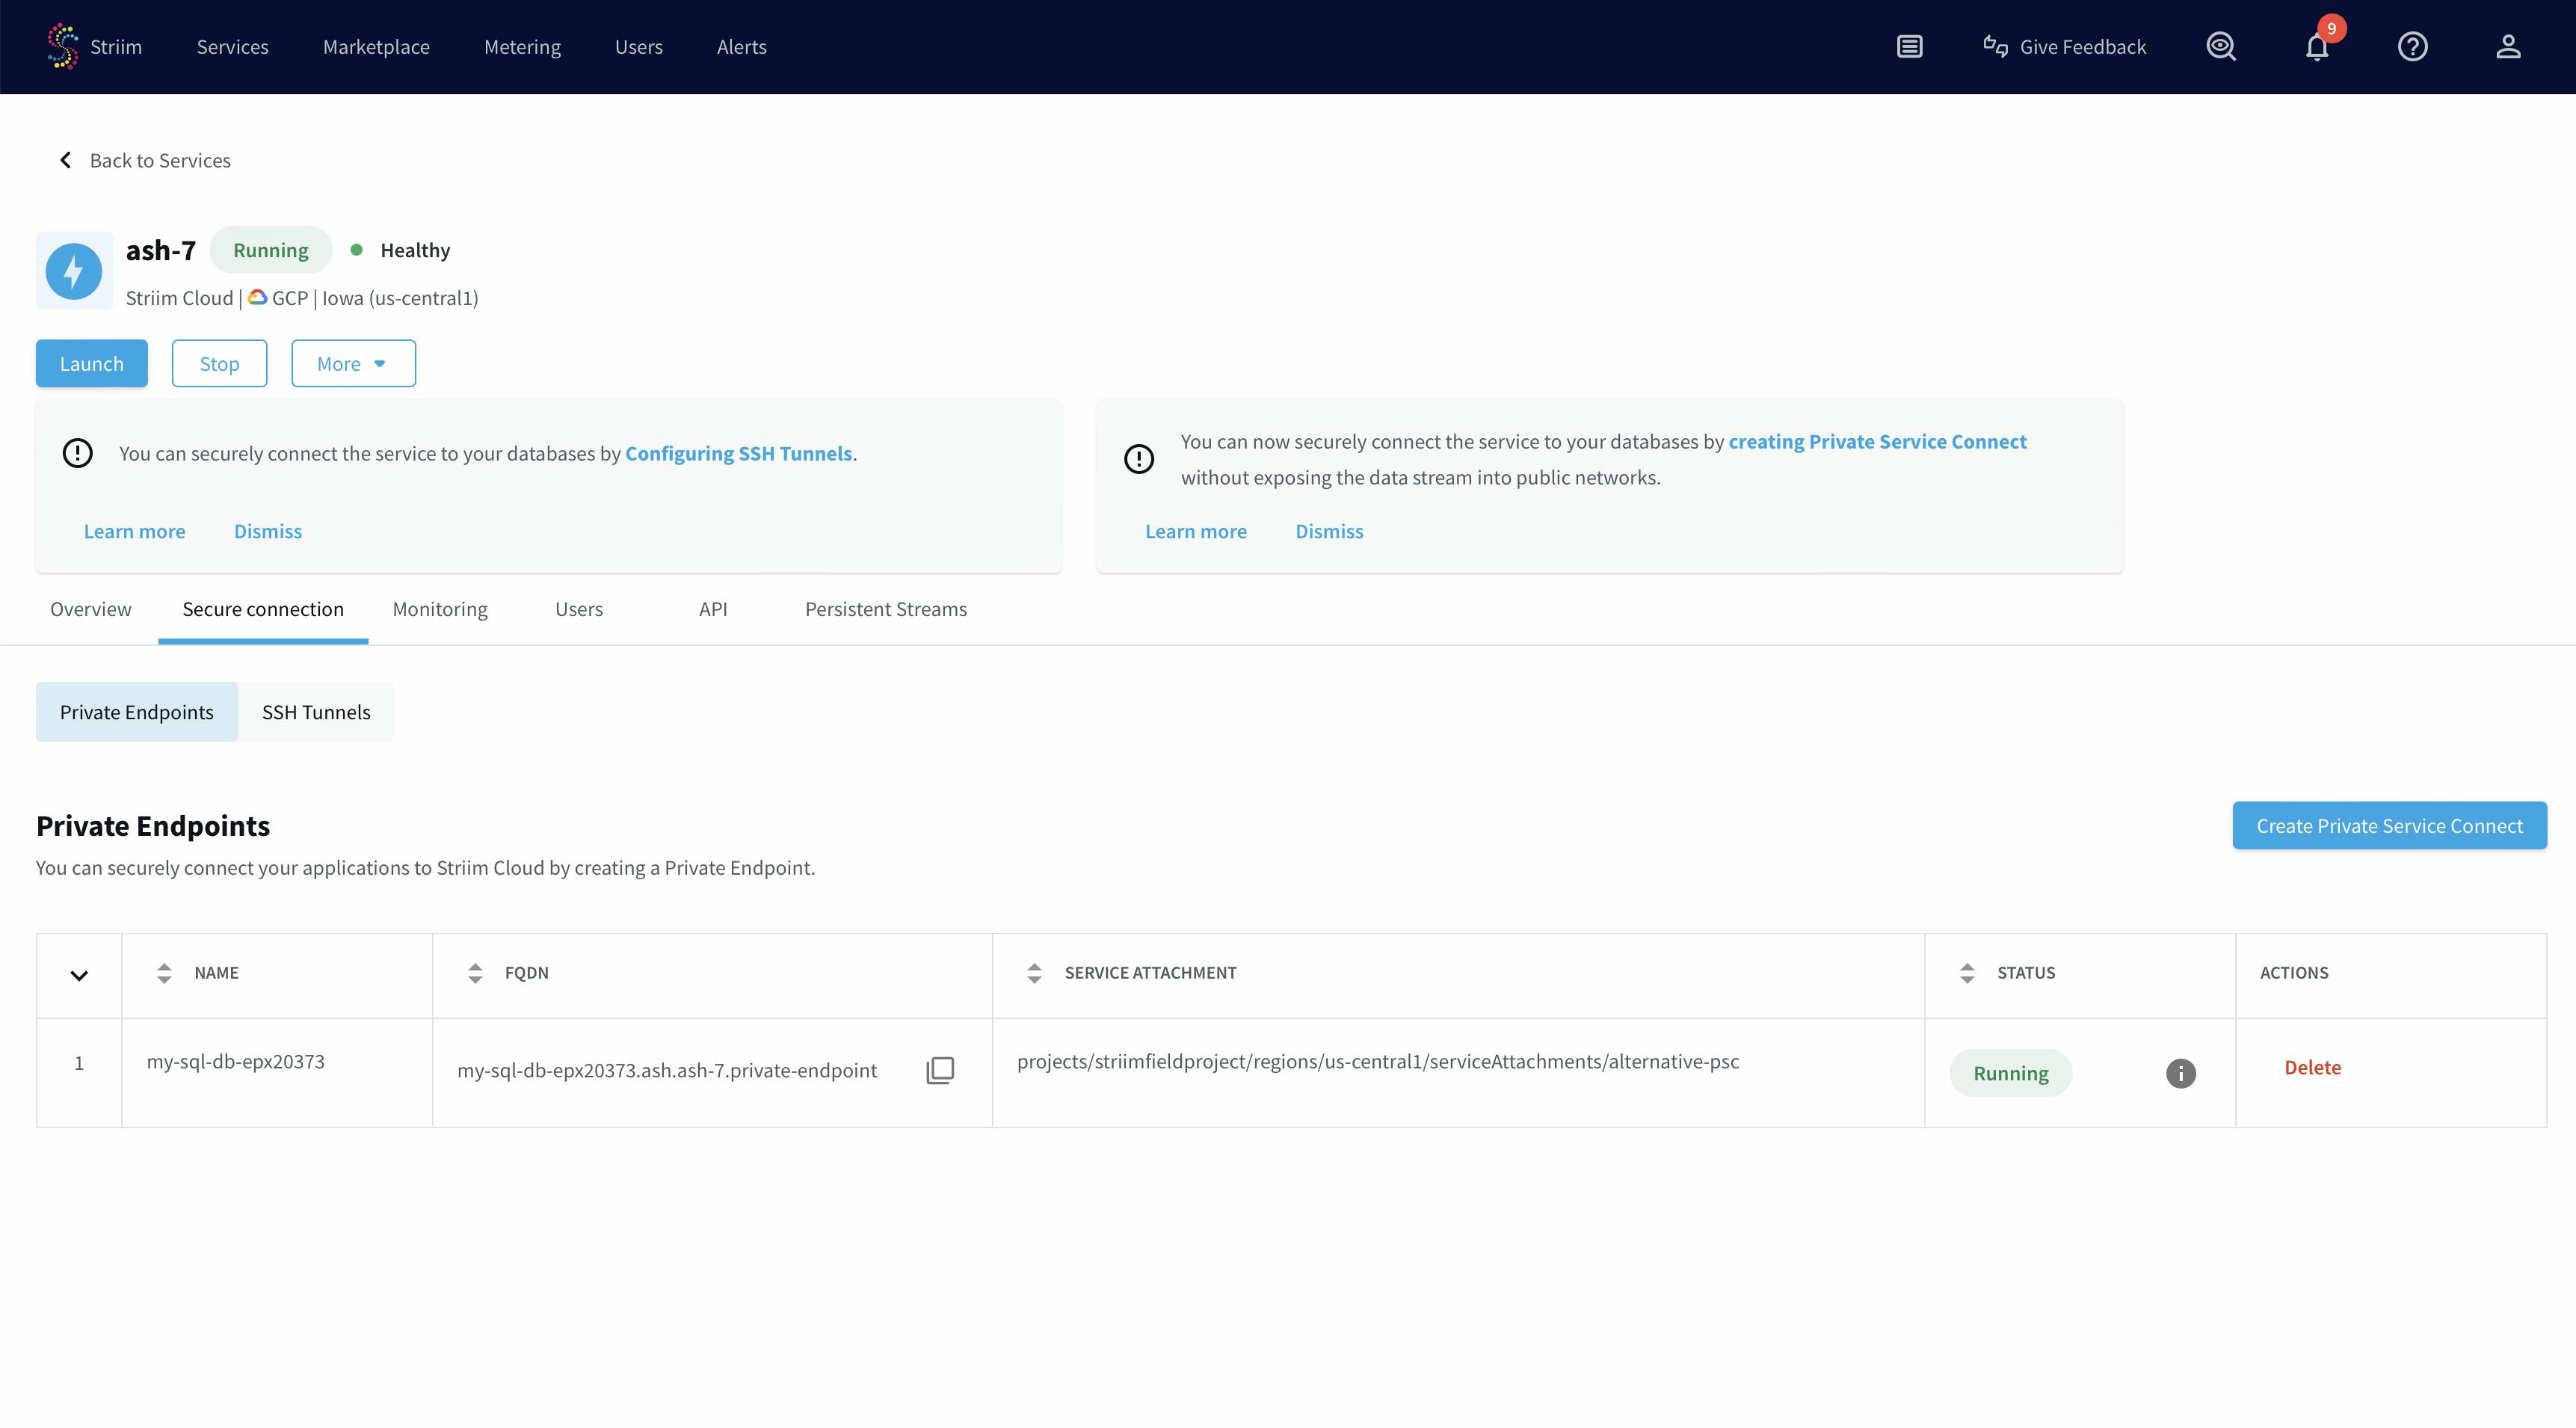
You have created a PSC connection endpoint. It is in a pending state until the request gets accepted.
Once the request gets approved from the PSC published service portal, the endpoint status will change to "Running".
Accept the PLS connection request in the customer project
The final step is to approve the connection request from your GCP project to complete the Private Service Connect setup.
Go to the Private service connect portal then published service
Select the published service.
You will see a request in the Pending state.
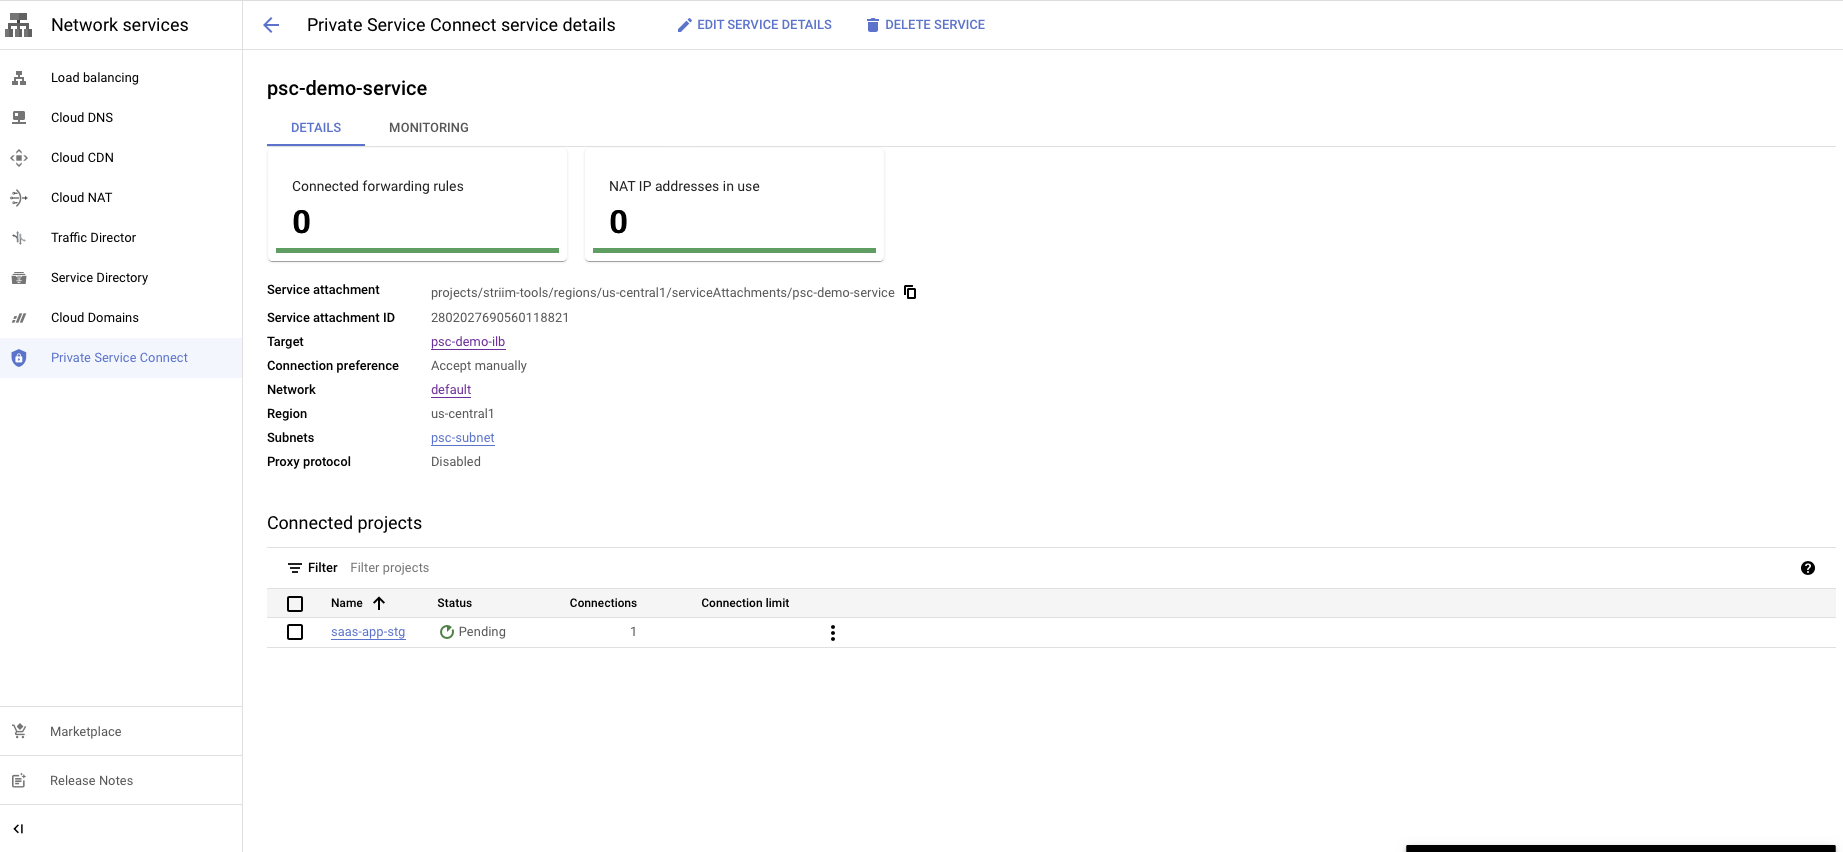
You have a choice to Accept or Reject the request.
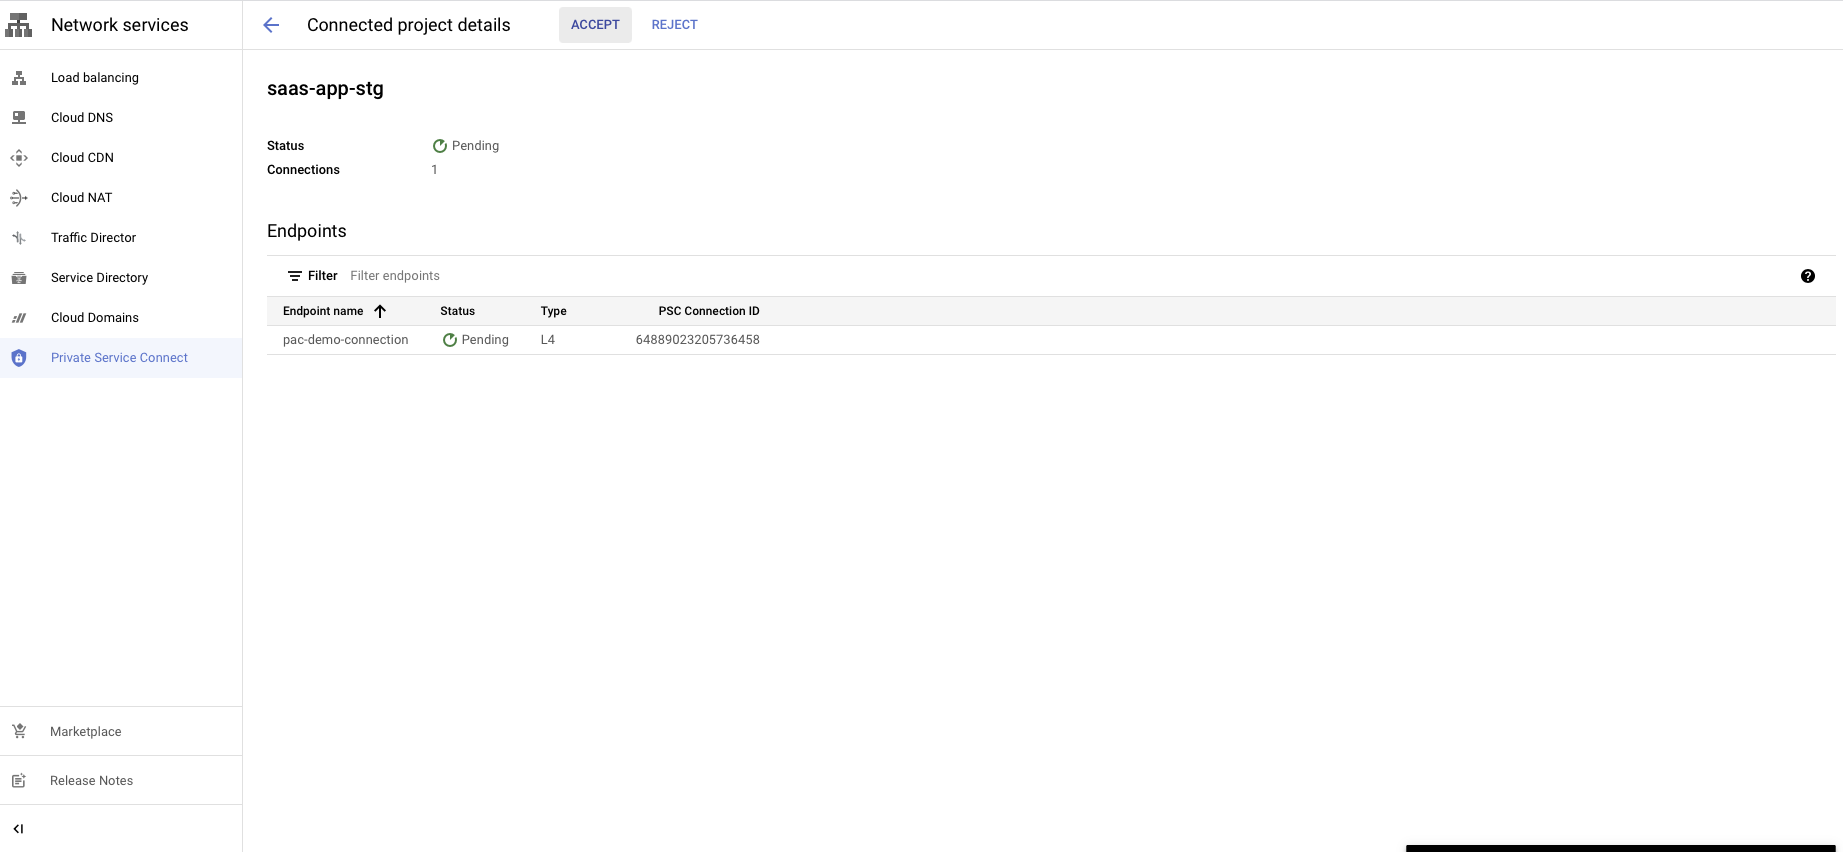
Reject will refuse the new connection request or disconnect the existing connection.