Connecting Striim Cloud on Azure to data services behind Striim Forwarding Agent
Note
This topic applies only to Striim Cloud on Azure (Enterprise and Mission Critical).
If you run a Striim Forwarding Agent on-premises to push data to Striim Cloud, you can also secure its connection via Private Link Service. In this case the agent initiates the connection (egress from your network), so no inbound firewall rules are needed. Private Link enforces a one-way connection from your agent to Striim Cloud.
For more information on the Striim Forwarding Agent, see the Using the Forwarding Agent and Striim Forwarding Agent installation and configuration topics.
Prerequisites
Before proceeding with the setup, ensure the following requirements are met:
An Azure subscription with a VNet (at least two subnets) in the same region as your Striim Cloud service.
A Site-to-Site VPN or ExpressRoute between your network and the Azure VNet.
The agent must be able to reach the Azure VNet on TCP ports 30000, 30002, 30003, and 30010-30200.
Admin rights to create resources in the Azure subscription.
Your Striim Cloud instance running in the same region as the Azure VNet.
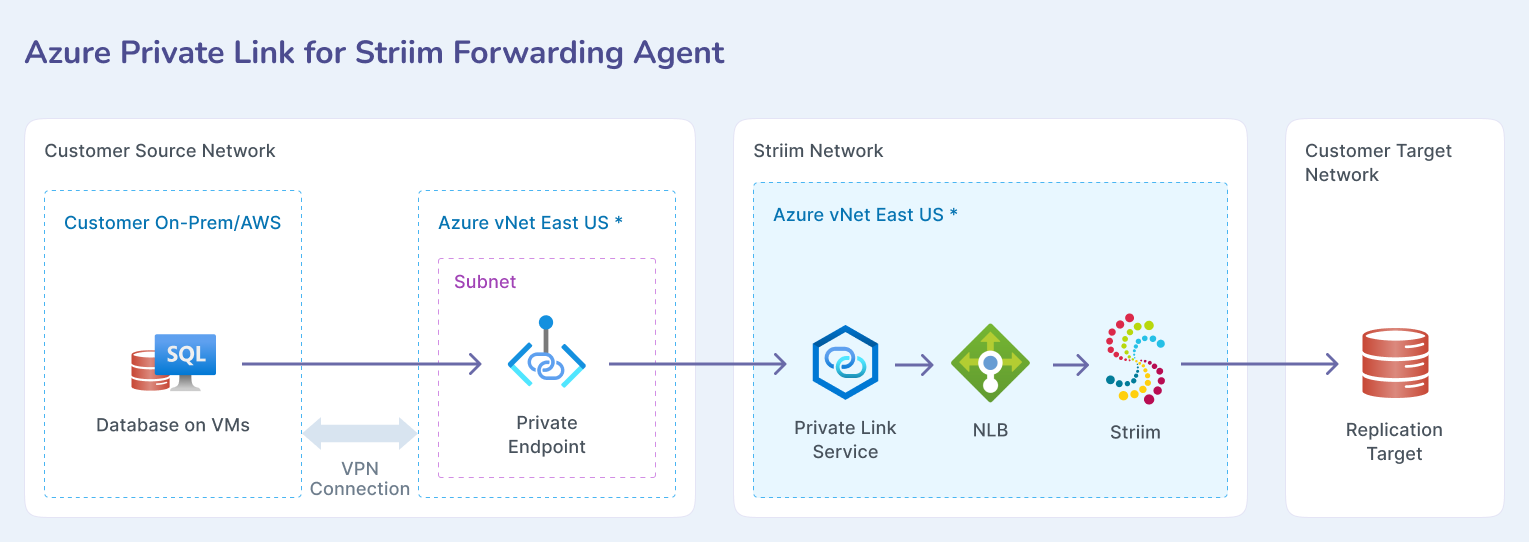
Setting up Azure Private Link for the Striim forwarding agent
Performing these steps ensures that your Striim forwarding agent securely connects to Striim Cloud over Azure Private Link, eliminating exposure to the public internet while maintaining a private, secure, and scalable connection.
Submit a request for Private Link access
Submit a request via Zendesk to enable Striim Forwarding Agent connectivity.
For enhanced security, provide your Azure Subscription ID to restrict access to requests originating from that subscription.
Example Azure Subscription ID:
123456h9-78a2-9012-3bca-45bcde67fgh8
Striim will provision the Private Link Service (PLS) and provide a PLS alias.
Example PLS alias:
identifier-1234-psc.5abc56d7-defg-8h90-1a23-4abcdefghij567h8.eastus2.azure.privatelinkservice
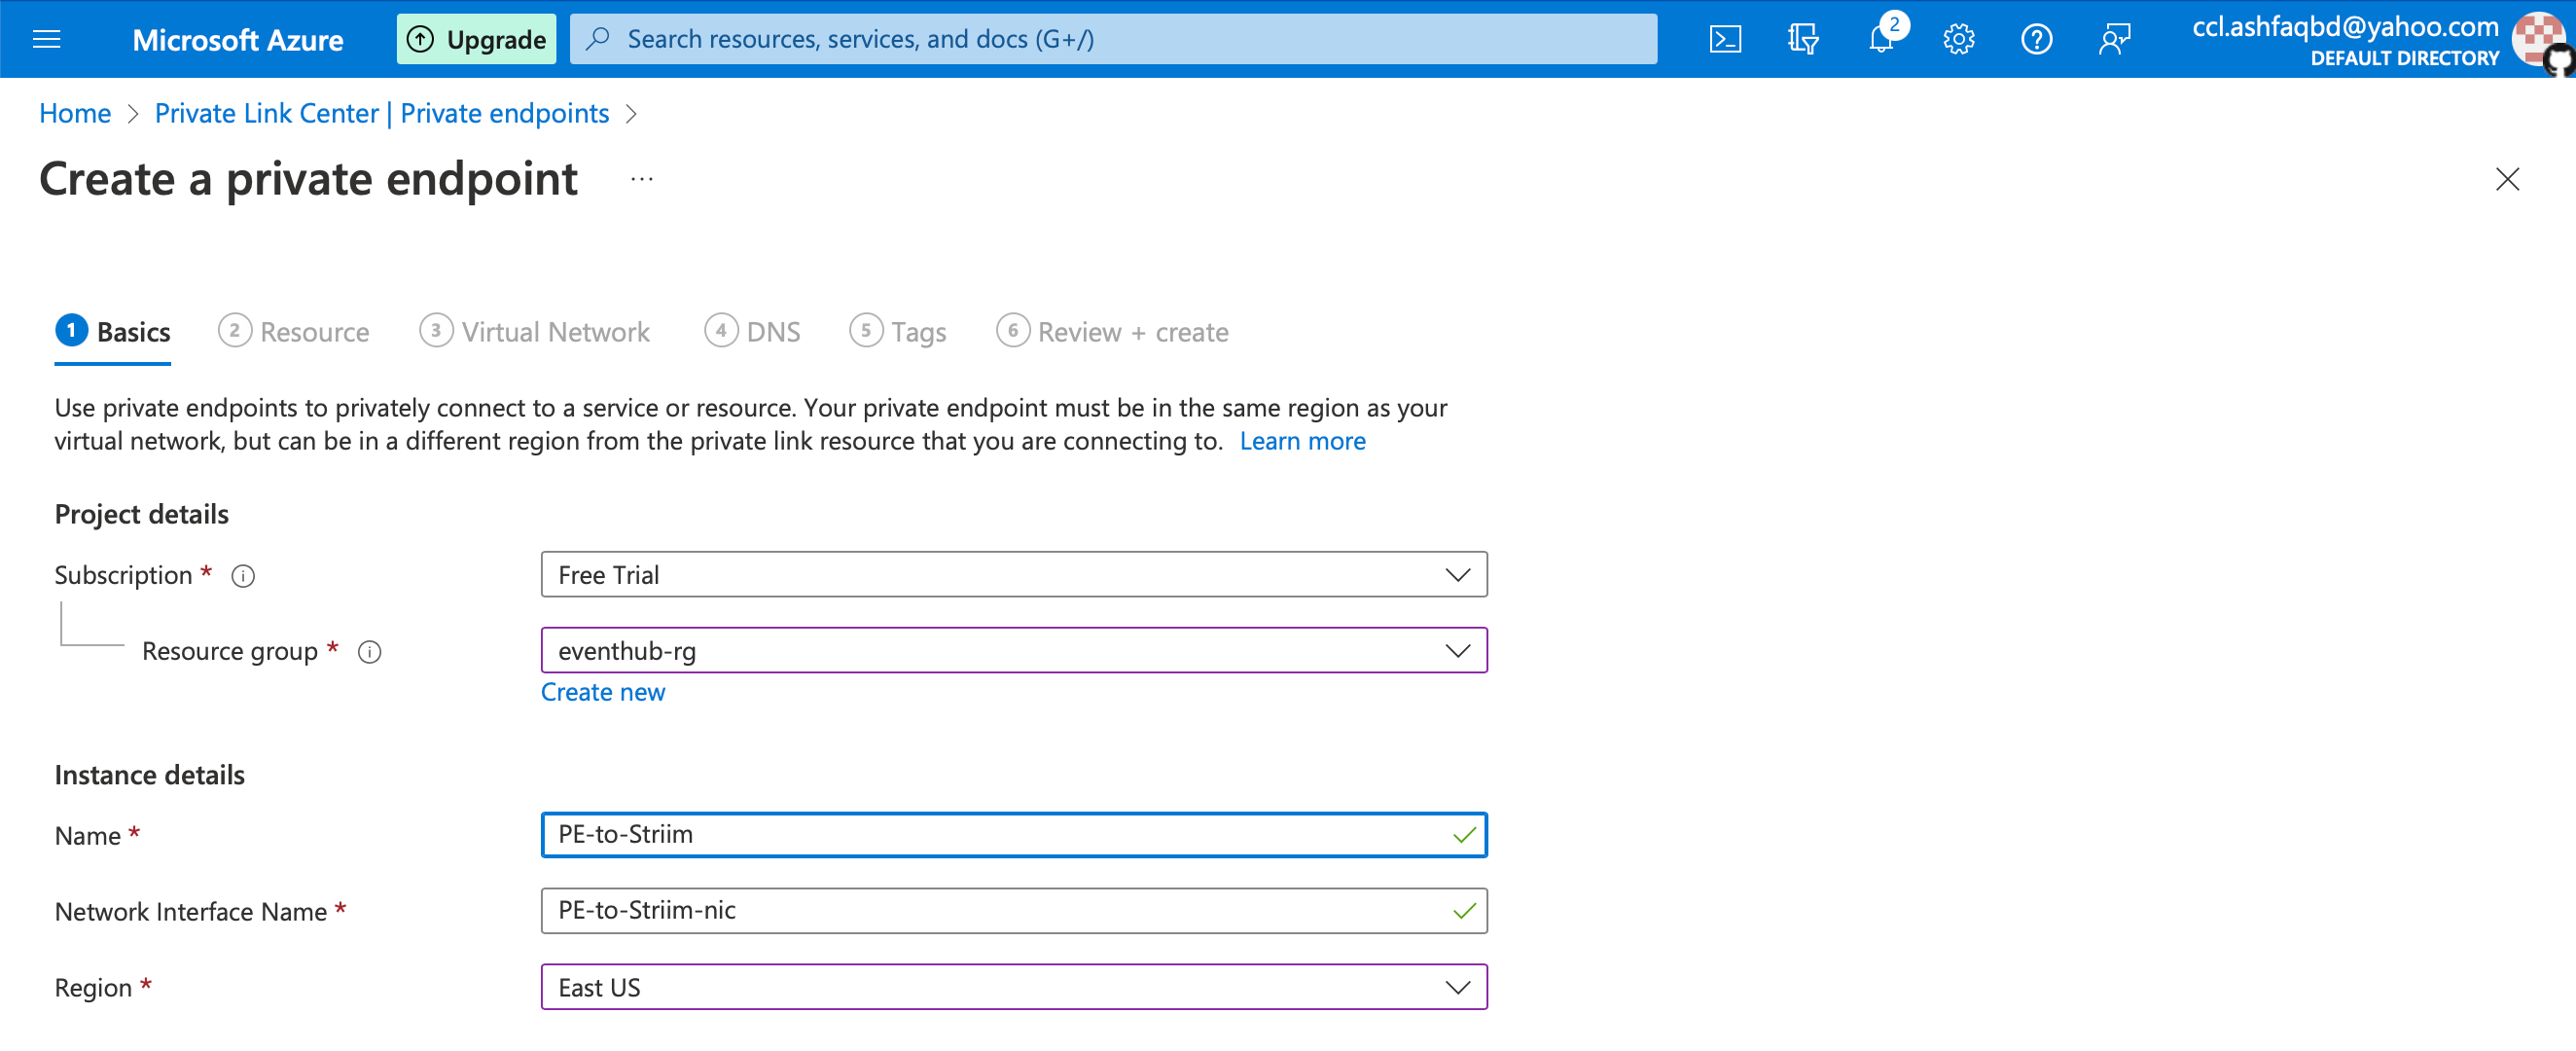
Create a private endpoint in Azure
Log in to the Azure Portal.
Search for "Private Endpoints" and choose Create.
Configure the basic settings:
Subscription: Choose the subscription associated with the site-to-site VPN vNet.
Resource Group: Select an existing resource group or create a new one.
Name: Assign a meaningful name to the private endpoint.
Network Interface Name: Leave as default.
Region: Select the region matching the site-to-site VPN vNet.
Click Next: Resource.
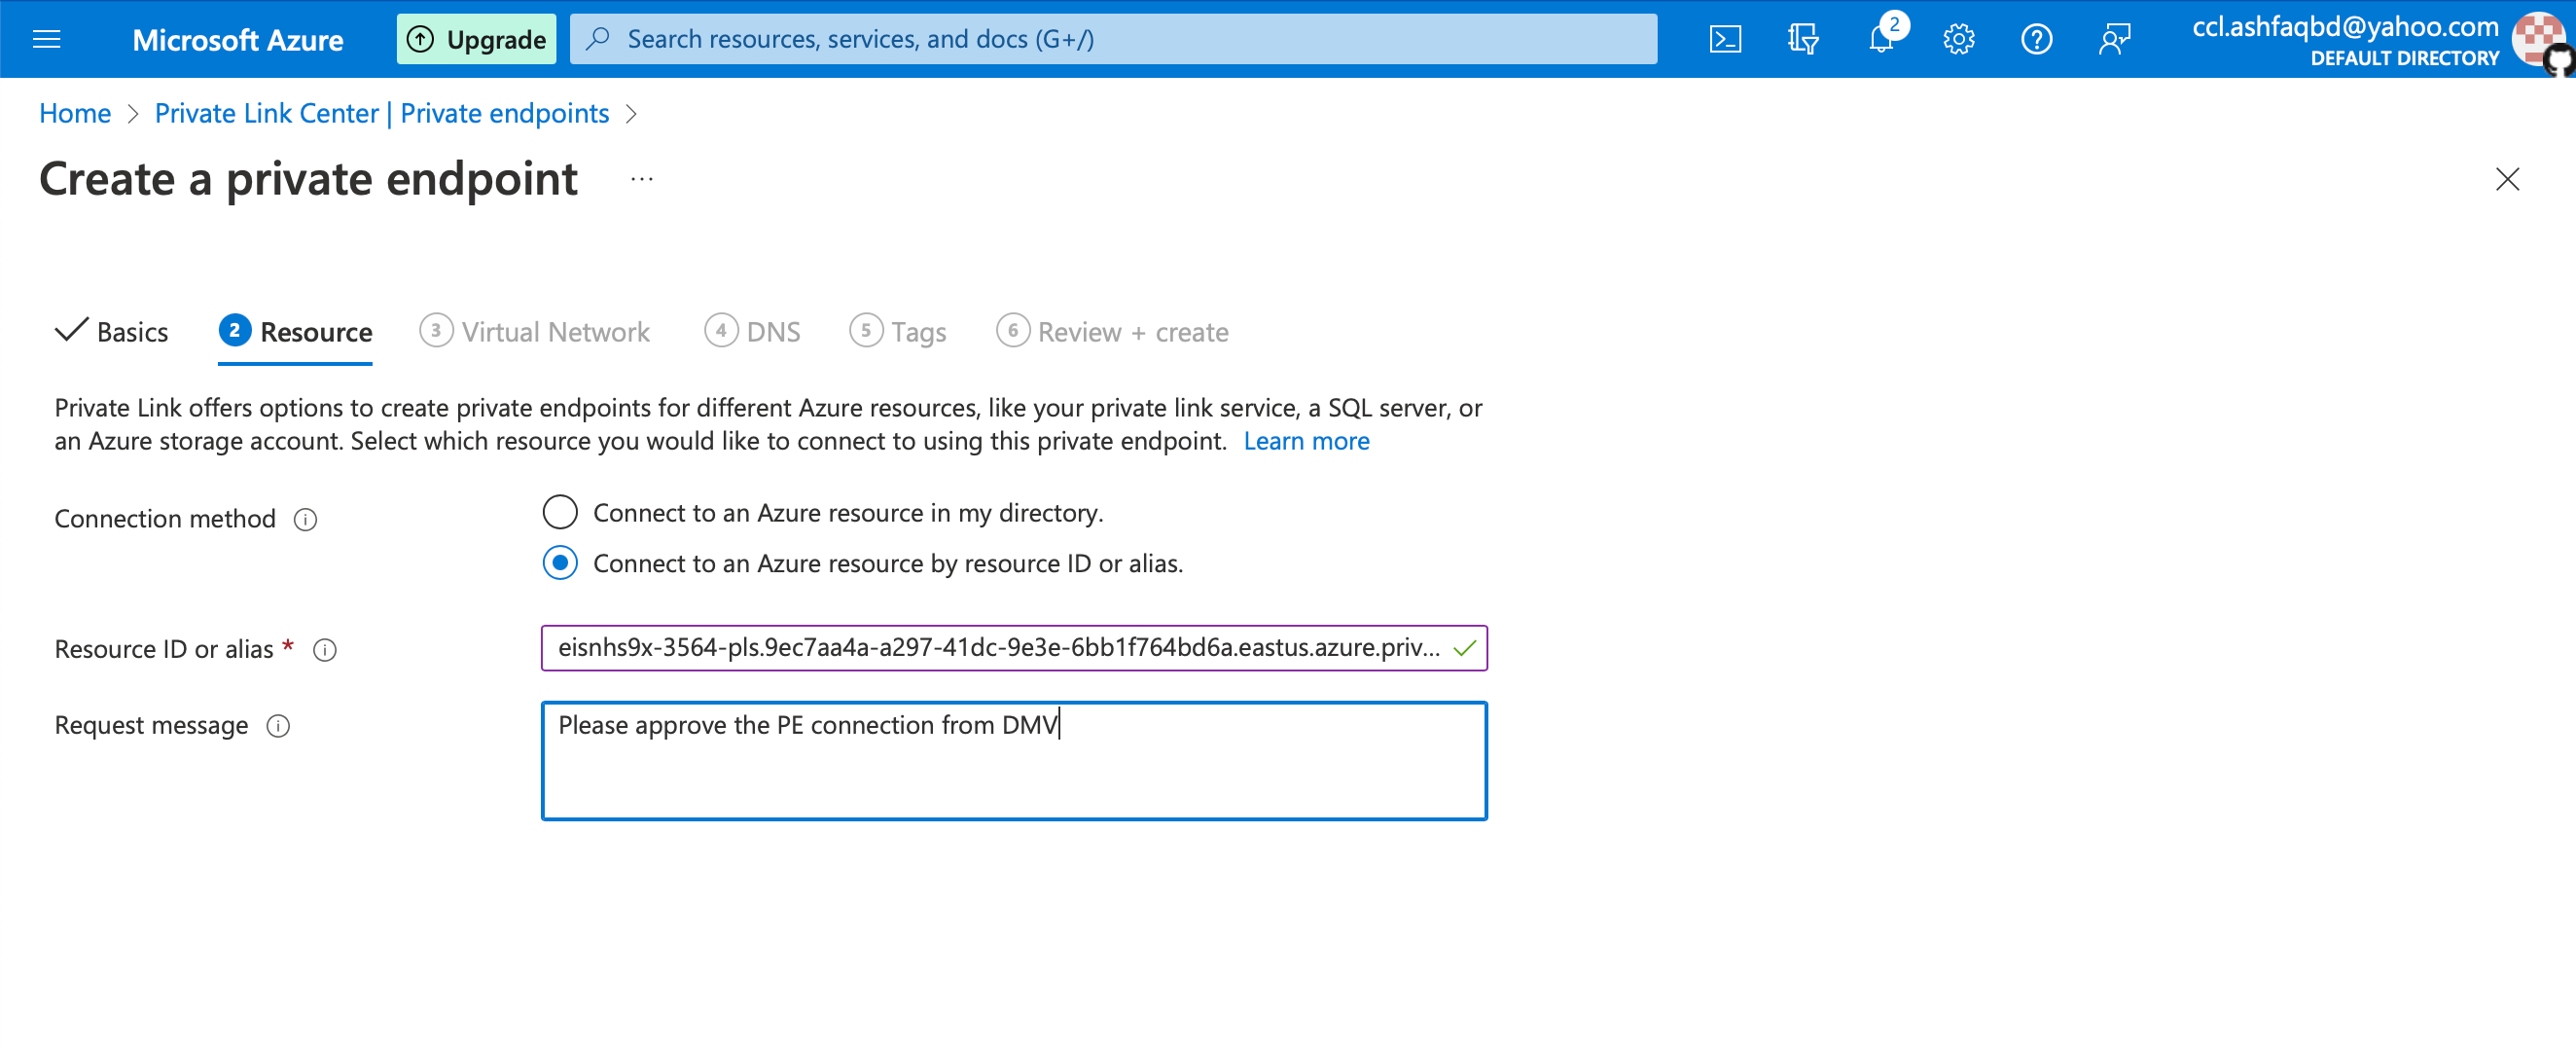
Configure the resource settings
Connection Method: Select "Connect to an Azure resource by resource ID or alias".
Enter PLS Alias: Use the PLS alias provided by Striim.
Request Message: Add a note for Striim administrators to review.
Click Next: Virtual Network.
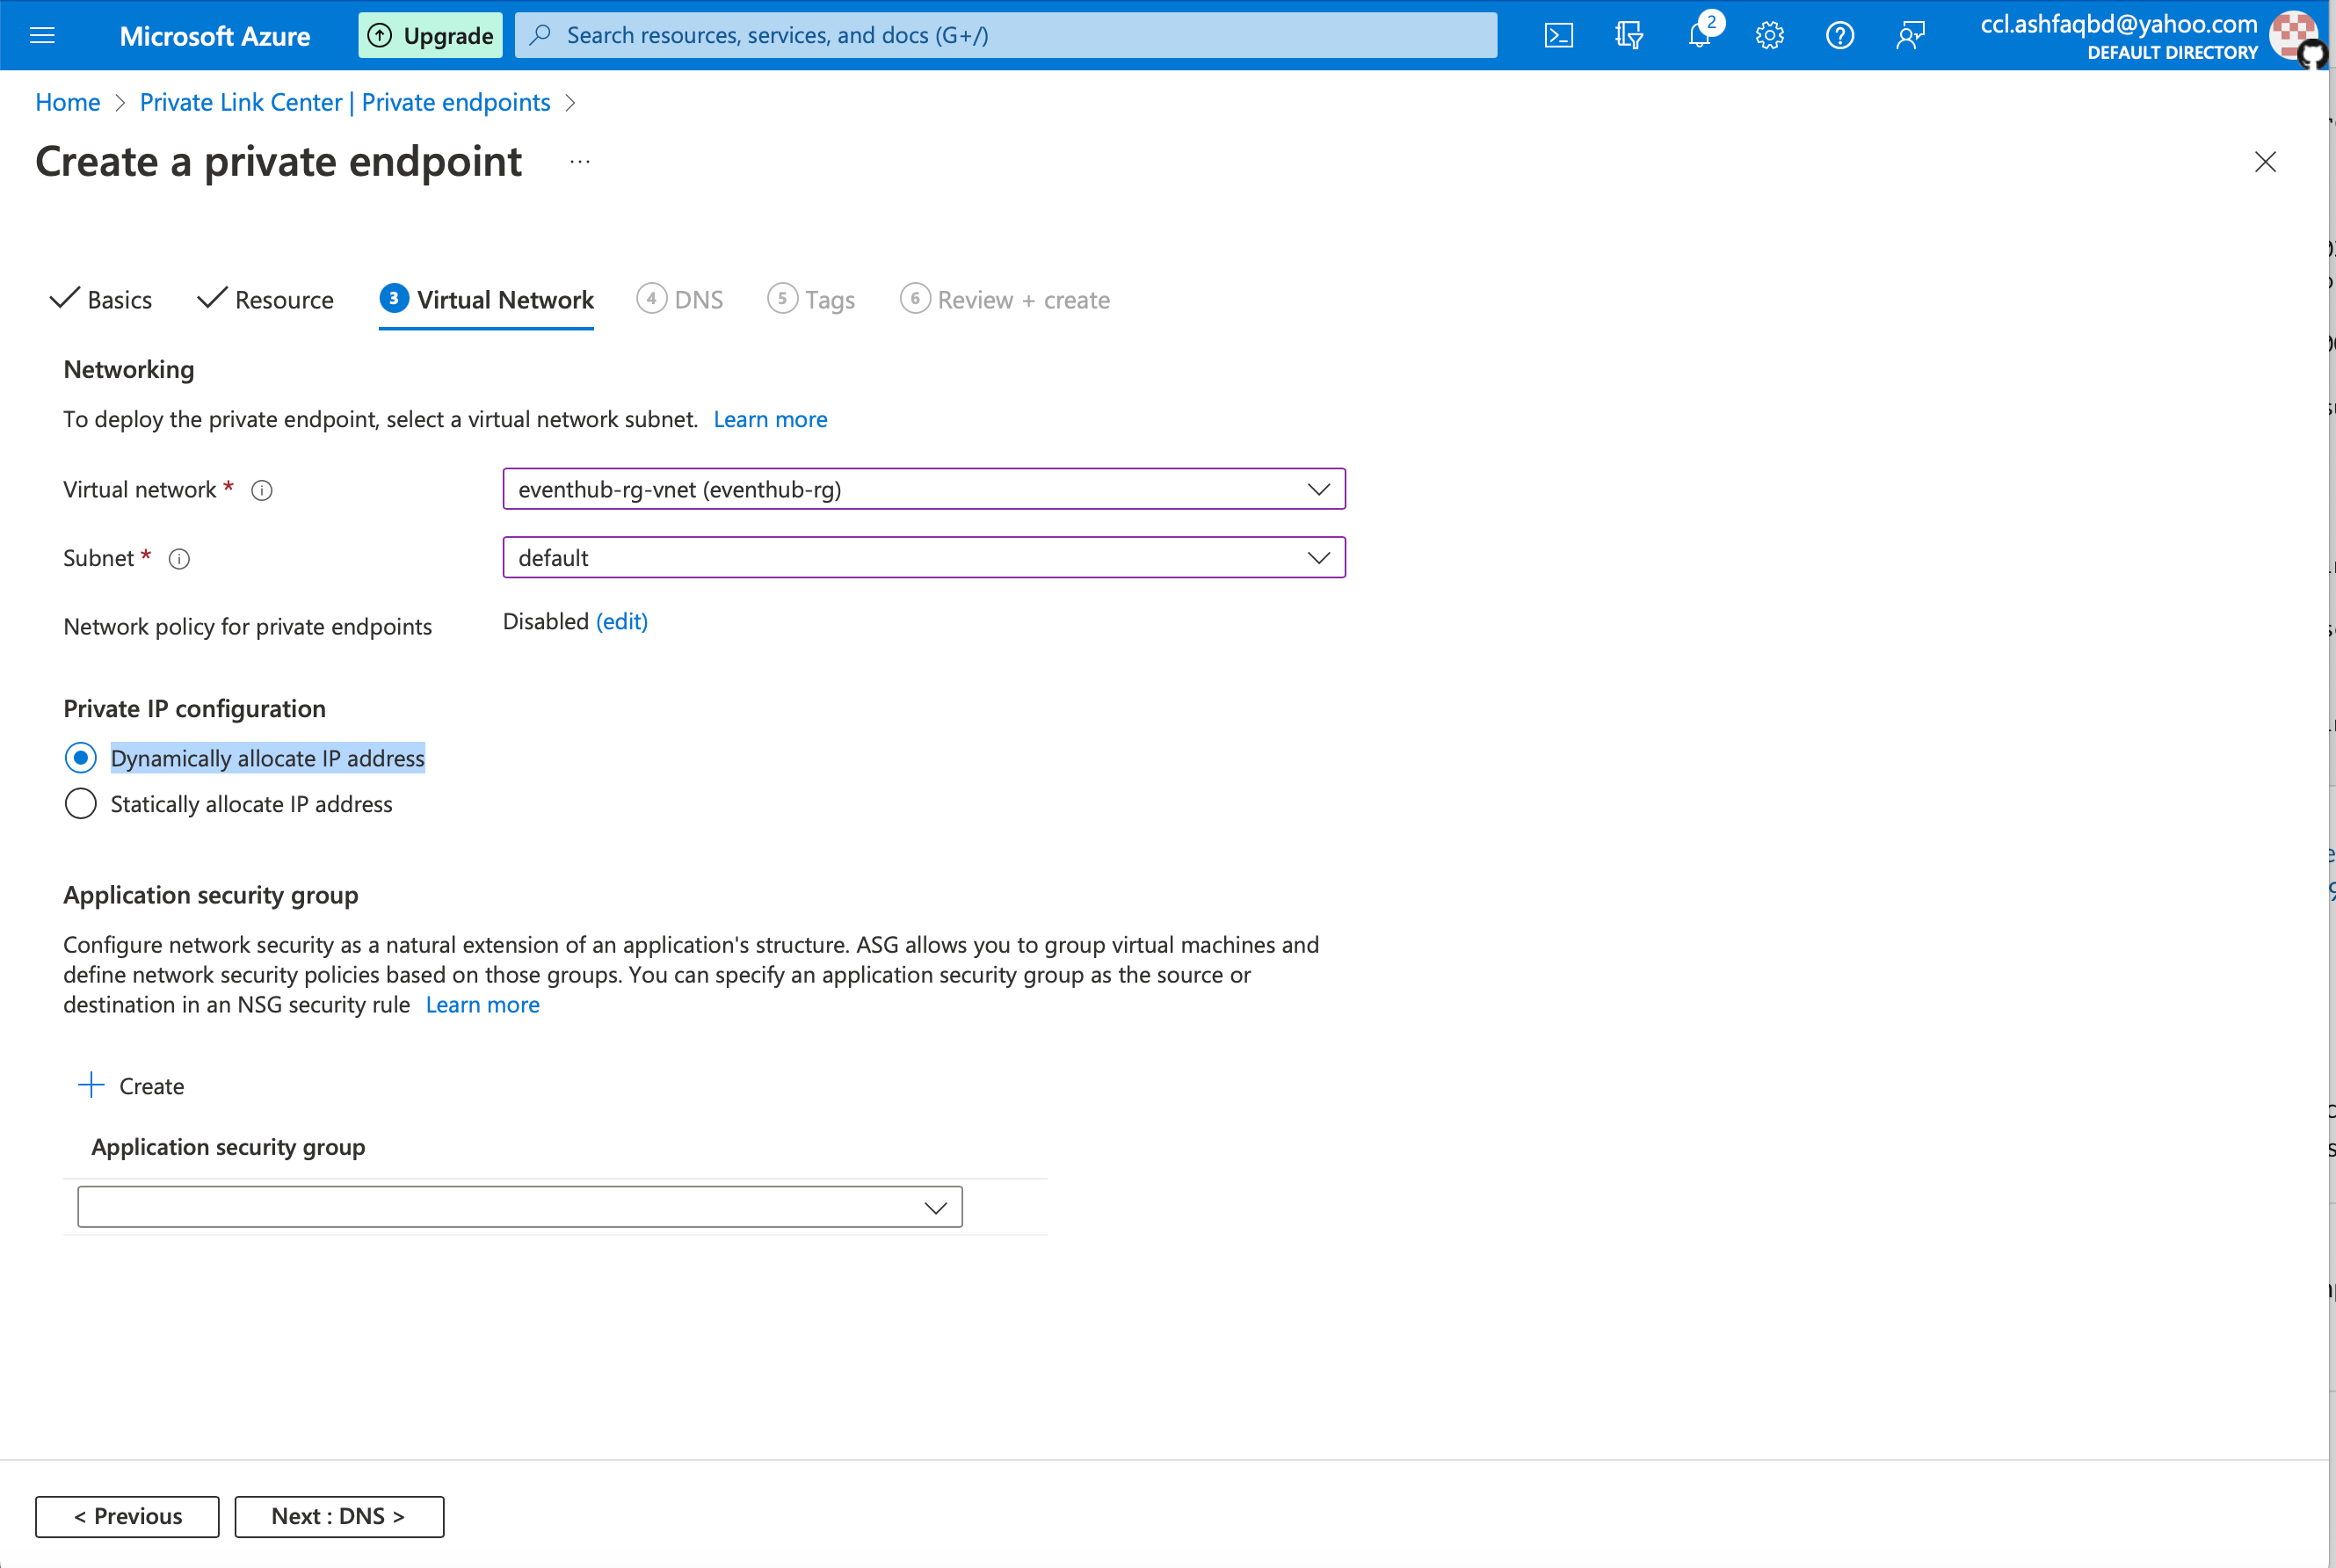
Configure the virtual network settings:
Virtual Network: Choose the vNet configured for this setup.
Subnet: Select a subnet within the vNet.
Private IP Configuration: Leave as default (dynamic allocation).
Click Next: DNS.
Configure the DNS settings:
Leave as default (no DNS settings are required for this setup).
Click Next: Tags (optional: add tags for resource management).
Click Next: Review + Create.
Click Create to deploy the private endpoint.
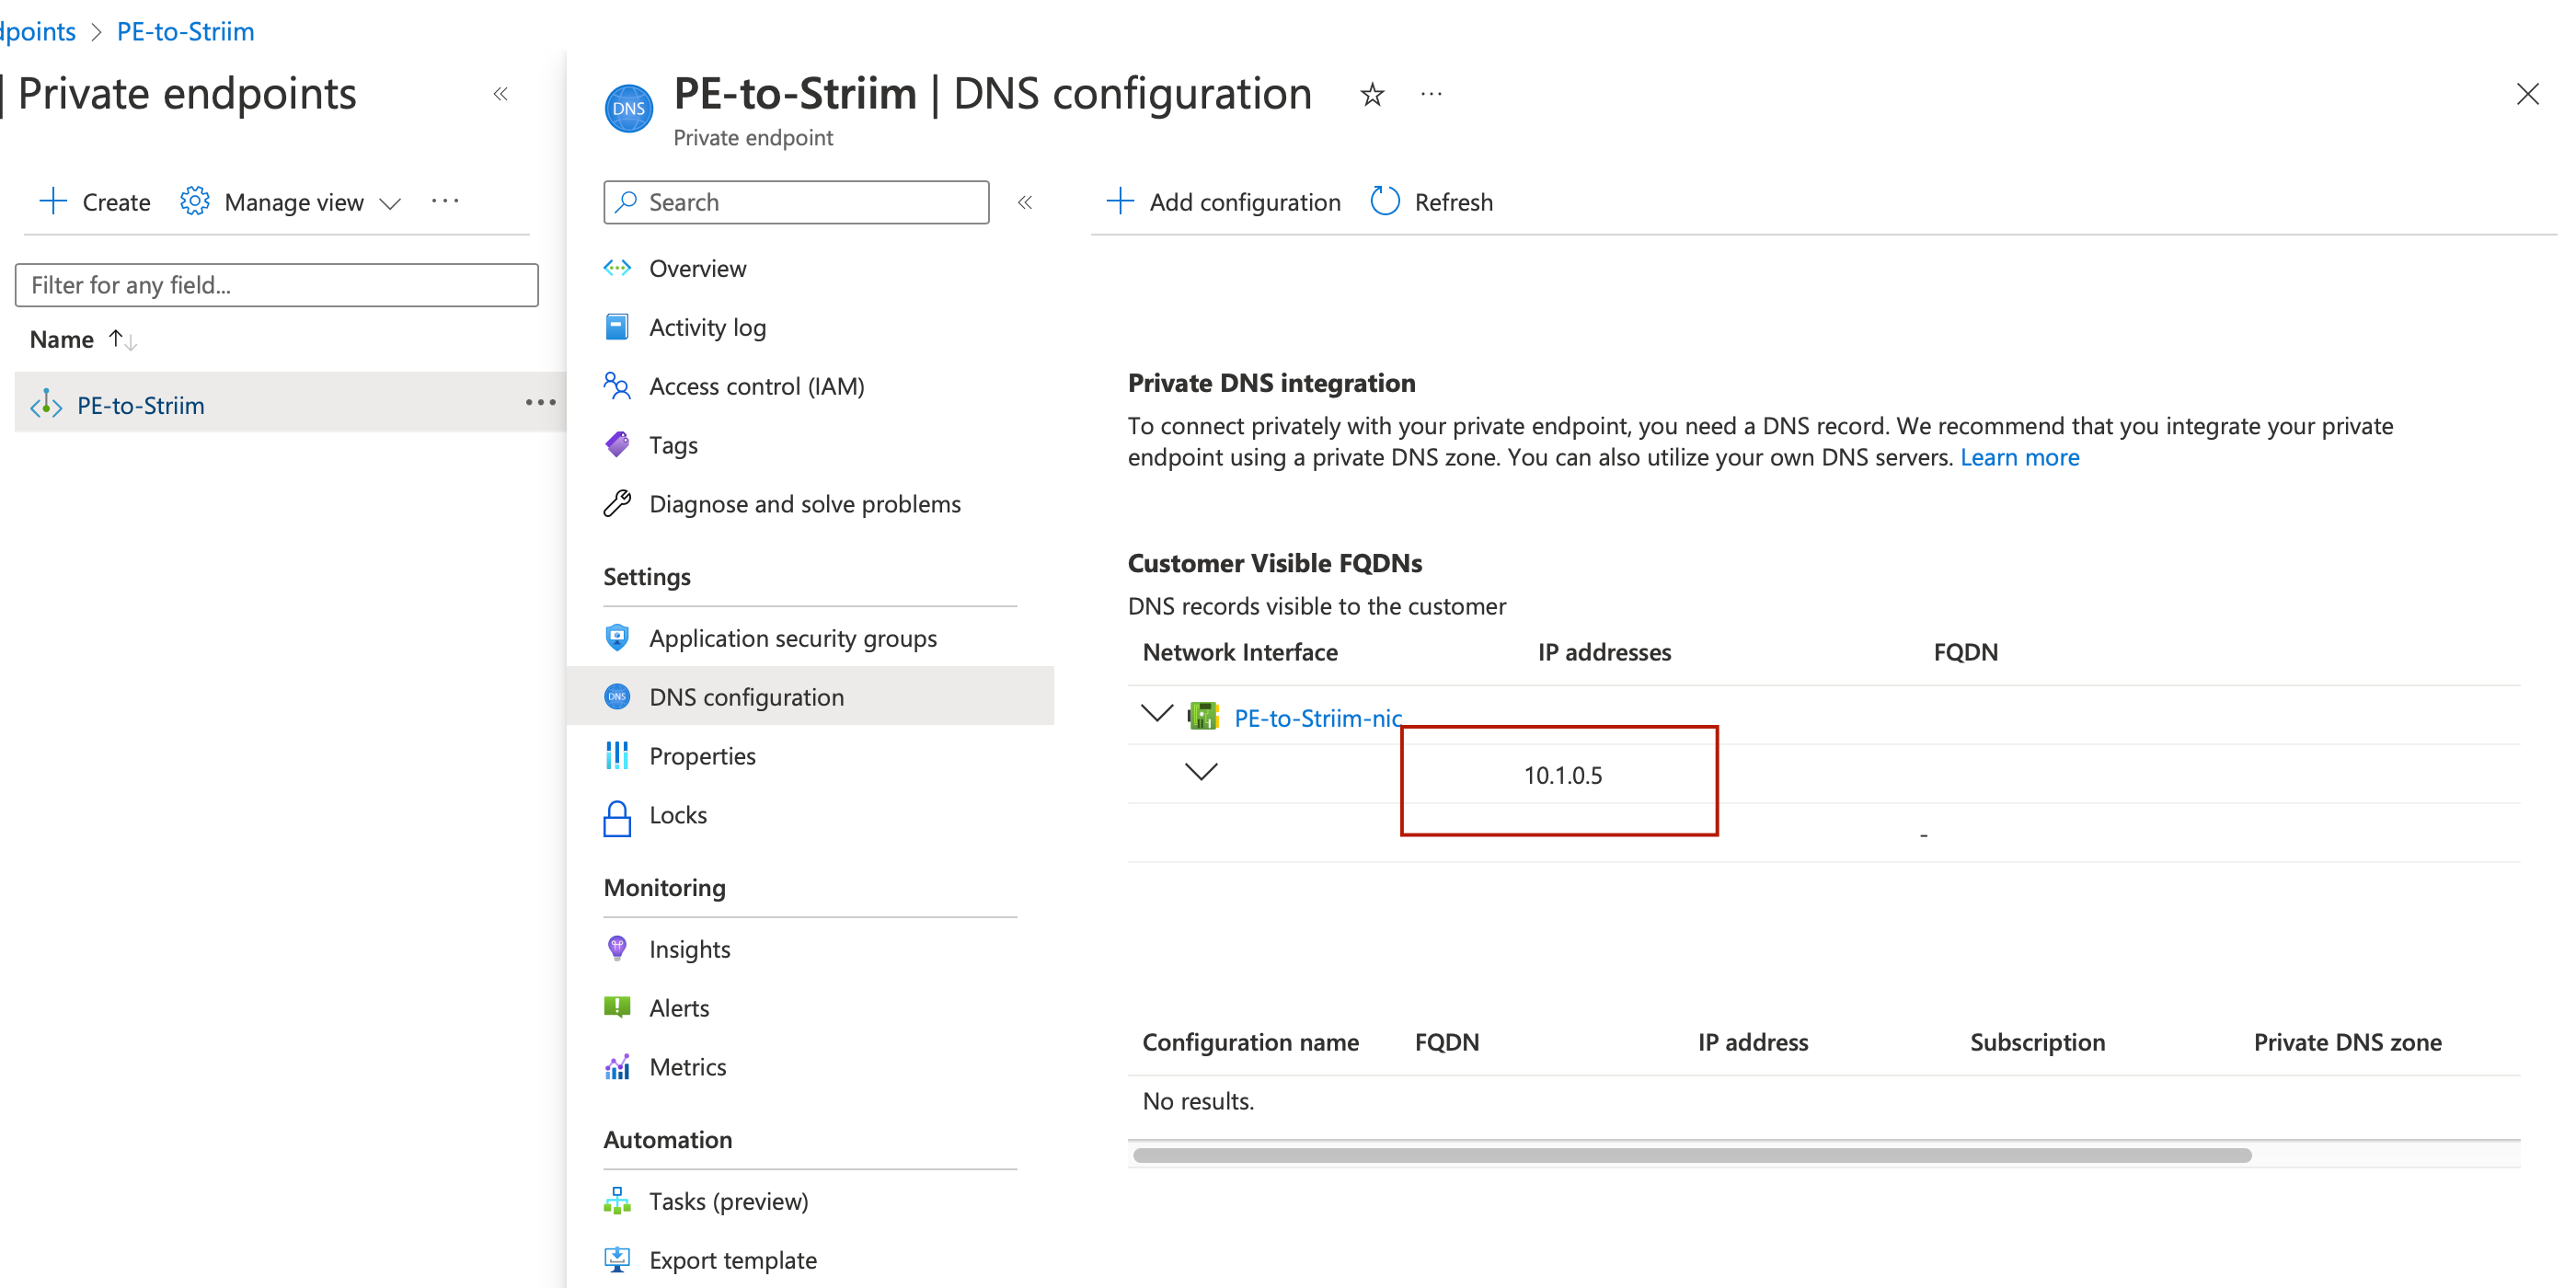
Retrieve the private IP address for the Striim forwarding agent
Once the private endpoint is successfully created, perform the following steps:
Navigate to the Private Endpoints section in Azure.
Select the newly created private endpoint.
Under Settings, choose DNS Configuration.
Locate the Private IP Address assigned to the private endpoint.
Use this Private IP Address in the Striim Forwarding Agent configuration.