Connecting Striim Cloud on AWS to managed data services
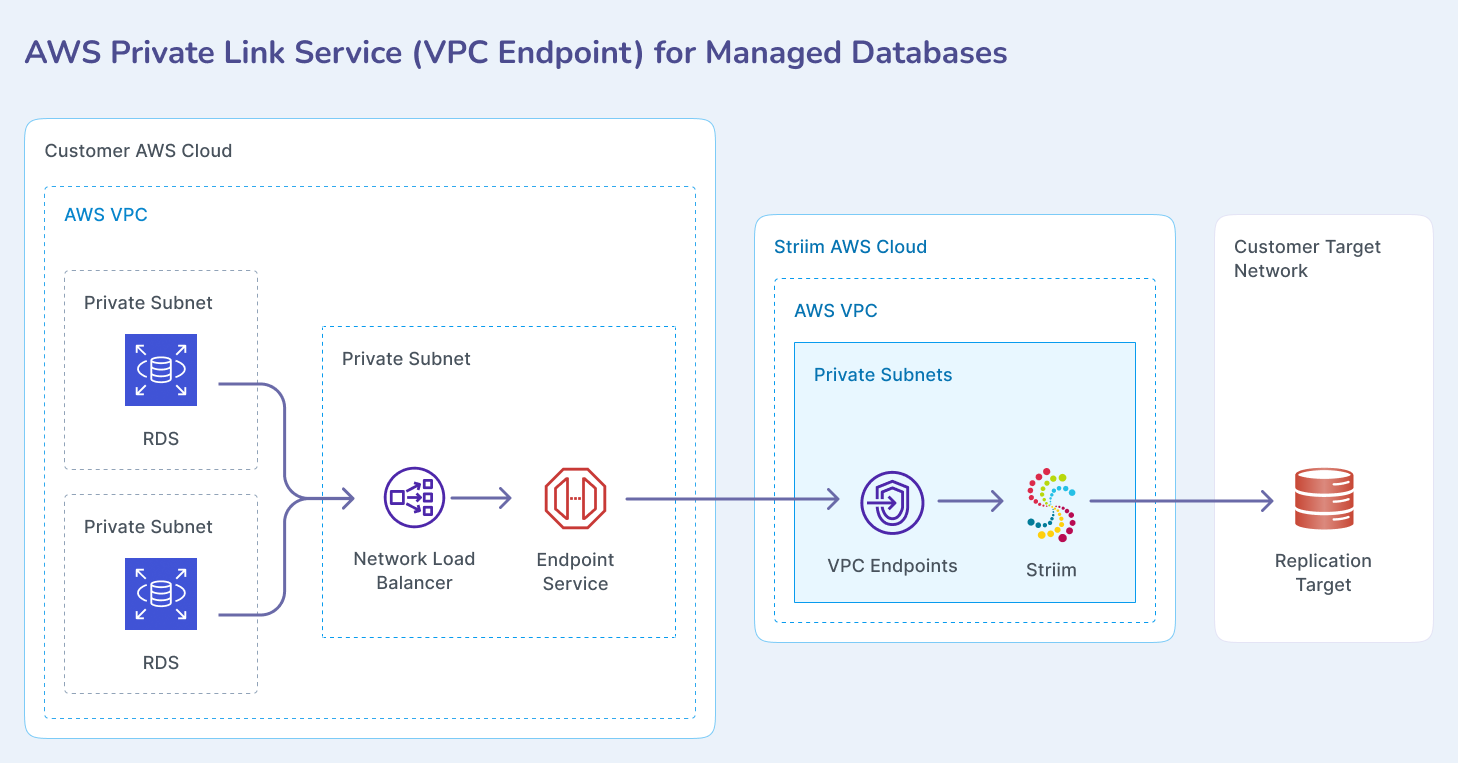
This topic describes how to enable private (non-public) connectivity from Striim Cloud hosted on AWS to customer databases hosted in AWS using AWS RDS or other managed database services. The connection leverages the AWS VPC Endpoint Service to ensure secure, private communication between Striim Cloud and your managed data sources without exposing traffic to the public internet.
Prerequisites
A VPC network with at least four subnets in four different availability zones.
AWS IAM Administrator role for the user.
At least one RDS database in the same VPC.
AWS account number that is hosting the Striim service. Contact your Striim team to obtain this account number.
Find the database private IP address
You must obtain the private IP address of your RDS database instance to configure the target group.
In the RDS console, select your database cluster.
In the Connectivity and Security section, copy the Writer Endpoint name. This is a fully qualified DNS name (FQDN).
From an EC2 instance running in the same VPC network, use nslookup to find the IP address associated with the FQDN:
$ nslookup striim-demo-database.cluster-cpo3dhu4tzyc.us-east-1.rds.amazonaws.com
Server:         10.0.0.2
Address:        10.0.0.2#53

Non-authoritative answer:
striim-demo-database.cluster-cpo3dhu4tzyc.us-east-1.rds.amazonaws.com    canonical name = striim-demo-database-instance-1.cpo3dhu4tzyc.us-east-1.rds.amazonaws.com.
Name:   striim-demo-database-instance-1.cpo3dhu4tzyc.us-east-1.rds.amazonaws.com
Address: 192.168.29.102
Record the IP address (in this example, 192.168.29.102) for use in the next step.
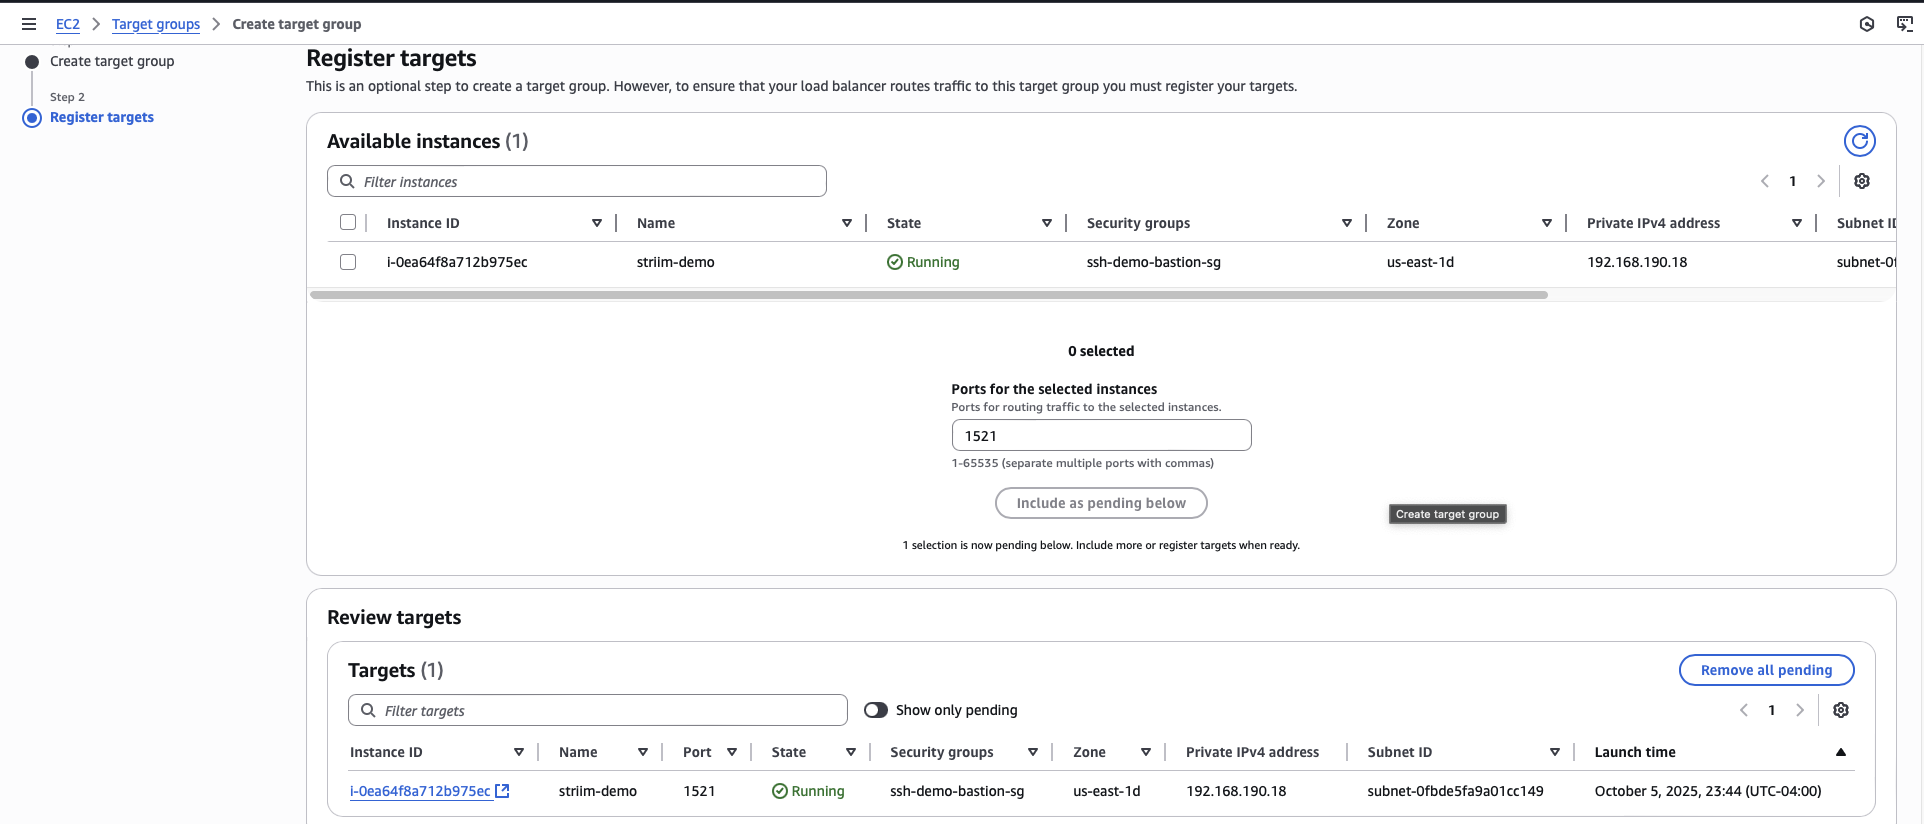
Create a load balancer target group
You must create a target group in the same VPC as the database. Create one target group for each database you want to connect to Striim Cloud.
In the EC2 console, navigate to Target Groups.
Click Create target group.
Select IP addresses as the target type.
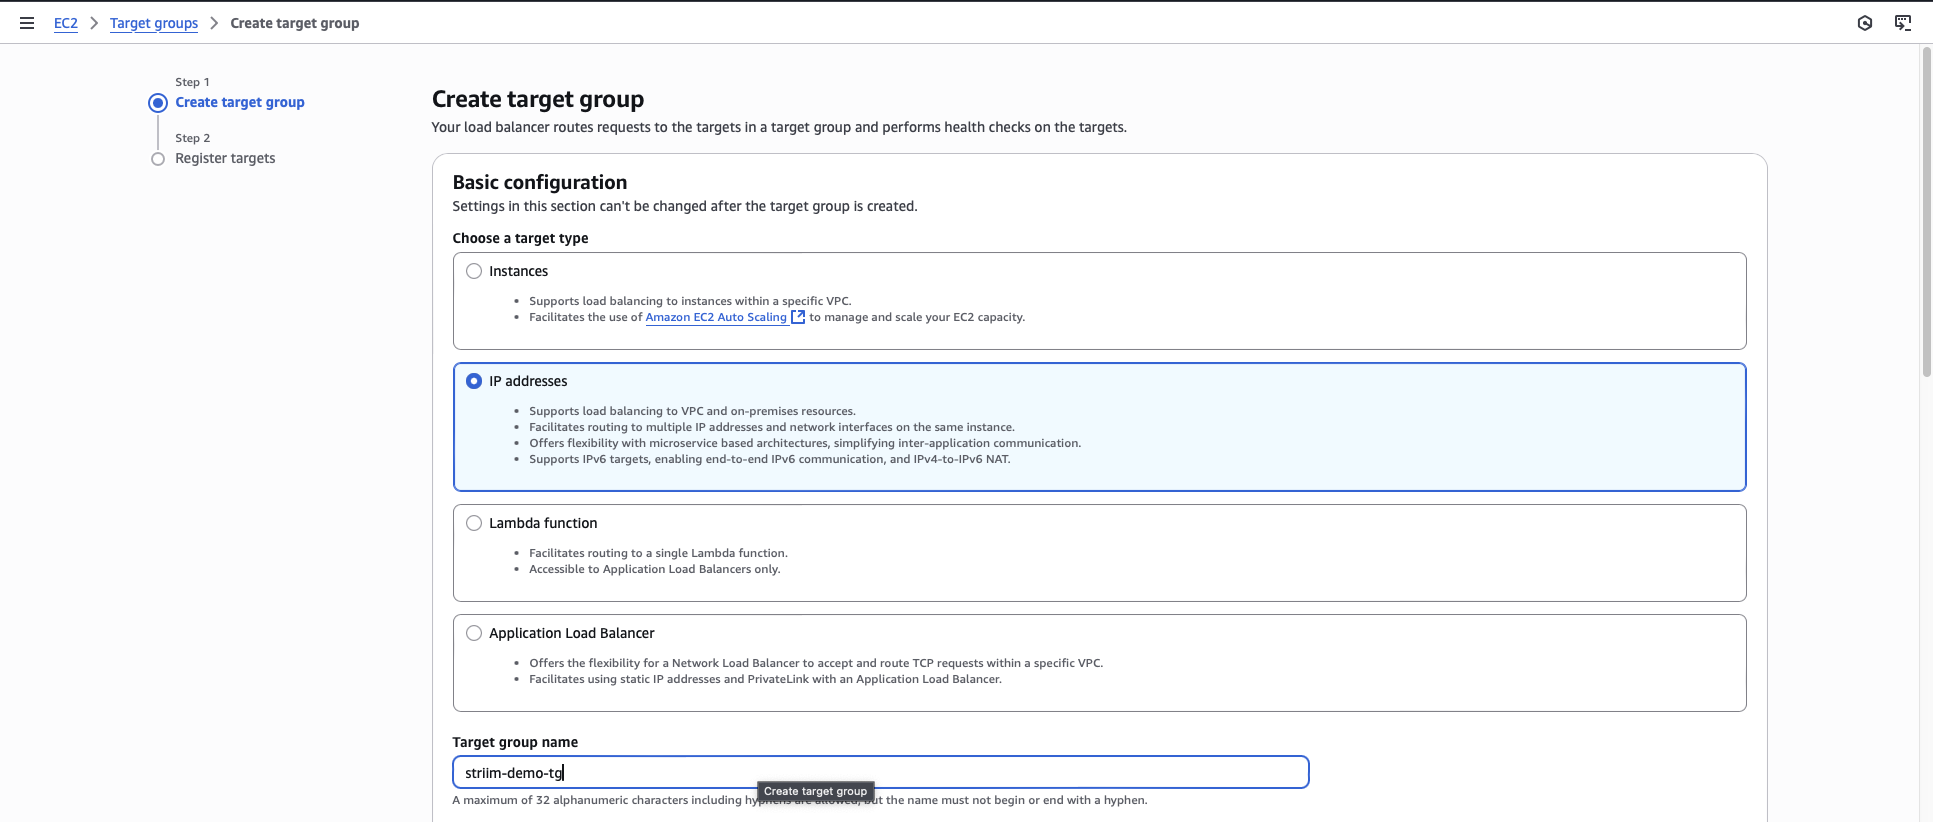
Enter a name for the target group.
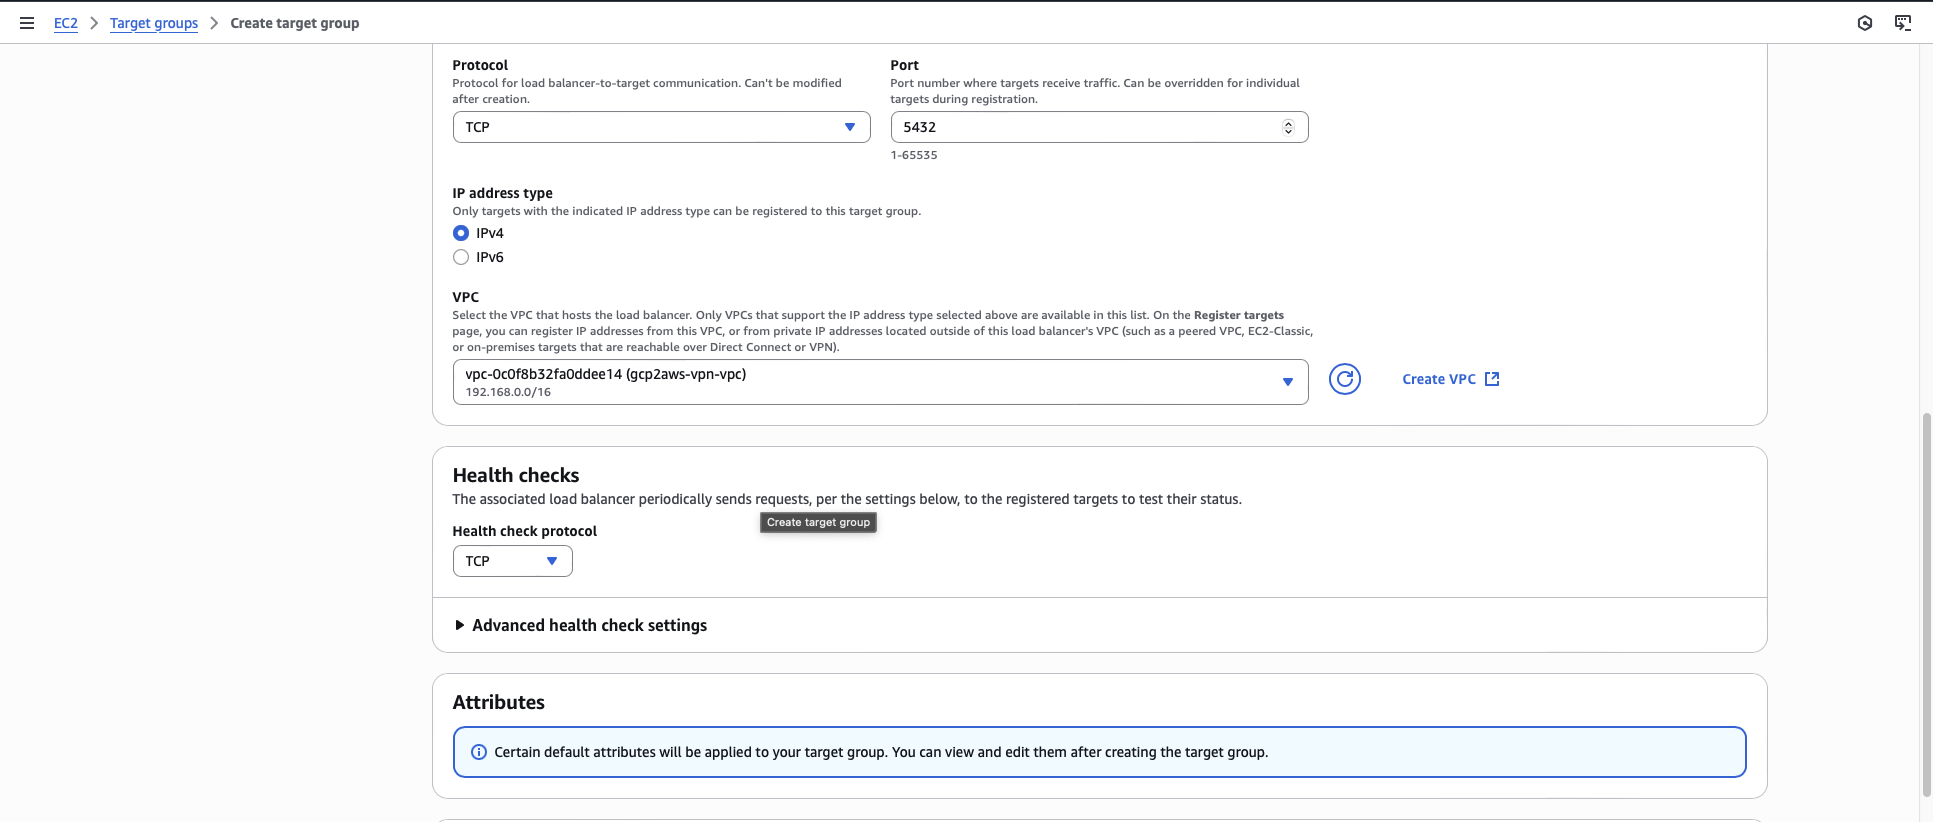
For the protocol and port, enter TCP and your database port number (for example, 5432 for PostgreSQL).
Select the VPC that contains your RDS database.
Register the RDS private IP address that you obtained in the previous section as a target.
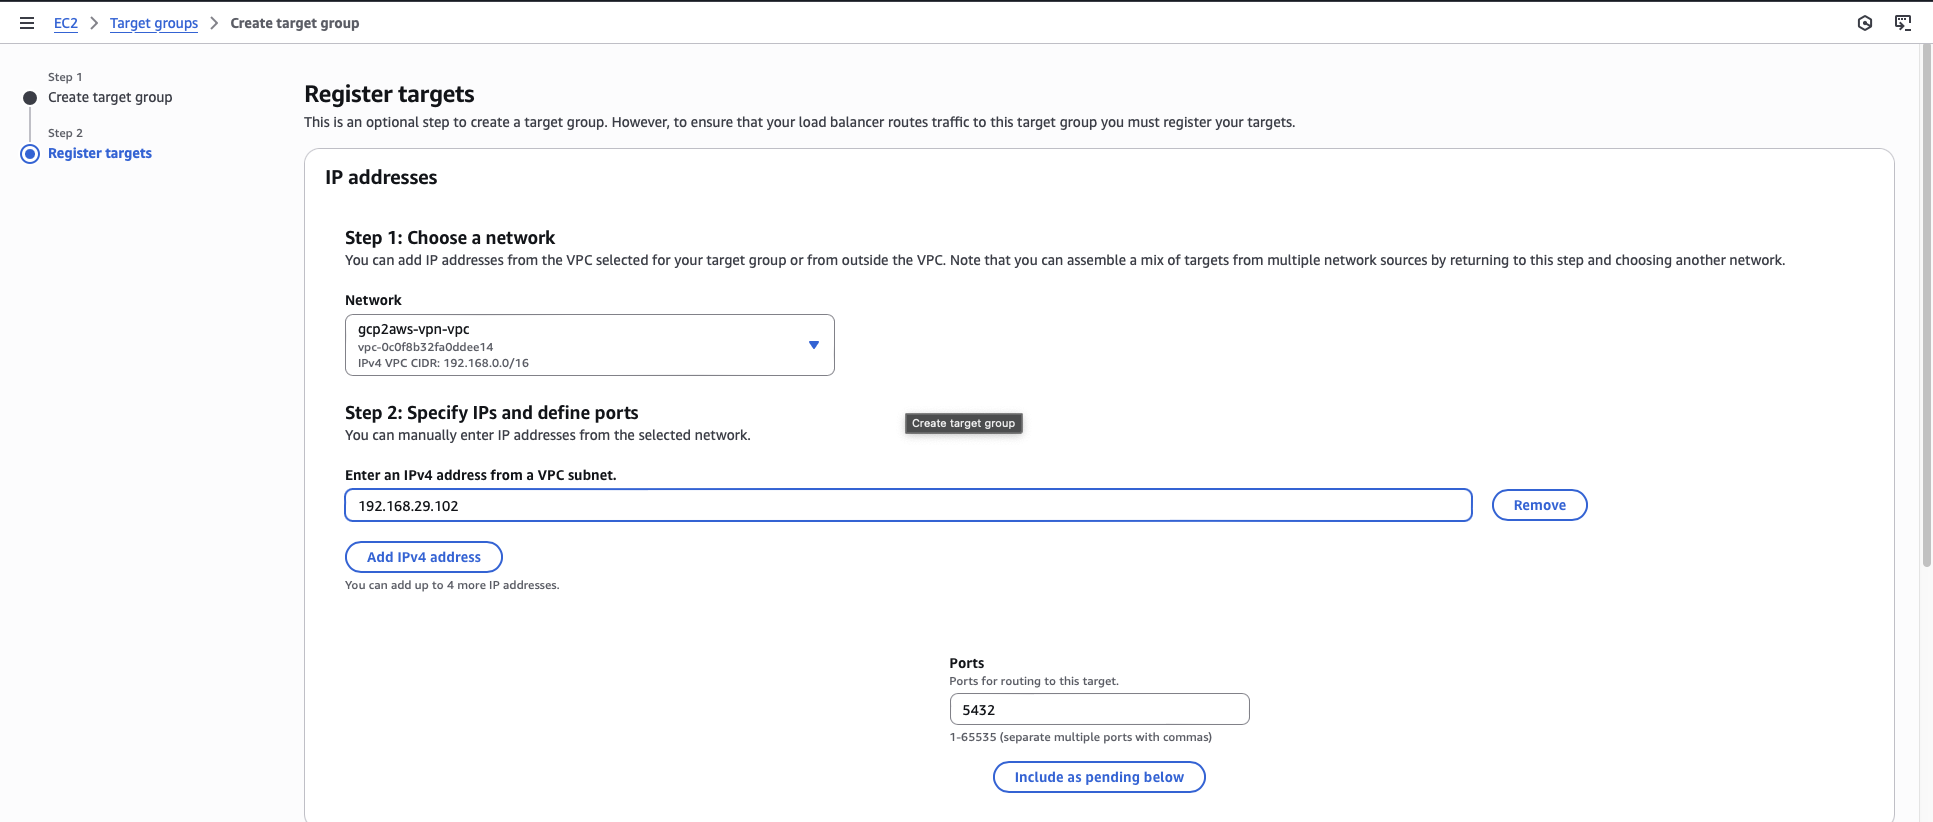
Click Create target group.
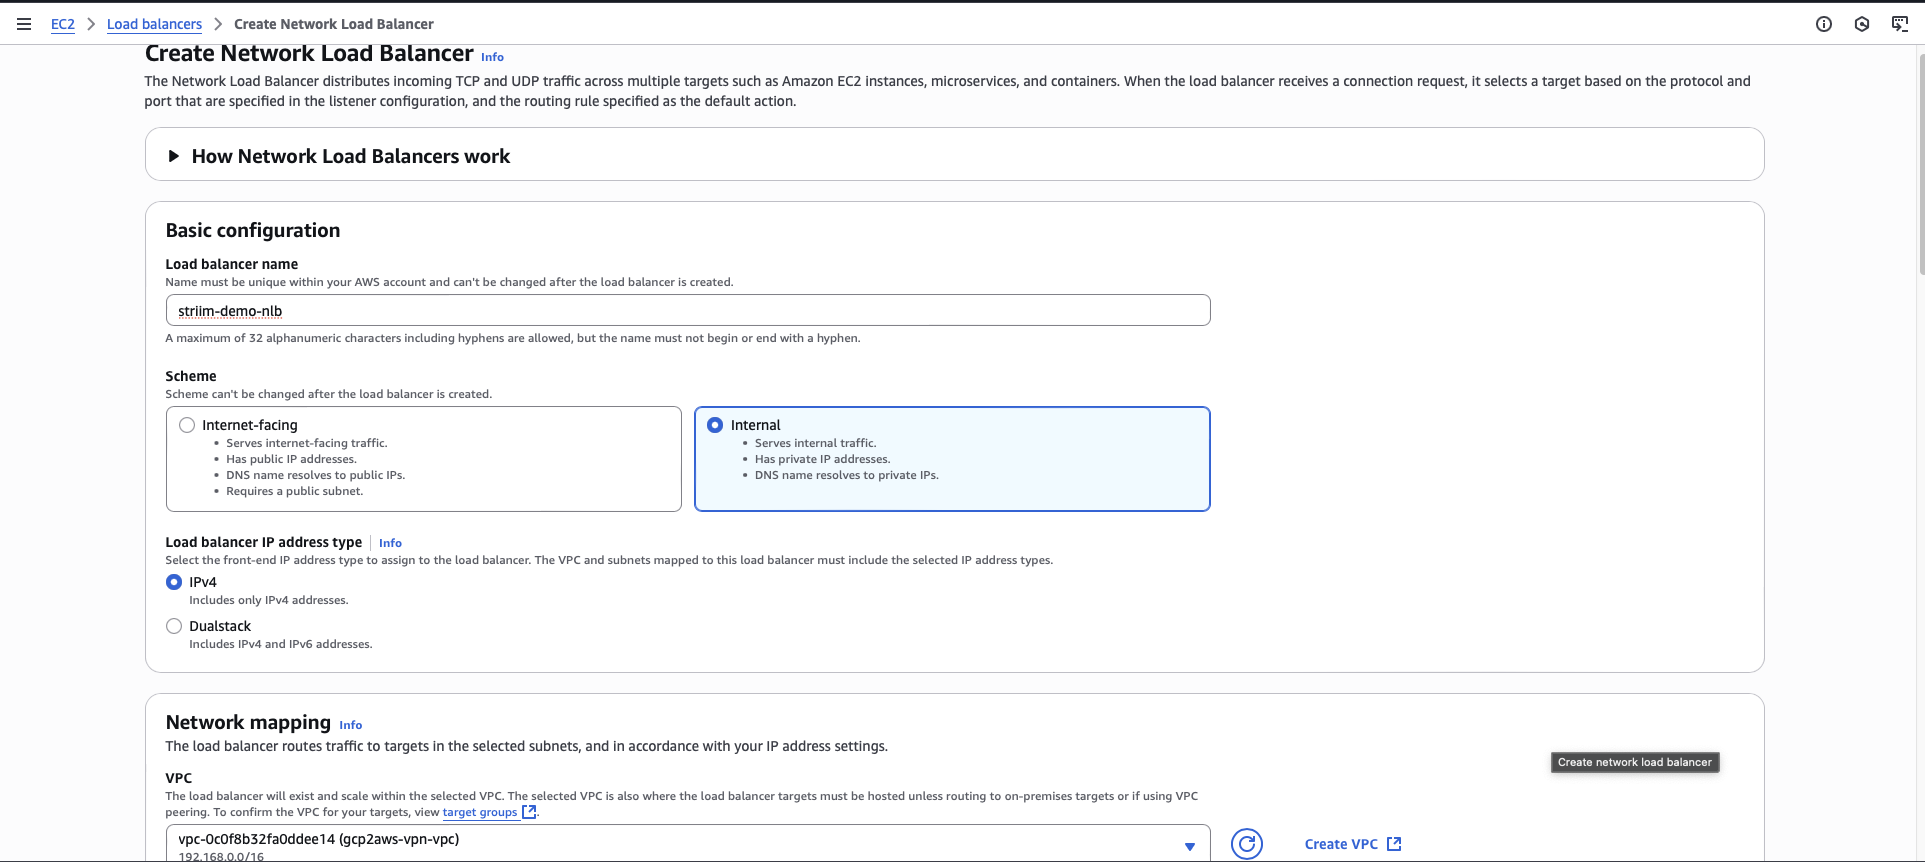
Create an internal network load balancer
You must create an internal Network Load Balancer to send traffic from the VPC endpoint to the target group.
In the EC2 console, navigate to Load Balancers.
Click Create load balancer.
Choose Network Load Balancer.
Enter a name for the load balancer.
For Scheme, select Internal.
Select the VPC that contains your RDS database.
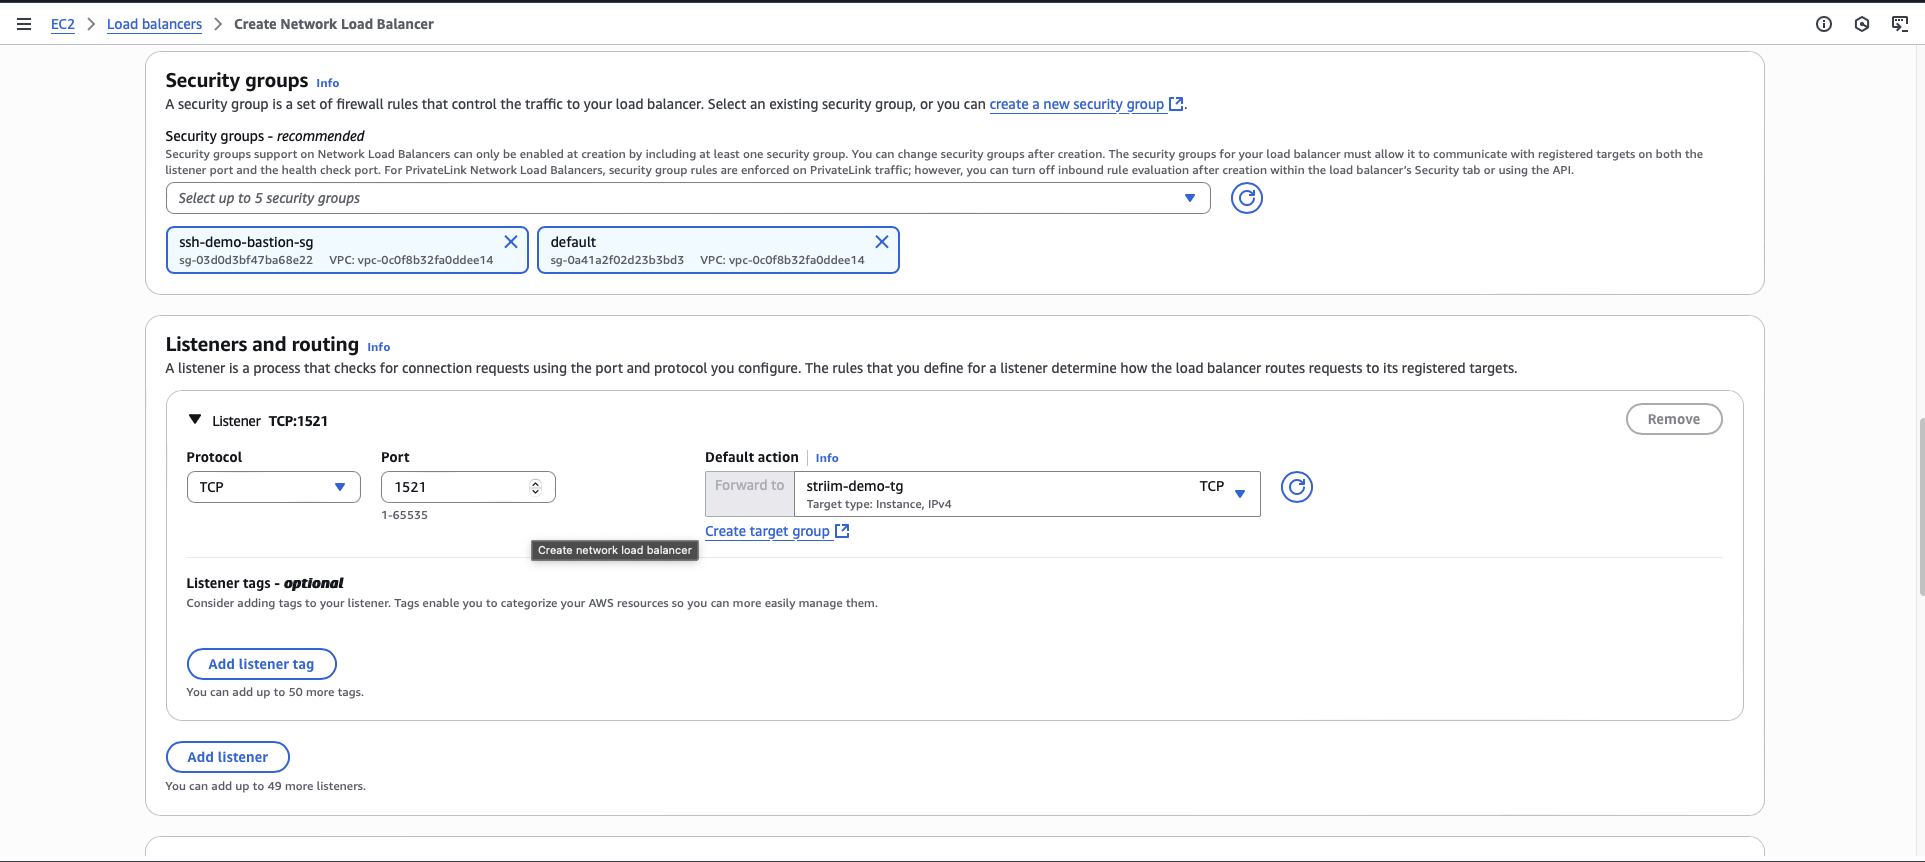
Select your VPC security group.
Add a listener with protocol TCP and port number matching your database port.
For the default action, select the target group you created.
Click Create.
Create a VPC endpoint service
You must create a VPC Endpoint Service that Striim Cloud will use to establish a private connection to your RDS database.
In the VPC console, navigate to Endpoint Services.
Click Create endpoint service.
Enter a name for the endpoint service.
For Load balancer type, select Network Load Balancer.
Select the load balancer that you created for this setup.
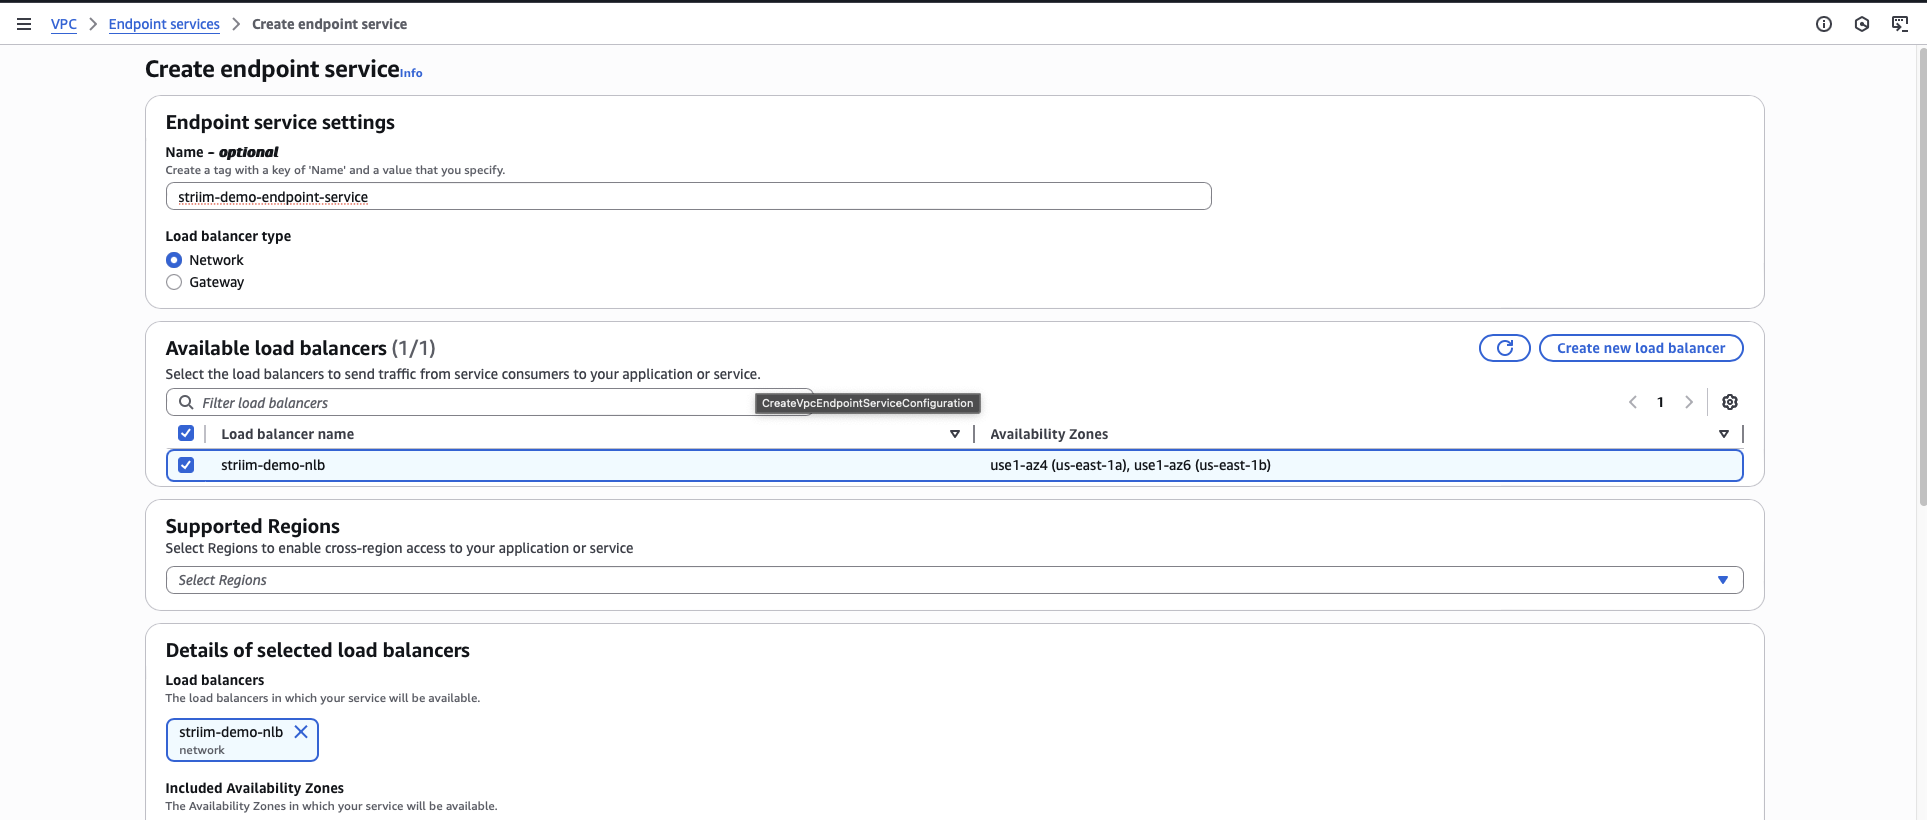
For Acceptance required, select Acceptance required. This ensures you must manually approve connection requests.
Click Create.
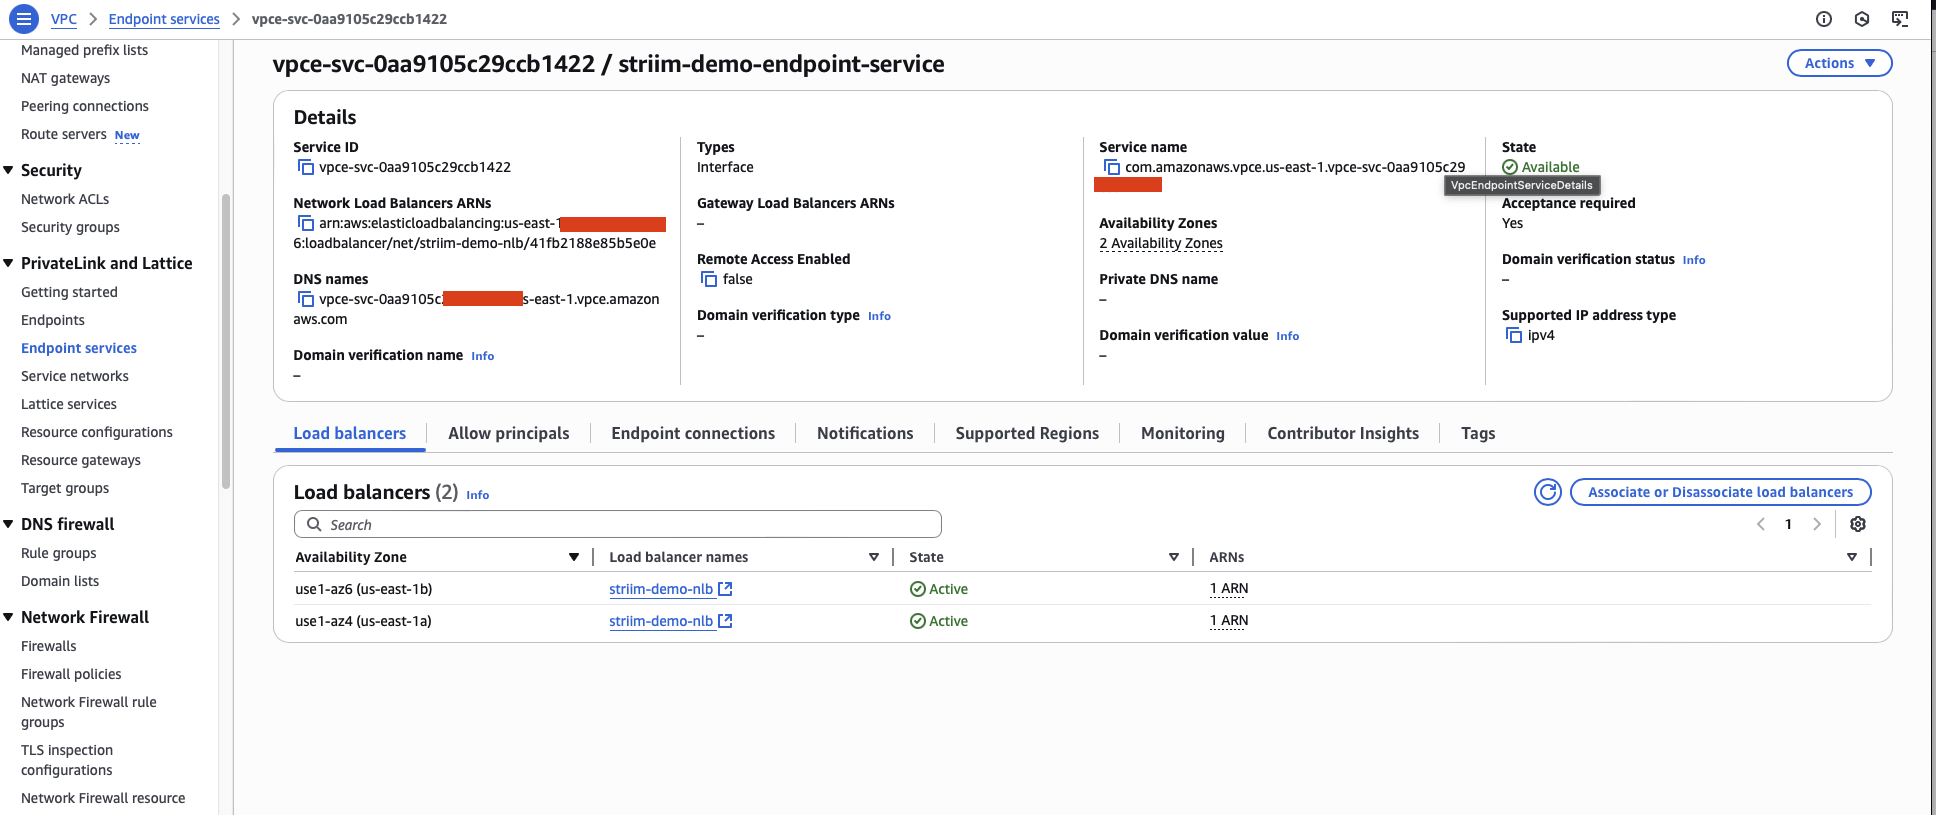
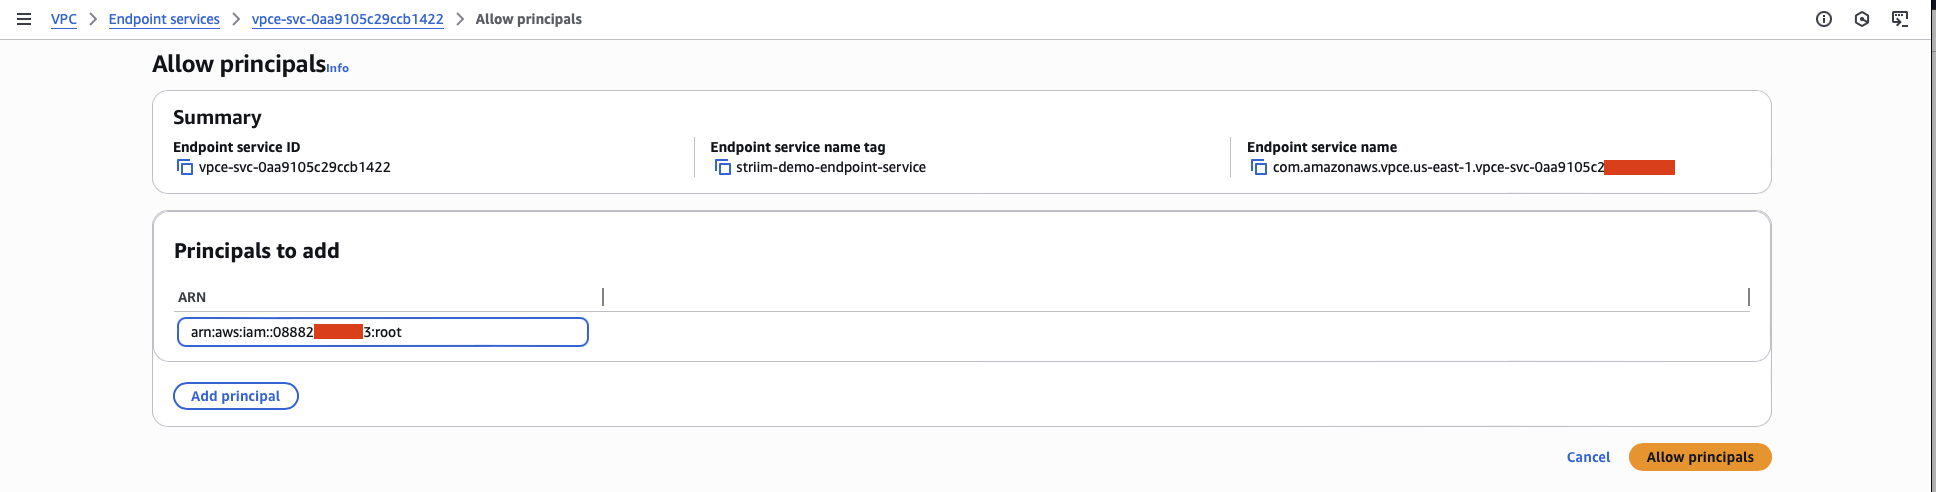
After the endpoint service is created, navigate to the Allow principals tab.
Add the Striim AWS account ID as an allowed principal. Use the account ID you obtained in the prerequisites.
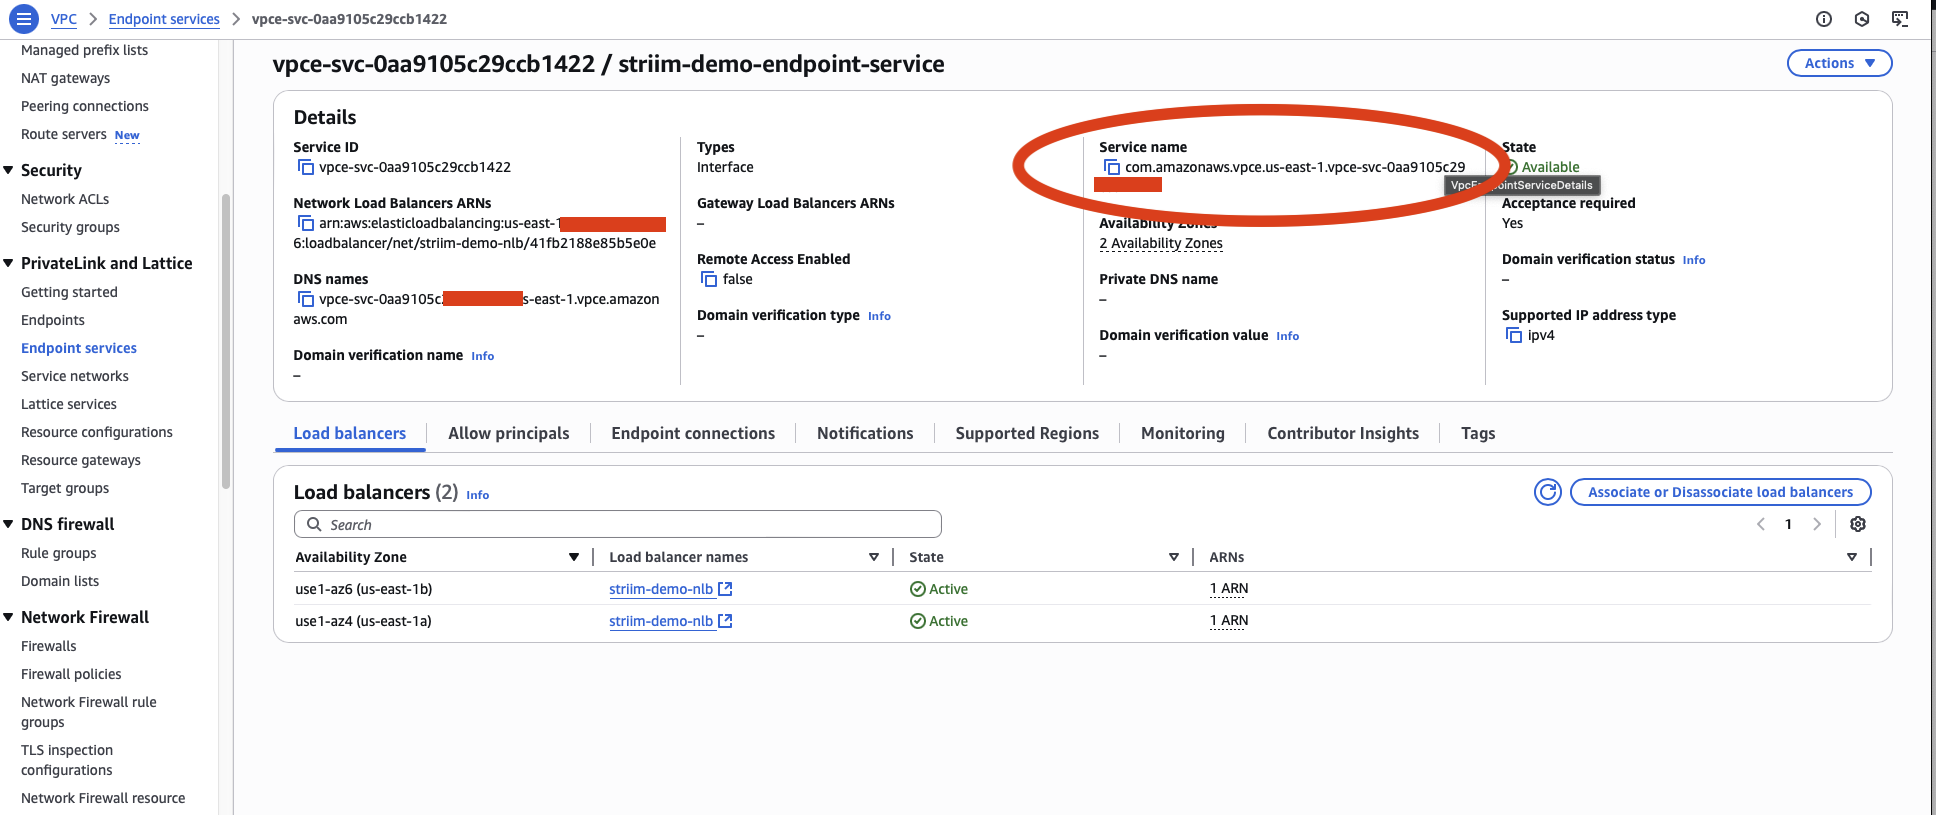
Copy the VPC Endpoint Service Name. You will need this value in the next step.
Create VPC endpoint from Striim service portal
You must create a VPC endpoint in the Striim service portal to initiate the connection request to your VPC endpoint service.
Log in to your Striim account.
Select the service for which you want to create the endpoint.
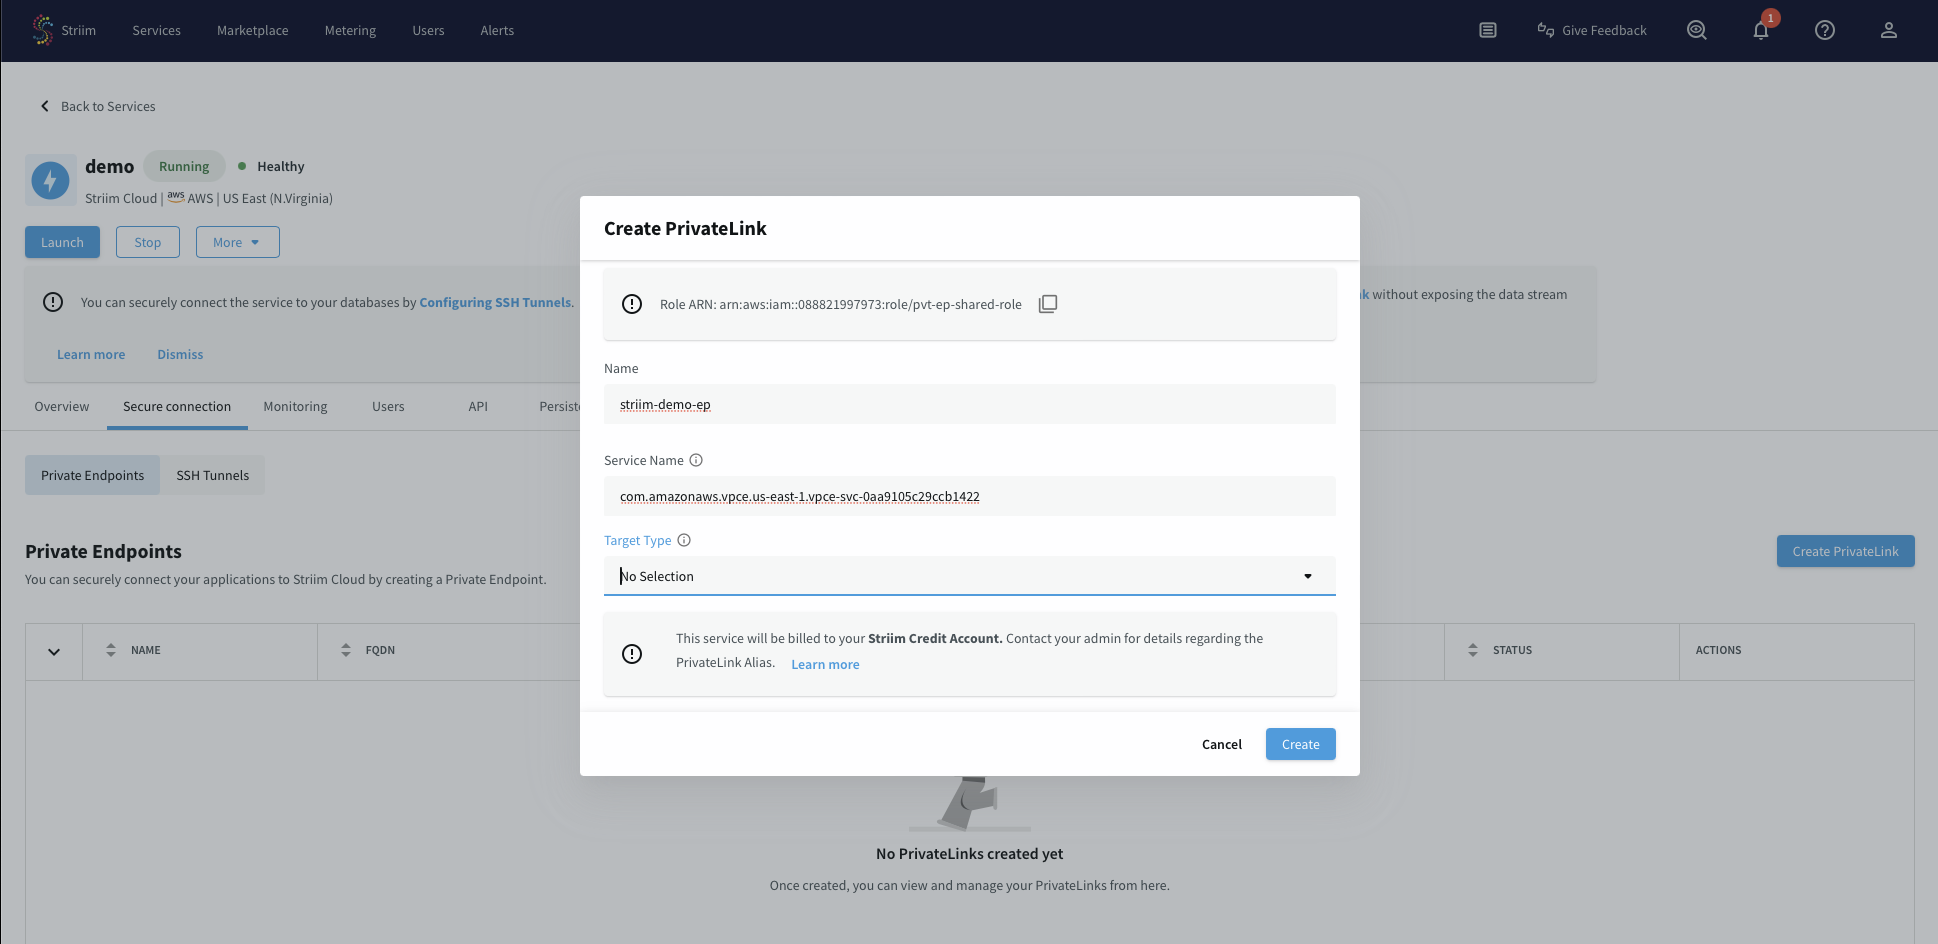
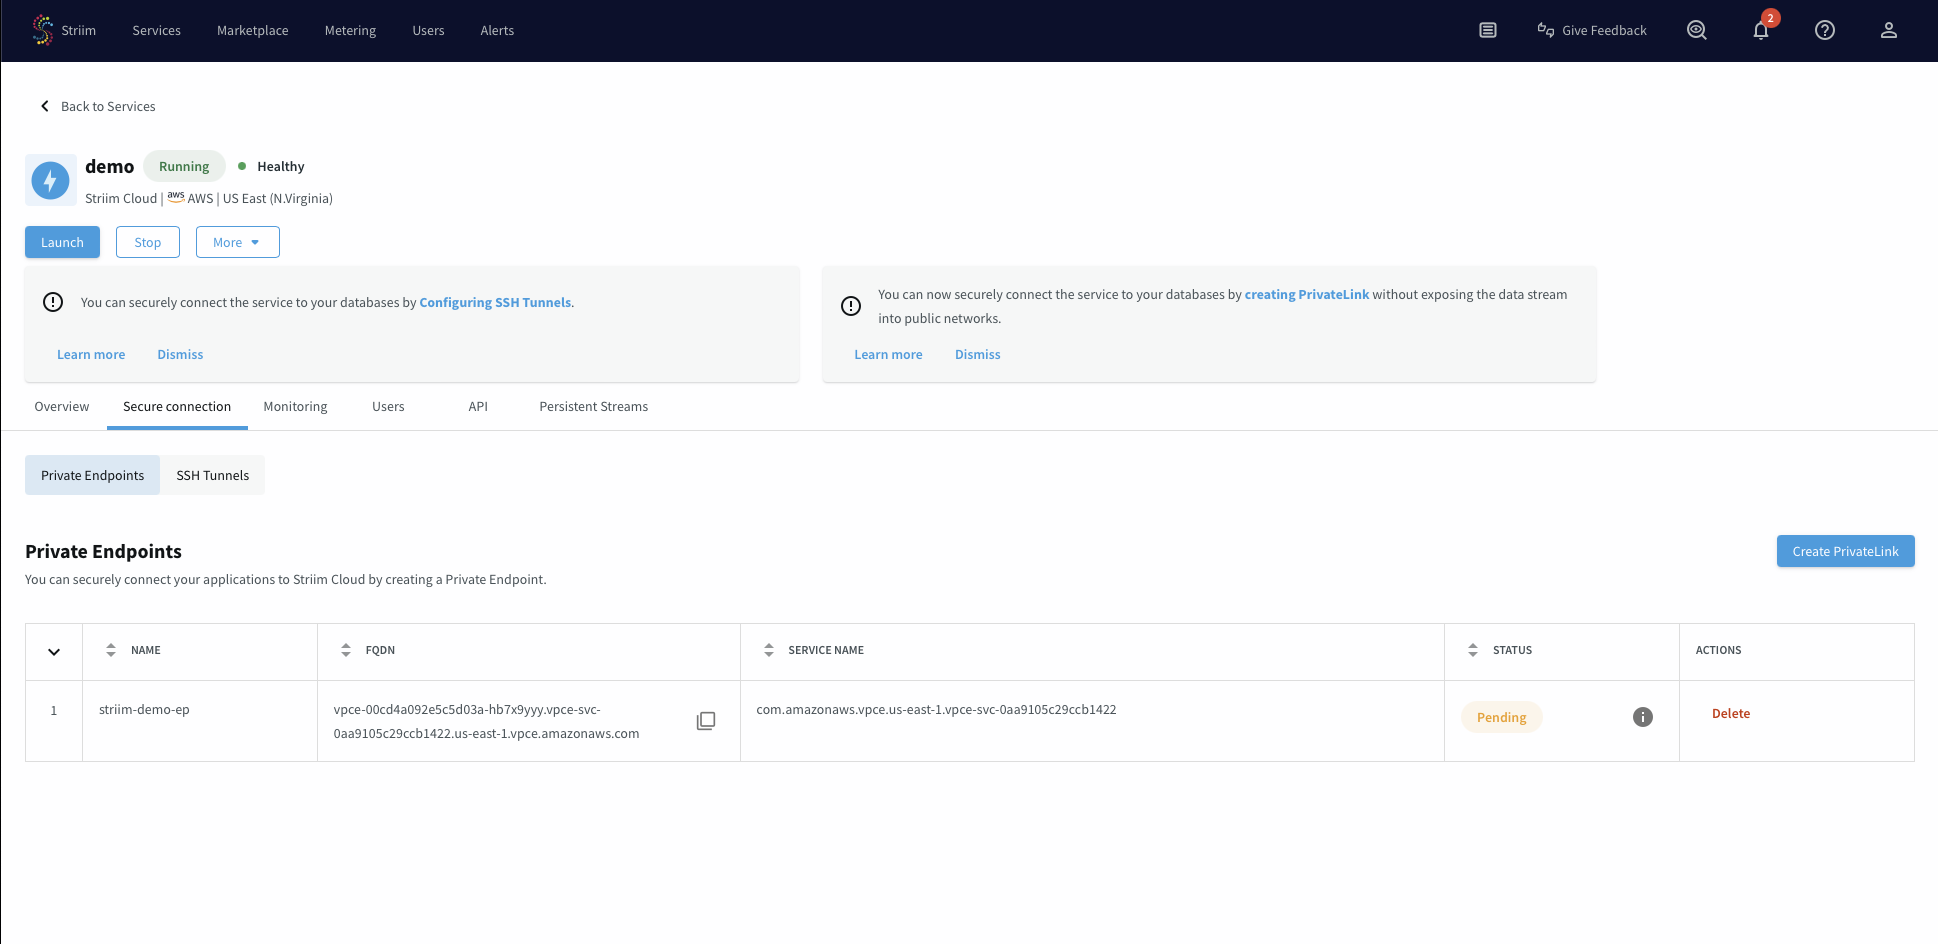
Under the Secure connection tab, click Create PrivateLink.
In the popup dialog, enter a name for this endpoint. Use a concise and meaningful name.
In the Service name field, enter the VPC Endpoint Service name that you copied from the previous step.
Leave the Target type field blank.
Click Create.
The endpoint displays a status of Pending initially while it waits for your acceptance in the AWS console.
Accept VPC endpoint connection request
You must manually accept the VPC endpoint connection request in the AWS console before the connection becomes active.
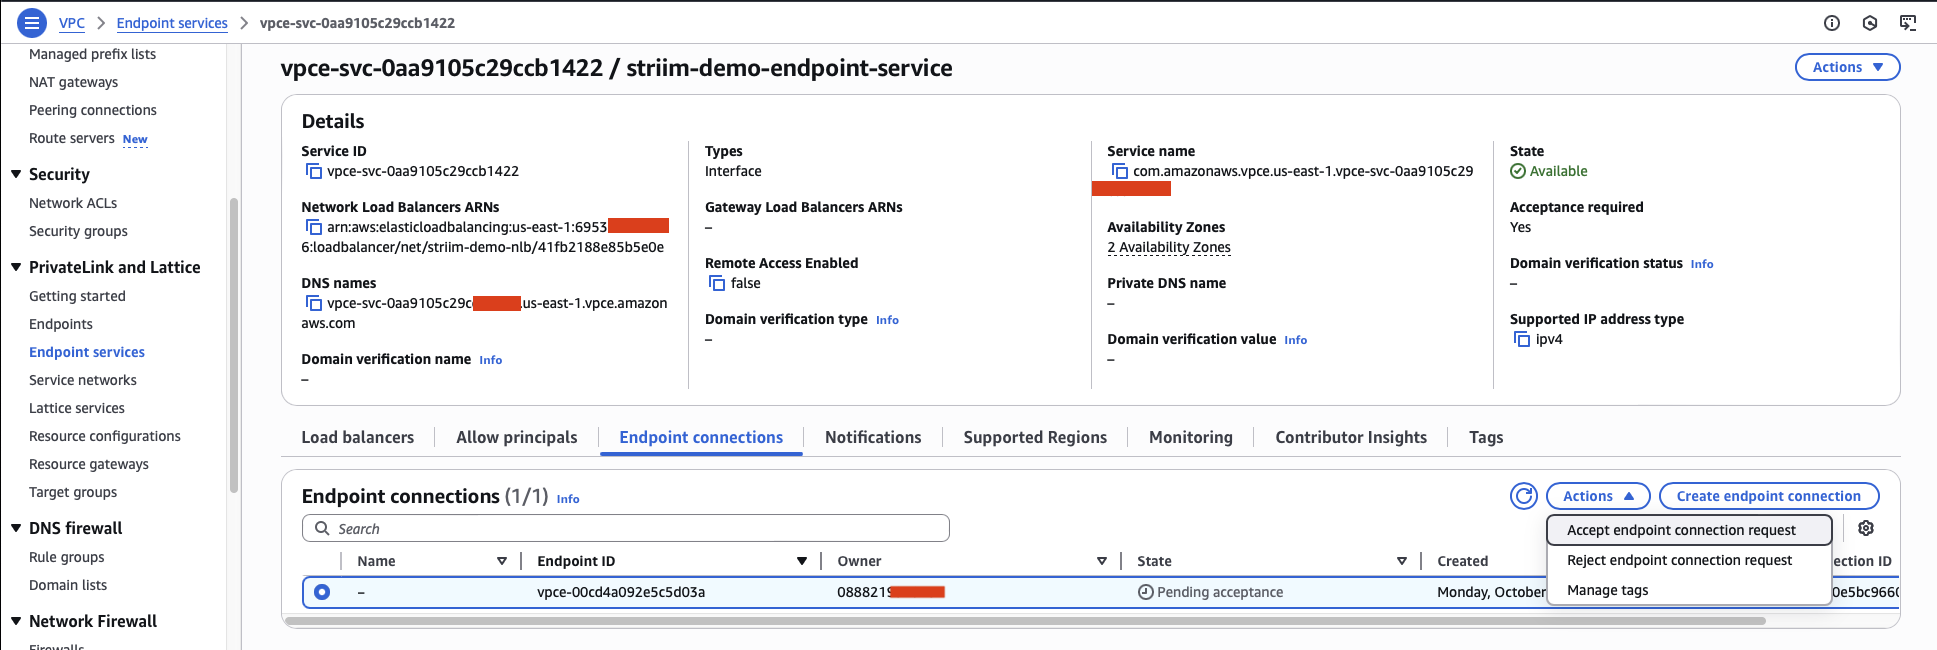
In the VPC console, navigate to Endpoint Services.
Select the endpoint service you recently created.
Click the Endpoint connections tab.
Select the endpoint connection that is in Pending state.
From the Actions dropdown menu, select Accept endpoint connection request.
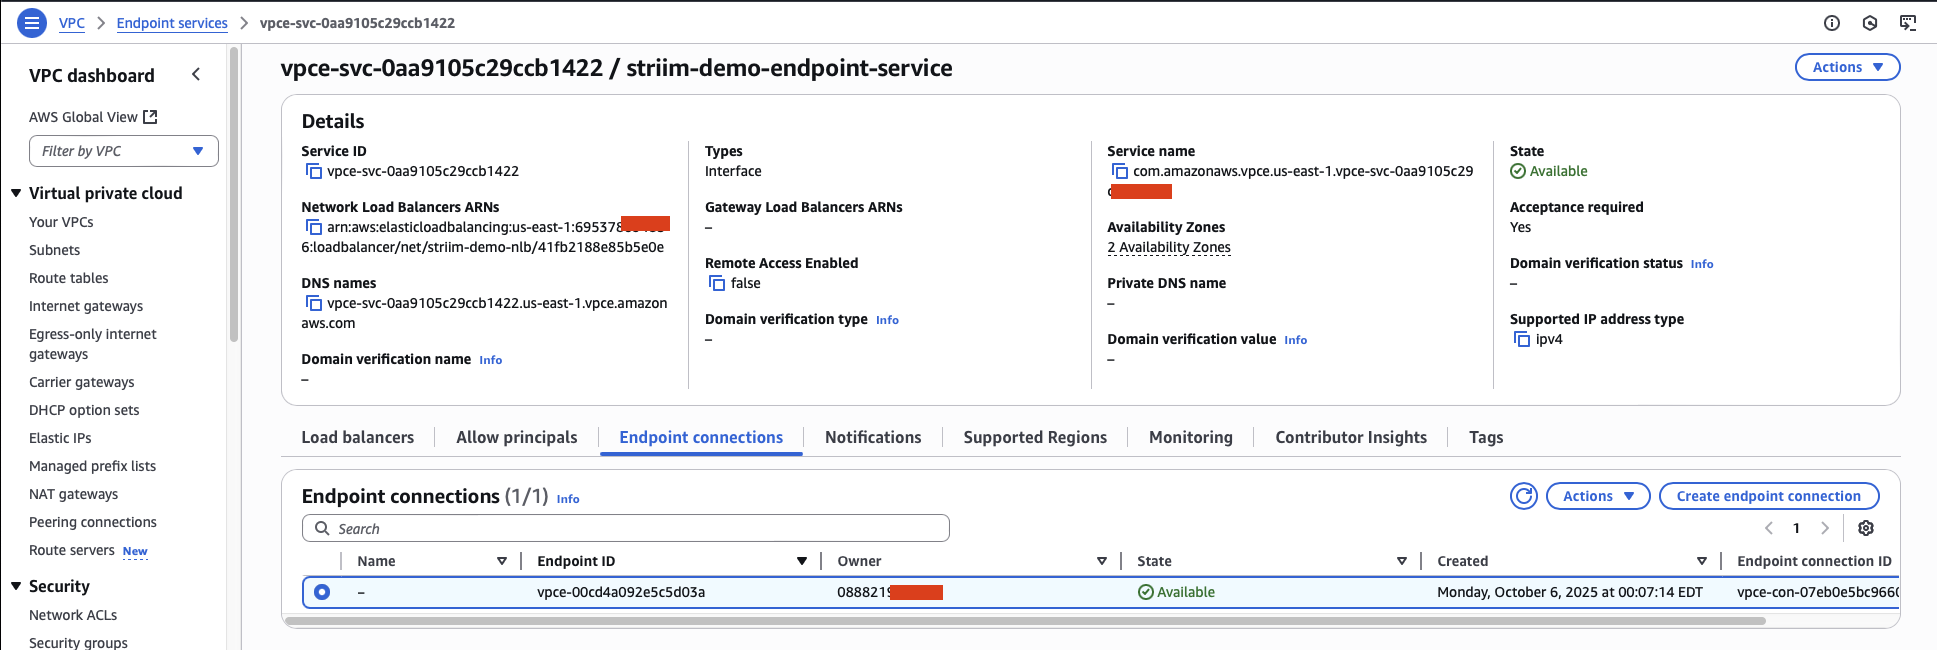
Within a few minutes, the connection status changes to Available, indicating your endpoint connection is ready to use.
Note
You can reject endpoint connection requests at any time by selecting Reject endpoint connection request from the Actions dropdown menu. This disconnects the connection.
Use the endpoint connection for your data source
After the endpoint connection is available, you can use the endpoint FQDN to configure your Striim data source connection.
In your Striim account, navigate to the service and select the Secure connection tab.
Copy the FQDN of the newly created endpoint connection.
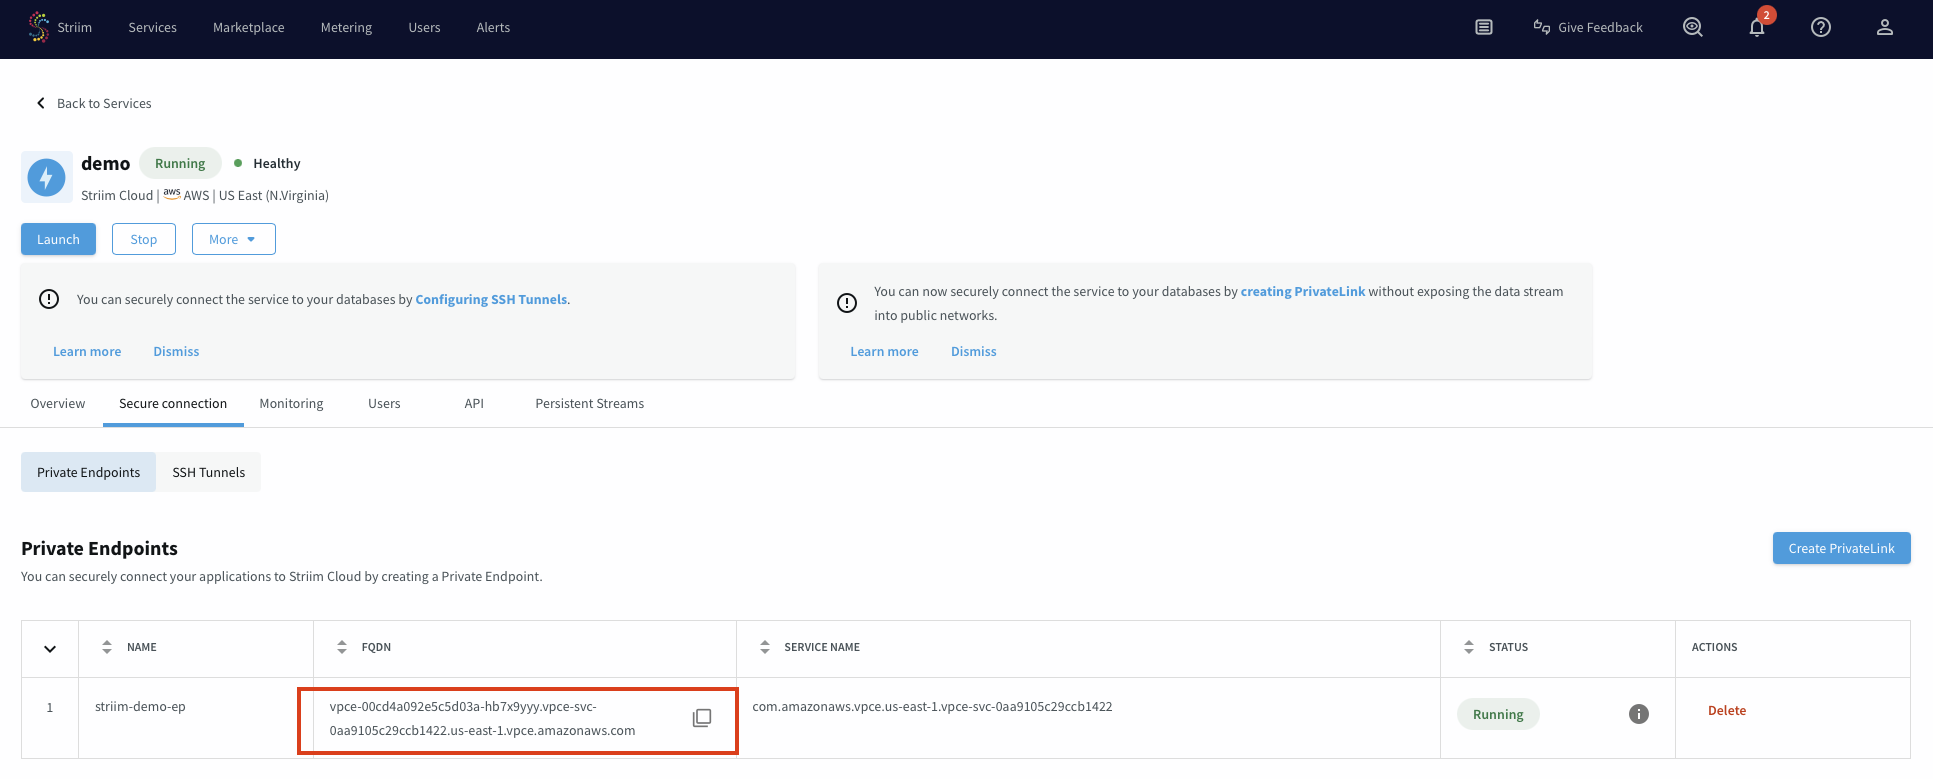
Use this FQDN as the connection string for your data source in your Striim application.
Endpoints for AWS-managed services
Select your target AWS service to view integration details specific to that service.