Connecting Striim Cloud on AWS to data services behind Striim Forwarding Agent
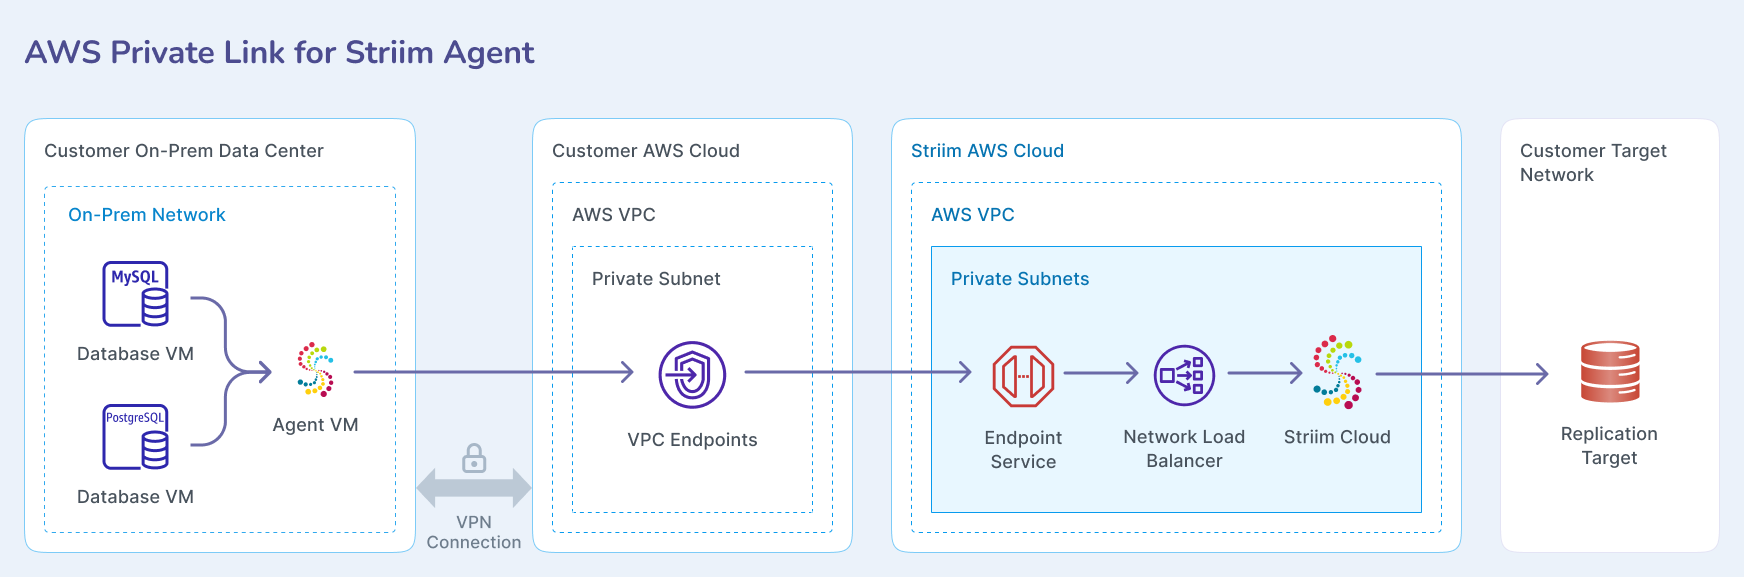
This topic describes how to enable a secure, private connection from a Striim Forwarding Agent running on-premises or in another cloud to Striim Cloud hosted on AWS. The connection leverages your AWS VPC and AWS VPC Endpoint Service to ensure that the Striim Agent reaches Striim Cloud without using the public internet. All traffic remains on private networks. The connection flows from the agent to your AWS VPC (via Interconnect, VPN, or peering), then through a VPC endpoint to Striim Cloud.
Overview
This private connectivity solution supports Striim Forwarding Agents located in the following environments:
On-premises data centers (via Direct Connect or VPN into your AWS VPC).
Cross-cloud environments (GCP, Azure, OCI) with private connectivity into your AWS VPC.
AWS (native EC2 instances or EKS in your AWS account).
When the agent VM already runs inside AWS, only an endpoint connection between your AWS account and Striim Cloud is required.
Prerequisites
An AWS account and VPC with at least four subnets in different availability zones.
Private connectivity from the agent location to your AWS VPC (Interconnect, VPN, or peering).
Appropriate IAM permissions to create VPC endpoints.
VPC firewall rules allowing traffic from the agent to the VPC endpoint and onward to Striim Cloud over the following ports: 30000, 30002, 30003, 30004, 30005, 30006.
Admin access to your Striim Cloud service account and AWS console.
Your Striim service system password for generating the agent keystore password. Contact your Striim support team to obtain this password.
Prepare customer VPN with on-premises or cross-cloud network
If your Striim Forwarding Agent is located in an on-premises data center or another cloud provider, you must first establish private connectivity between that location and your AWS VPC.
For AWS to on-premises or cross-cloud connections, see Get started with AWS Site-to-Site VPN in the AWS documentation.
Request VPC Endpoint Service from Striim
You must request a VPC Endpoint Service from Striim to enable private connectivity for your Forwarding Agent.
Submit a support request to your Striim team requesting VPC Endpoint Service for Forwarding Agent compatibility.
The Striim team prepares the environment and provides you with the following information:
VPC Endpoint Service Name (for example:
com.amazonaws.vpce.us-east-1.vpce-svc-0aa9105c29cxxxxxxx22).Striim service system password for generating the agent keystore password.
Create VPC endpoint in your AWS network
You must create a VPC endpoint in your AWS network to establish the connection to Striim Cloud. This configuration assumes your AWS VPC network is in the same AWS region as your Striim service.
In the AWS VPC console, navigate to Endpoints.
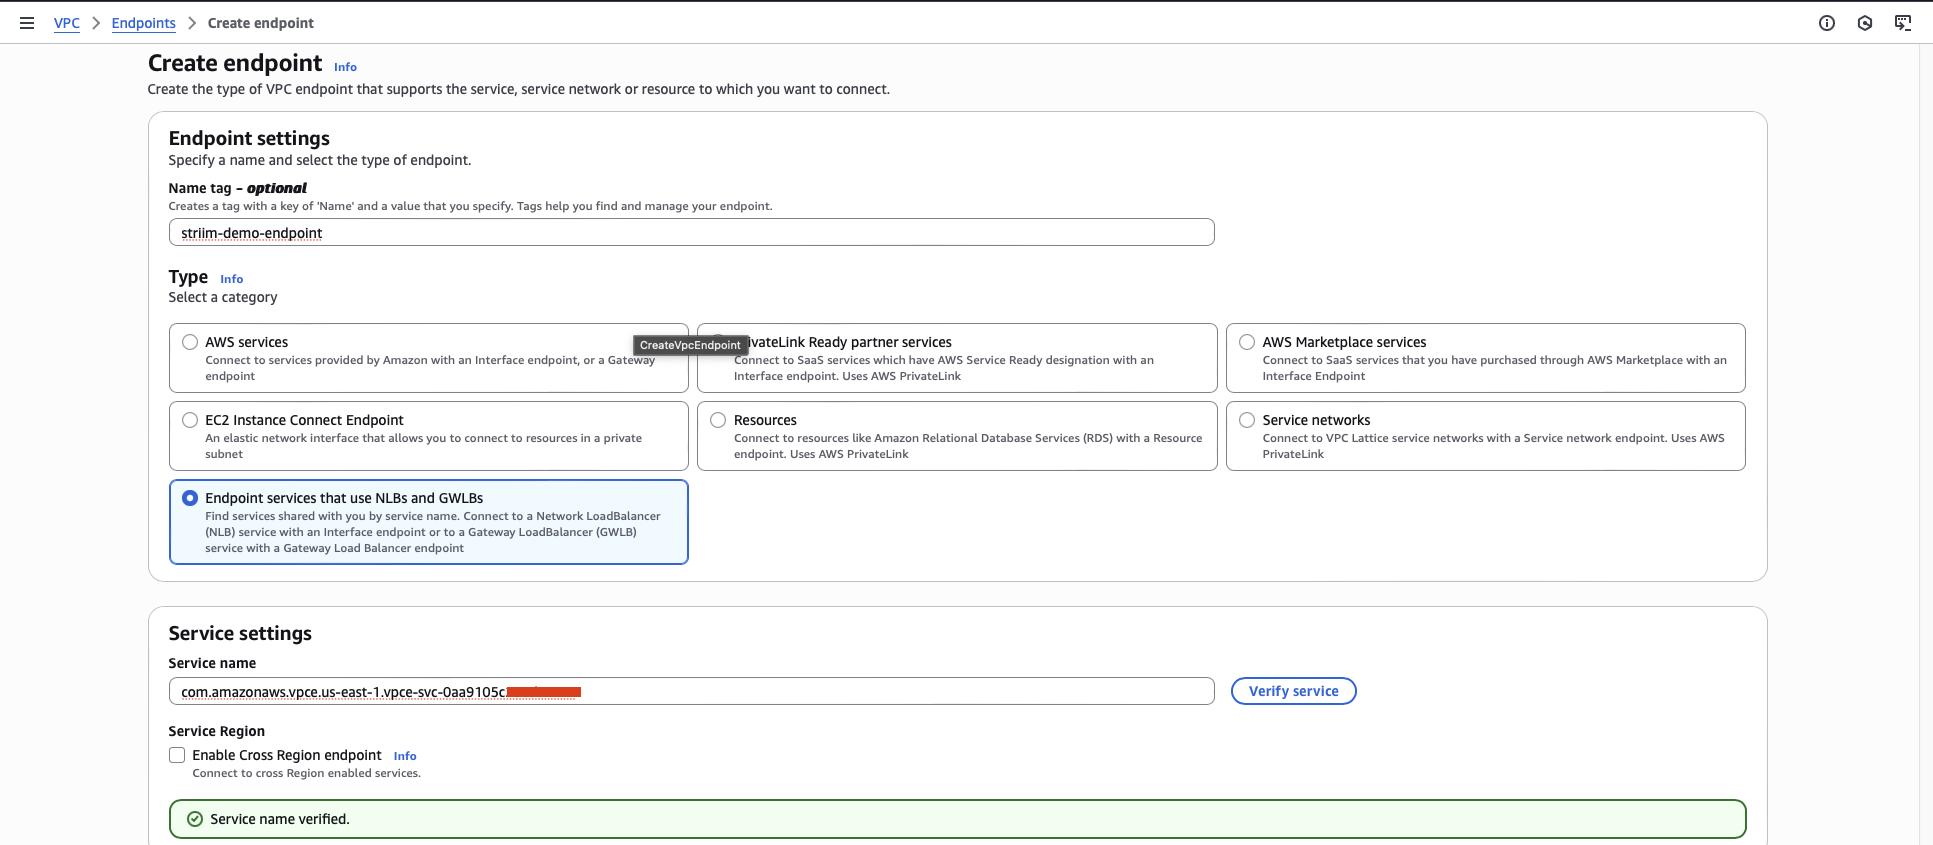
Click Create Endpoint.
Enter a name for the endpoint.
For Type, select Endpoint services that use NLBs and GWLBs.
In the Service settings section, enter the Endpoint Service Name that was provided by the Striim team.
Select the VPC that connects to your VPN.
Select one or more subnets that are available. You can select multiple subnets for high availability.
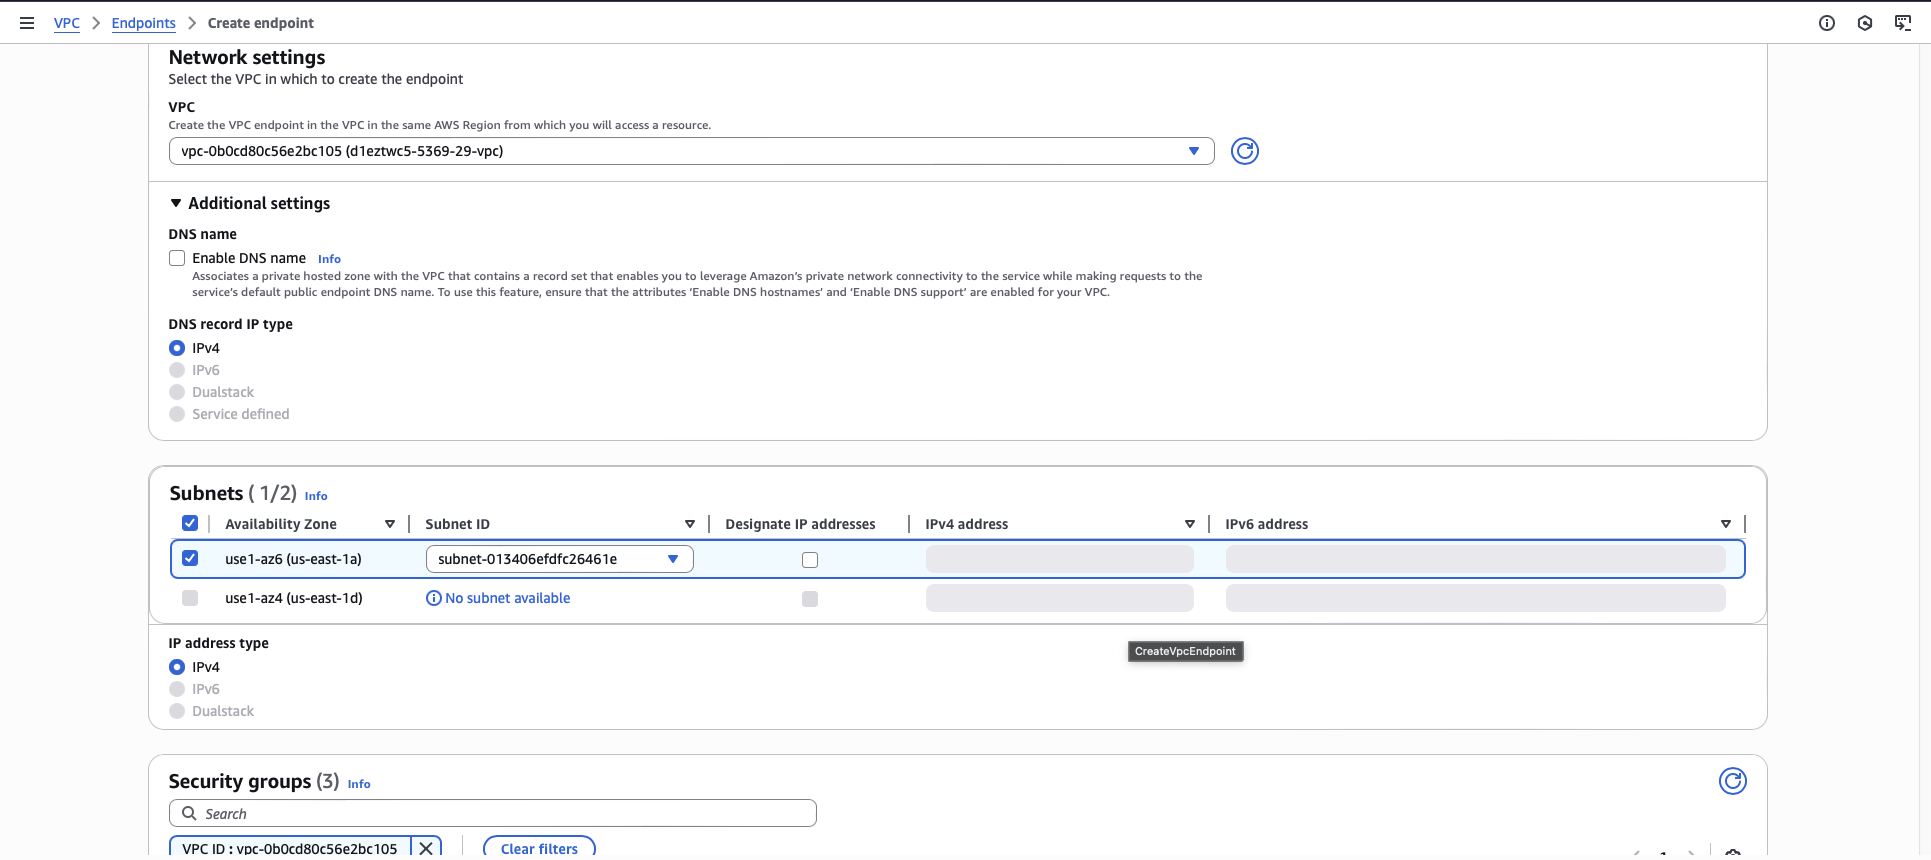
Click Create endpoint.
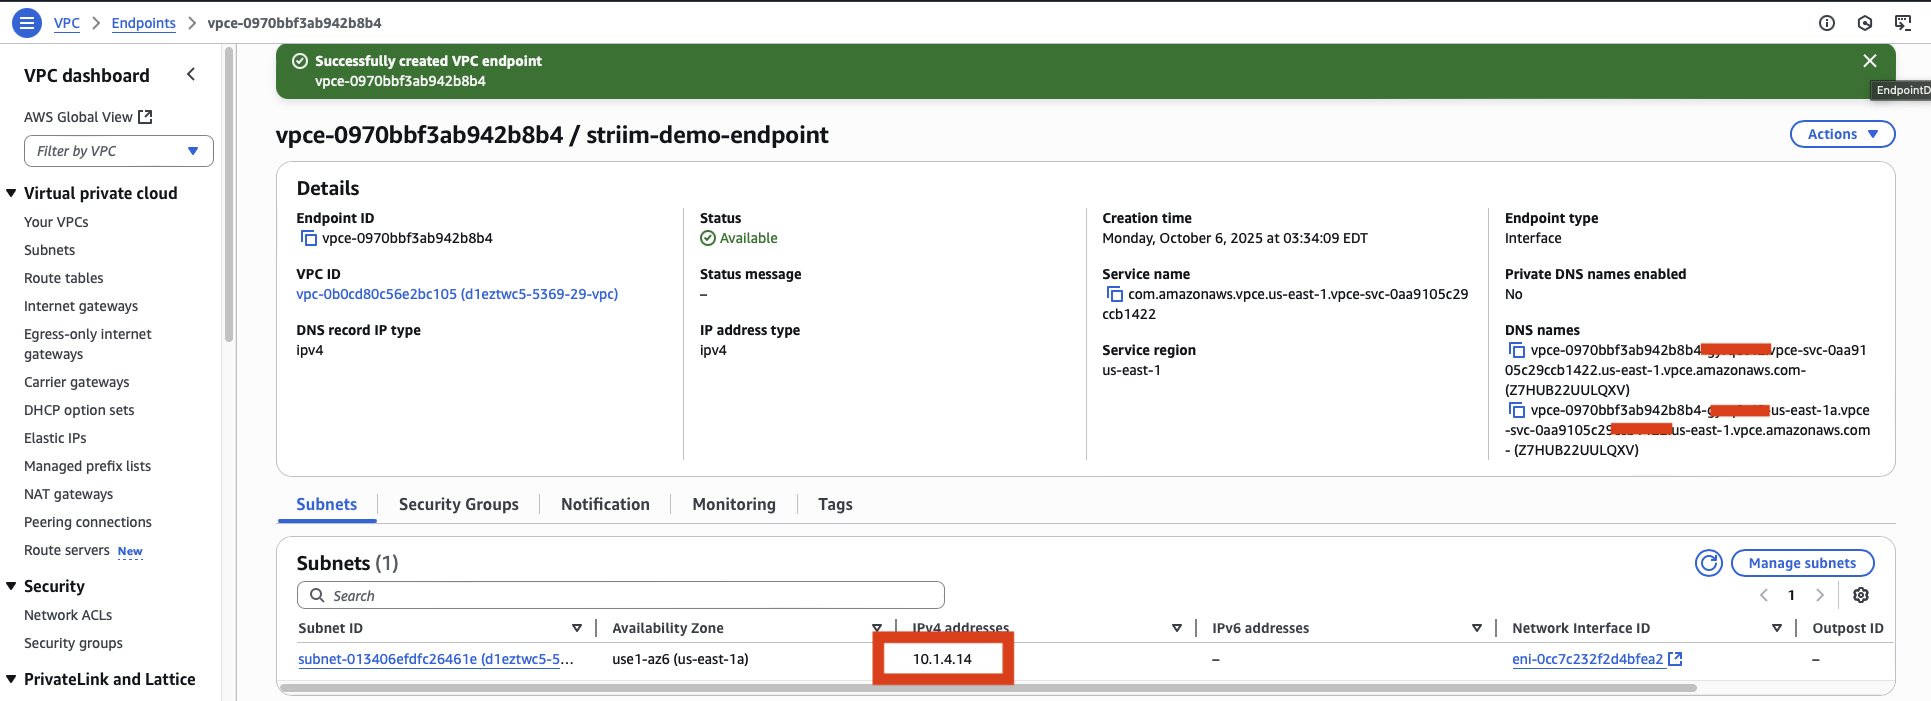
The endpoint displays a status of Pending initially.
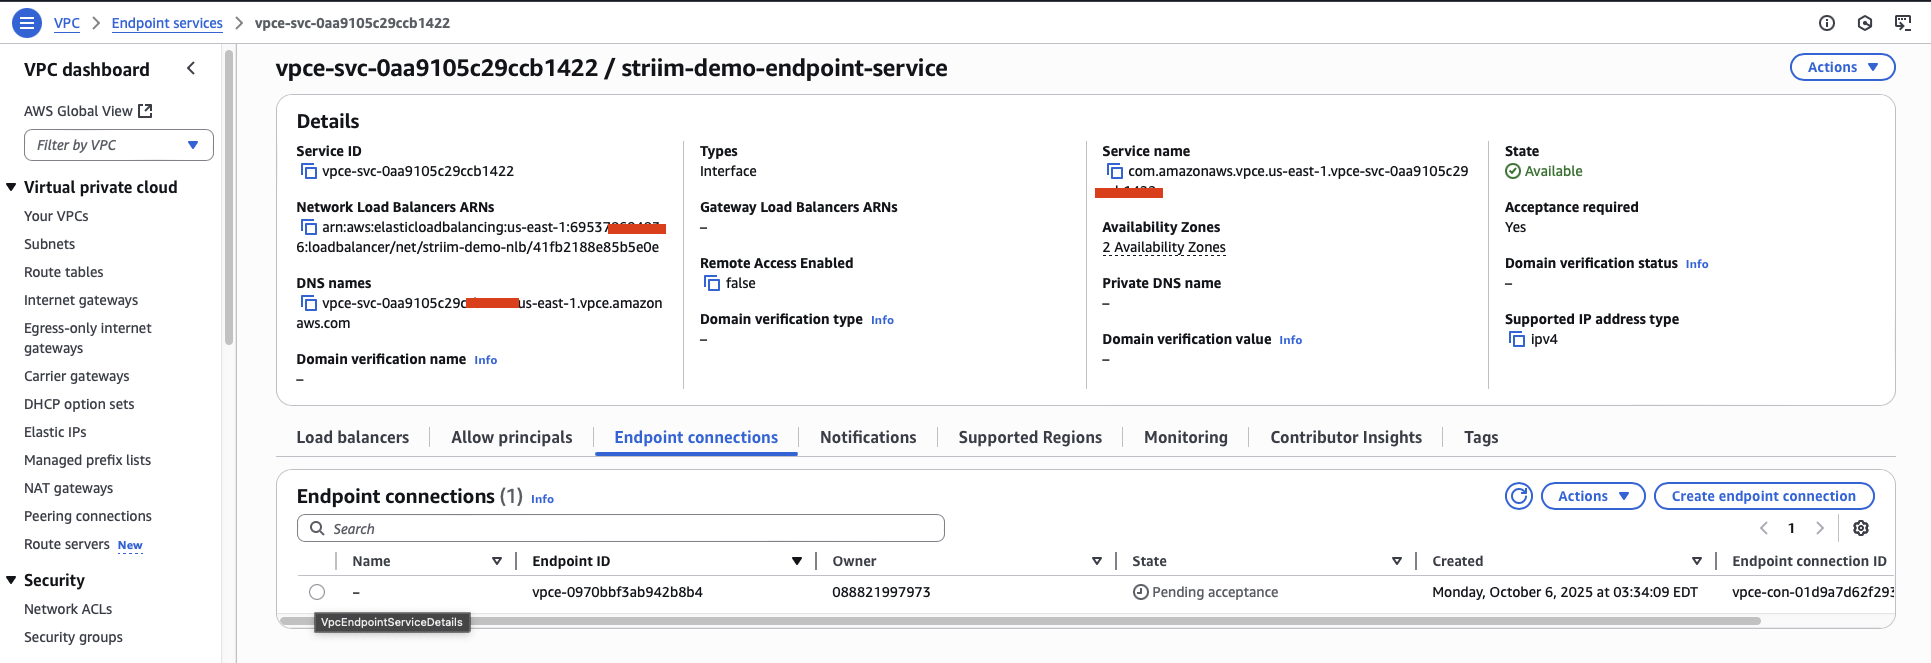
After the Striim team accepts the connection, the VPC endpoint status changes to Available.
Test the connection
You should verify that the agent can successfully connect to Striim Cloud through the VPC endpoint.
Connect to the agent VM using SSH.
Use the telnet command to test connectivity to the VPC endpoint IP address. Replace
10.1.4.14with your actual VPC endpoint IP address:telnet 10.1.4.14 30000
Test connectivity on the following additional ports: 30002, 30003, 30004, 30005, 30006.
If the connection is successful, you should see a response indicating that the connection was established.