Initial setup for Iceberg in Google Cloud
Writing to Iceberg tables in Google Cloud requires the following:
Google Cloud Storage (GCS) buckets to host the data lake and external staging area
a Dataproc cluster to provide compute resources
an Iceberg catalog: in this release, BigLake Metastore, Hadoop in GCS (not recommended for a production environment), Nessie, or Polaris
a storage account key with the necessary permissions for GCS and Dataproc
Configure Google Cloud Storage (GCS) buckets for Iceberg Writer
If you are running Striim Cloud in Google Cloud Platform, create the GCS buckets in the same region.
Create two buckets, for example,
mycompany_datalakeandmycompany_staging, for the Iceberg data lake and staging area. The staging area must be in the same project as the Dataproc cluster. The data lake may be in a different GCS instance in another project in the same region as the Dataproc cluster. We recommend enabling hierarchical namespace on the data lake bucket.If you plan to create a Dataproc cluster, download the Striim Utilities, extract the .zip file, and upload
setupIcebergDataProcv1.shto the staging area bucket. This will be required when you create the Dataproc instance. Skip this step if you plan to use an existing Dataproc cluster.
Use an existing Dataproc cluster
You may use an existing Dataproce cluster provided it is not configured as Internal IP Only (see the cluster's Configuration tab to check) or create a new cluster as described below.
To make an existing cluster usable by Iceberg Writer, connect to the master node of the cluster using ssh and run the following commands:
sudo su
wget -P /usr/lib/striim/iceberg/ "https://repo1.maven.org/maven2/org/apache/iceberg/\
iceberg-spark-runtime-3.5_2.12/1.5.0/iceberg-spark-runtime-3.5_2.12-1.5.0.jar"
wget -P /usr/lib/striim/iceberg/ "https://repo1.maven.org/maven2/org/apache/iceberg/\
iceberg-spark-extensions-3.5_2.12/1.5.0/iceberg-spark-extensions-3.5_2.12-1.5.0.jar"
wget -P /usr/lib/striim/iceberg/ "https://repo1.maven.org/maven2/org/apache/iceberg/\
iceberg-gcp/1.5.0/iceberg-gcp-1.5.0.jar"
Then check to make sure the files were downloaded to /usr/lib/striim/iceberg/ correctly:
ls /usr/lib/striim/iceberg/*.jar
Create a new Dataproc cluster
The following steps require the Dataproc Administrator role (roles/dataproc.admin). Create the Dataproc instance in the same project as the GCS instance.
Create the GCS buckets as discussed above.
Enable the Dataproc Metastore API (see Enable Dataproc Metastore).
Open the Dataproc Create a cluster page and click Create Cluster.
Click Create Cluster on Compute Engine.
Under Versioning, if Image Type and Version is not
2.2-debian12, click Change and select it.Under Spark performance enhancements, select Enable advanced optimizations and Enable advanced execution layer.
Under Dataproc Metastore, verify that the Selected Project is the same as for the GCS buckets.
In the left column, select Configure Nodes.
Under Manager node, choose a Machine type with at least 2 vCPUs and 8 GB memory and set Primary disk size to
100.Under Worker nodes, choose a Machine type with at least 2 vCPUs and 8 GB memory and set Primary disk size to
200. The Number of worker nodes must be at least 2 (additional worker nodes may be added later if required for better performance).In the left column, select Customize cluster.
Uncheck Configure all instances to have only internal IP addresses.
Under Initialization actions, select Add Initialization Action > Browse, browse to
setupIcebergDataProcv1.sh, and select it.Under Cloud Storage staging bucket, click Browse and select the staging bucket you created earlier.
In the left column, click Create.
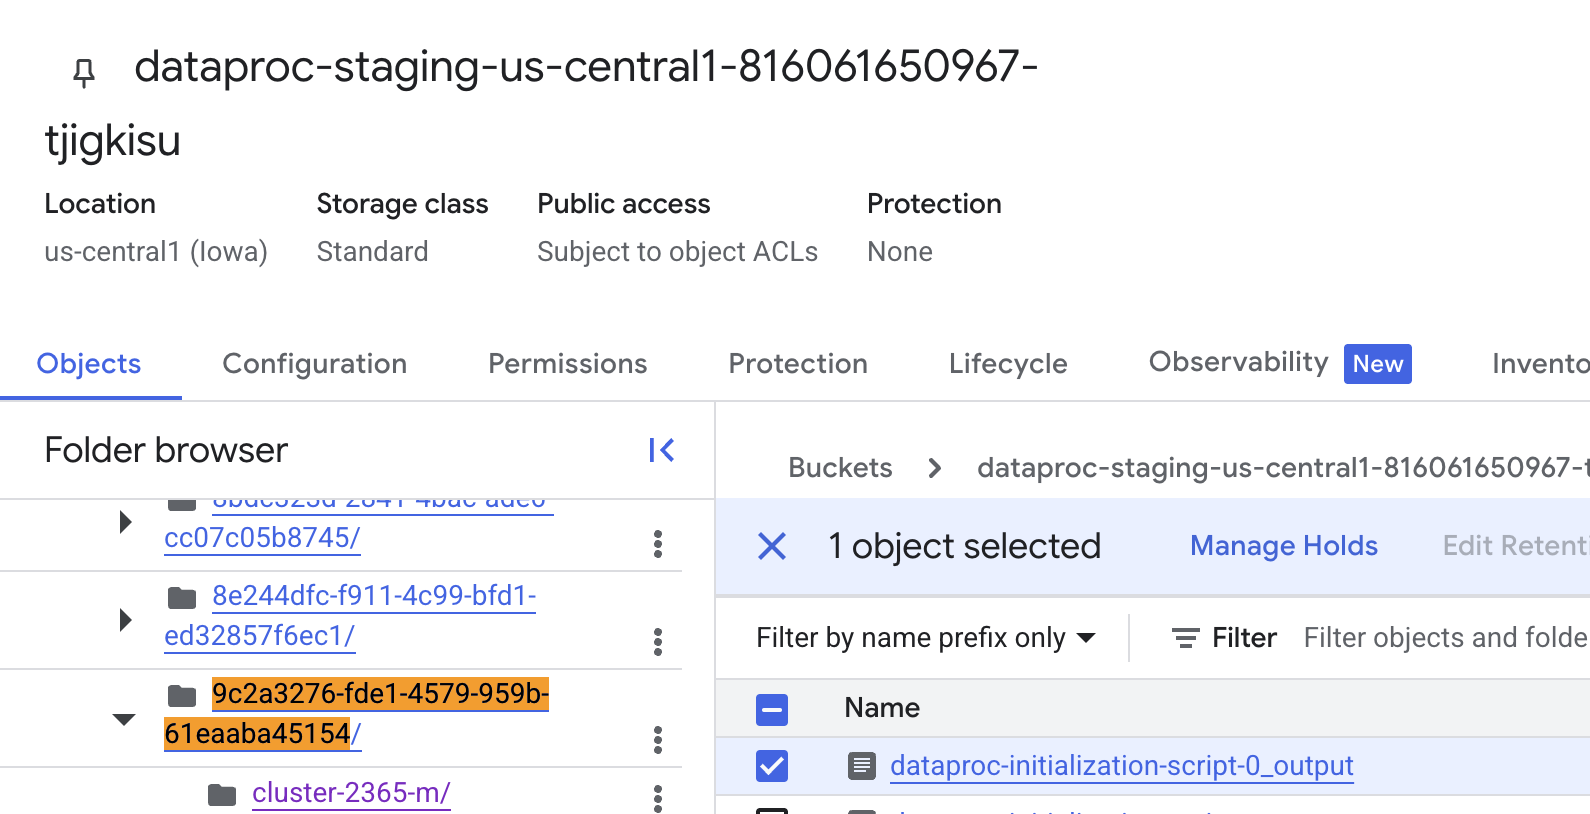
The log for cluster creation is in the storage bucket. To view the log, navigate to this bucket from the Clusters page, find a folder with the UUID of the cluster, and open the log for the master node.
Configure the Dataproc cluster and data lake bucket in different projects
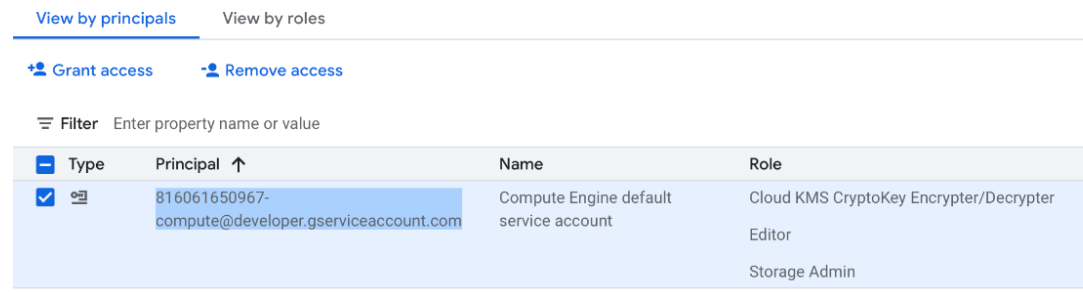
In the Dataproc cluster's project, locate the Compute Engine Default Service Account and copy its principal name.
In the data lake bucket's project, go to the IAM & Admin page, create a role with the following permissions and role, and save it.
storage.objects.get
storage.objects.list
storage.objects.create
storage.objects.update
storage.objects.delete
storage.buckets.get
storage.folders.*
BigQuery Data Editor role
Click Grant Access, paste the principal name from step 1, under Assign roles choose the role you just created, and click Save.
Create the service account and download the service account key
The following instructions assume that all your resources are in the same project and you will use a single service account. Alternatively you may use separate service accounts for GCS and Dataproc. If the resources are not all in the same project, you must use separate service accounts.
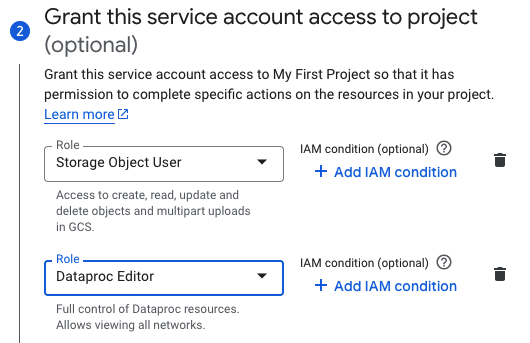
Create a service account (see Create service accounts) for the project containing the GCS buckets and Dataproc. The service account must have the Storage Object User (see IAM roles for Cloud Storage) and Dataproc Editor role (
roles/dataproc.editor) roles (see Dataproc IAM roles and permissions) or, alternatively, be individually assigned the following permissions:dataproc.clusters.use
dataproc.jobs.list
dataproc.jobs.get
dataproc.jobs.create
dataproc.jobs.cancel
dataproc.jobs.delete
storage.buckets.get
storage.folders.*
storage.objects.list
storage.objects.get
storage.objects.create
storage.objects.update
storage.objects.delete
If you will use the BigLake Metastore catalog, the Dataproc service account must have the BigQuery Data Editor role (
roles/bigquery.dataEditor)Download the service account key file in JSON format (see iAM > Documentation > Guides > Create and delete service account keys > Create a service account key). You will need to upload this when creating the connection profiles for GCS and Dataproc.
Configure the Iceberg catalog
Use a BigLake metastore catalog
Support for BigLake metastore catalog is automatically available in GCS, no setup is required. To use it for the Iceberg catalog, create a BigLake Metastore Catalog connection profile (see Connection profiles) and specify the project ID and region of your GCS data lake bucket. Select this connection profile in Iceberg Writer's Catalog Connection Profile Name property.
Limitations when using a BigLake metastore catalog:
Iceberg table names must not contain SQL reserved keywords (such as TABLE) or special characters (such as
@ # $ ^ * & _).If there is a BigLake instance in the same project, it must not contain native BigQuery tables with the same name as the Iceberg tables to be created by Iceberg Writer.
Use an Hadoop catalog
For development and testing, you may use the Hadoop catalog in the GCS data lake. We do not recommend its use in a production environment.
Support for an Hadoop catalog is automatically available in GCS, no setup is required. To use it for the Iceberg catalog, set Catalog Type to Hadoop..
Use a Nessie catalog
For general information about Nessie, see https://projectnessie.org/.
Install Nessie as described in Setting Up Nessie.
Create a Nessie Catalog connection profile (see Connection profiles) and enter the host URI and the Nessie branch name to be used for the catalog.
Select the authentication type.
If authentication is disabled in Nessie (the default), select None.
If OpenID authentication has been enabled (see OpenID Bearer Tokens), select Google Open ID and click Sign in using Google OpenID.
To use another authentication method (see Authentication), select Custom and click Add Property as many times as necessary to enter the required.property names and values.
Save the connection profile.
Select this connection profile in Iceberg Writer's Catalog Connection Profile Name property.
Use a Polaris catalog
For general information about Polaris, see https://polaris.apache.org.
Install Polaris and create a catalog as described in the Polaris Quick Start.
Create a principal and assign it either the CATALOG_MANAGE_CONTENT privilege or the following privileges, as described in Creating a Principal and Assigning it Privileges:
NAMESPACE_FULL_METADATA (or NAMESPACE_CREATE, NAMESPACE_DROP, NAMESPACE_LIST, NAMESPACE_READ_PROPERTIES, and NAMESPACE_WRITE_PROPERTIES)
VIEW_FULL METADATA (or VIEW_CREATE and VIEW_DROP)
TABLE_CREATE
TABLE_LIST
TABLE_READ_DATA
TABLE_WRITE_DATA
TABLE_DROP
Create a Polaris Catalog connection profile (see Connection profiles), enter the host URI, catalog name, and client ID and client secret for the principal, and save the connection profile.
Select this connection profile in Iceberg Writer's Catalog Connection Profile Name property.